2022 Warm-Season Outdoor Living Trends: The New American Yard

LANDSCAPE DESIGN FOR ALL

The American yard has changed, and for good reason. Born of this moment— pandemic, drought, climate change, migration, a booming housing market— the yard has become something altogether new. An outdoor space with impact beyond the confines of private property, creating good neighborhoods and thriving habitats.

Here, we tell the story of the changing American yard using data from the over 100,000 homeowners who have shared their priorities and preferences as they reimagine their yard using Yardzen.


TREND 01

Creating Real Change With The Yard


  • 100,000+ pollinator plants planted

  • 50,000+ trees planted

  • 1,125,000+ gallons of water saved

  • 25,000+ edible plants planted

Yardzen clients understand that their yard can make a tangible, positive impact on their neighborhood and the planet. Outdoor spaces have real potential to create change through biodiversity, habitat creation, carbon sequestration, neighborhood beautification, and community creation.

And, as the largest outdoor design & build company in the world, Yardzen has the power to make a difference in the world through the American Rewilding Project, our mission to create proactively sustainable yards that help to halt the devastation of a warming planet.

Over 95% of Yardzen yards follow the core principles of our American Rewilding Project, including:

  • Habitat creation through the use of keystone species

  • Pollinator-supporting yards using native and climate-adapted plants

  • Water smart landscaping: Save water, avoid flooding, and stop water pollution

  • Cut back on air pollution, urban heat islands, and home energy use by planting trees

  • Use FSC-certified furniture and materials made from recycled goods

  • Make the community safer, healthier, and more attractive with outdoor spaces that welcome the neighborhood

Our yards are not incidental, they’re where the good work gets done. Learn more about the American Rewilding Project.

TREND 02

Re-Thinking the Lawn


Requests for lawn replacement have increased 66% over the last year

Lawns are deeply rooted in our national identity, an enduring symbol of the American residential landscape. Times change, though. Client requests to reduce or replace lawns have steadily increased over the past year. Increasingly, landscape design is turning to different opportunities, reducing or replacing lawns in favor of other landscape features.

THE TROUBLE WITH LAWNS

There are good reasons to cut back on lawns. For starters, lawns are the most maintenance-intensive part of a yard’s landscape, requiring regular mowing, fertilization, and a whole lot of irrigation to remain in good shape. With these high maintenance demands come fuel consumption and exhaust emissions from mowers, water pollution from fertilizer and pesticides, and major water use in an era of massive drought.

In short, lawn reduction can have a massive positive impact on the environment.

POST-LAWN DESIGN

Removing lawn is an opportunity. Rather than simply substituting a different species within the existing lawn footprint, we suggest a broader perspective: how can we create the most overall design benefit within the space a lawn occupies?

There is no cookie-cutter response to this design inquiry. Rather, an individual client’s goals and priorities will guide the design response to lawn replacement. Often, the response will involve a mix of features: seating areas, play areas, planting beds, veggie gardens. The options are limitless, as is the potential to improve overall design quality.

TREND 03

The Return of the English "Cottage" Garden


100% increase in requests for a “cottage” style garden over the last year

The traditional English “cottage” garden style is on the rise, with Yardzen client requests for the style doubling over the past year.

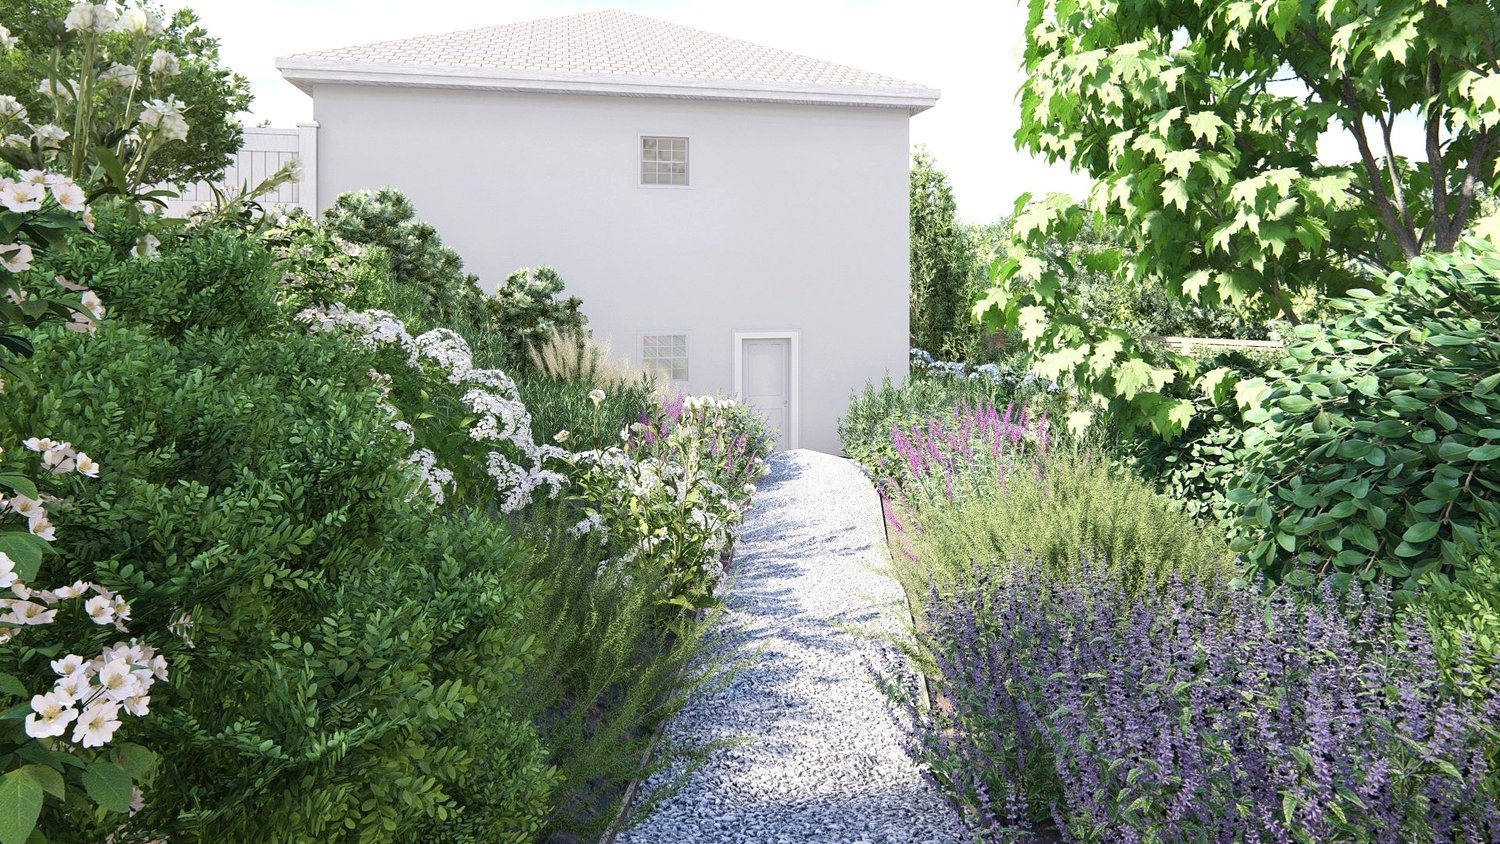
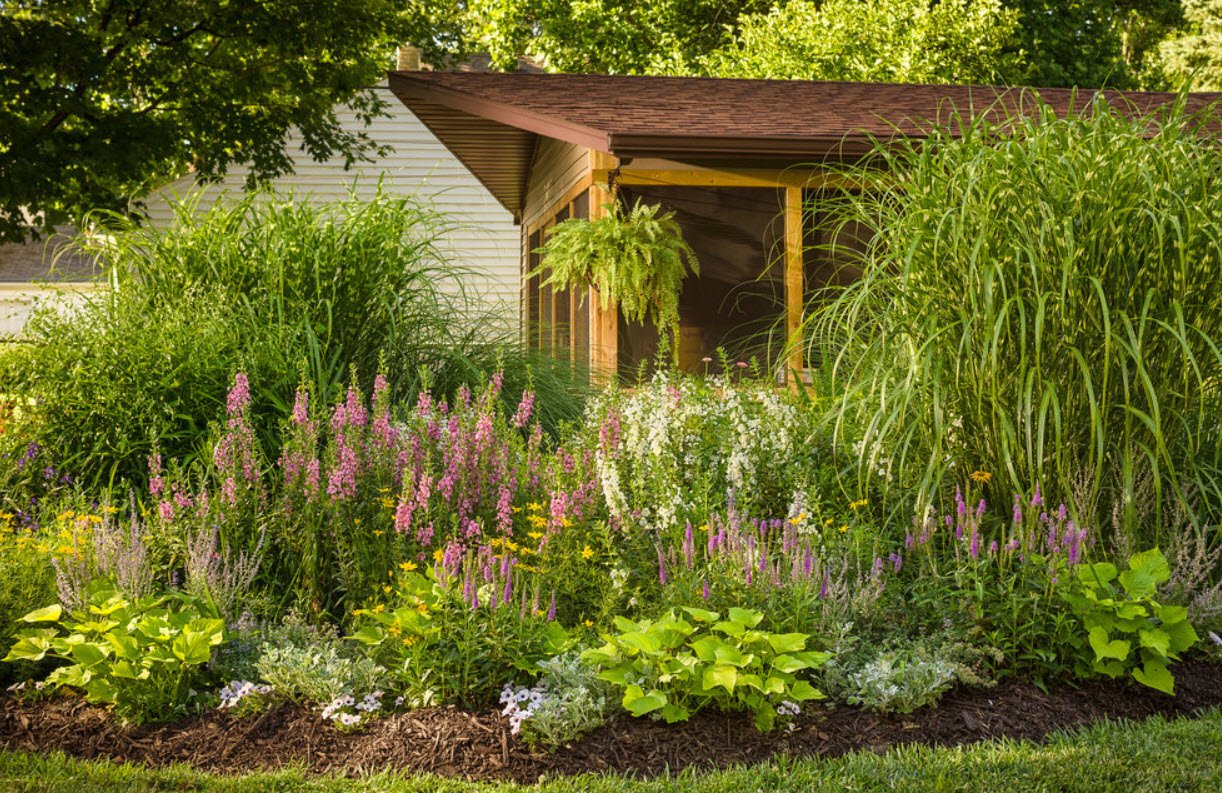
Cottage gardens are characterized by an abundance of different species, arranged in a highly intermixed, colorful, billowing display of plant life. You’ll see fruit trees and herbs, big green shrubs, dense mats of groundcover, wispy perennials, and above all, lots and lots of flowers.

Cottage gardens have a come one, come all attitude, and welcome change. It’s common practice to continually tinker with cottage gardens, adding and removing plants over time. The result is an ever-evolving garden that inevitably bears the personal signature of its caretakers.

Because of the wide species variety in a cottage garden, it’s easy to adapt them to regional landscape identities. While the archetypal cottage garden features flowers like foxgloves, hollyhocks, and Delphiniums, there are no required plants. Focus instead on replicating the colors, textures, and fullness of a cottage garden using a palette of native and climate-adapted plants. Sage, yarrow, fleabane, buckwheat, California lilac, Kniphofia, lavender, and Russian sage are just a handful of native and climate-adapted species that can bring a rainbow of color to cottage gardens throughout the dry, western U.S.

TREND 04

Modern Meadow


Meadow yards are one of Yardzen's most requested design styles

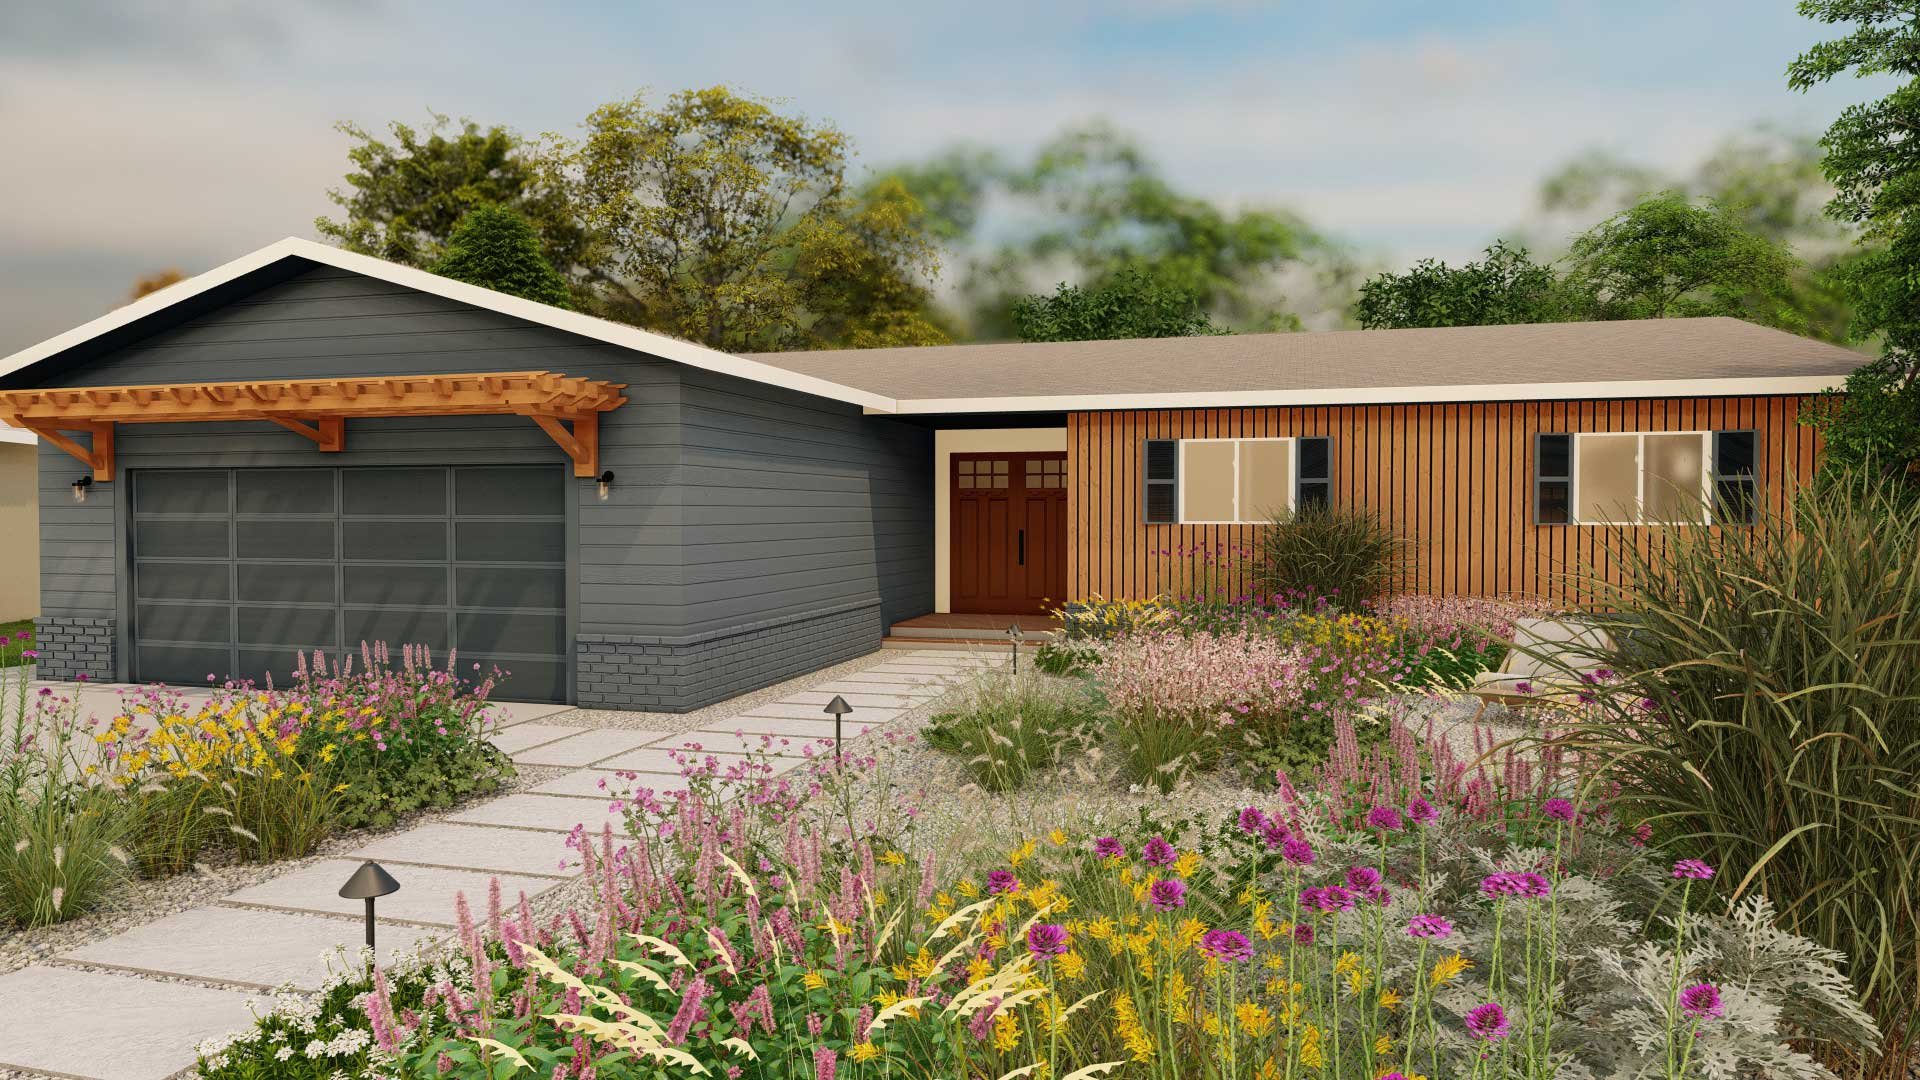
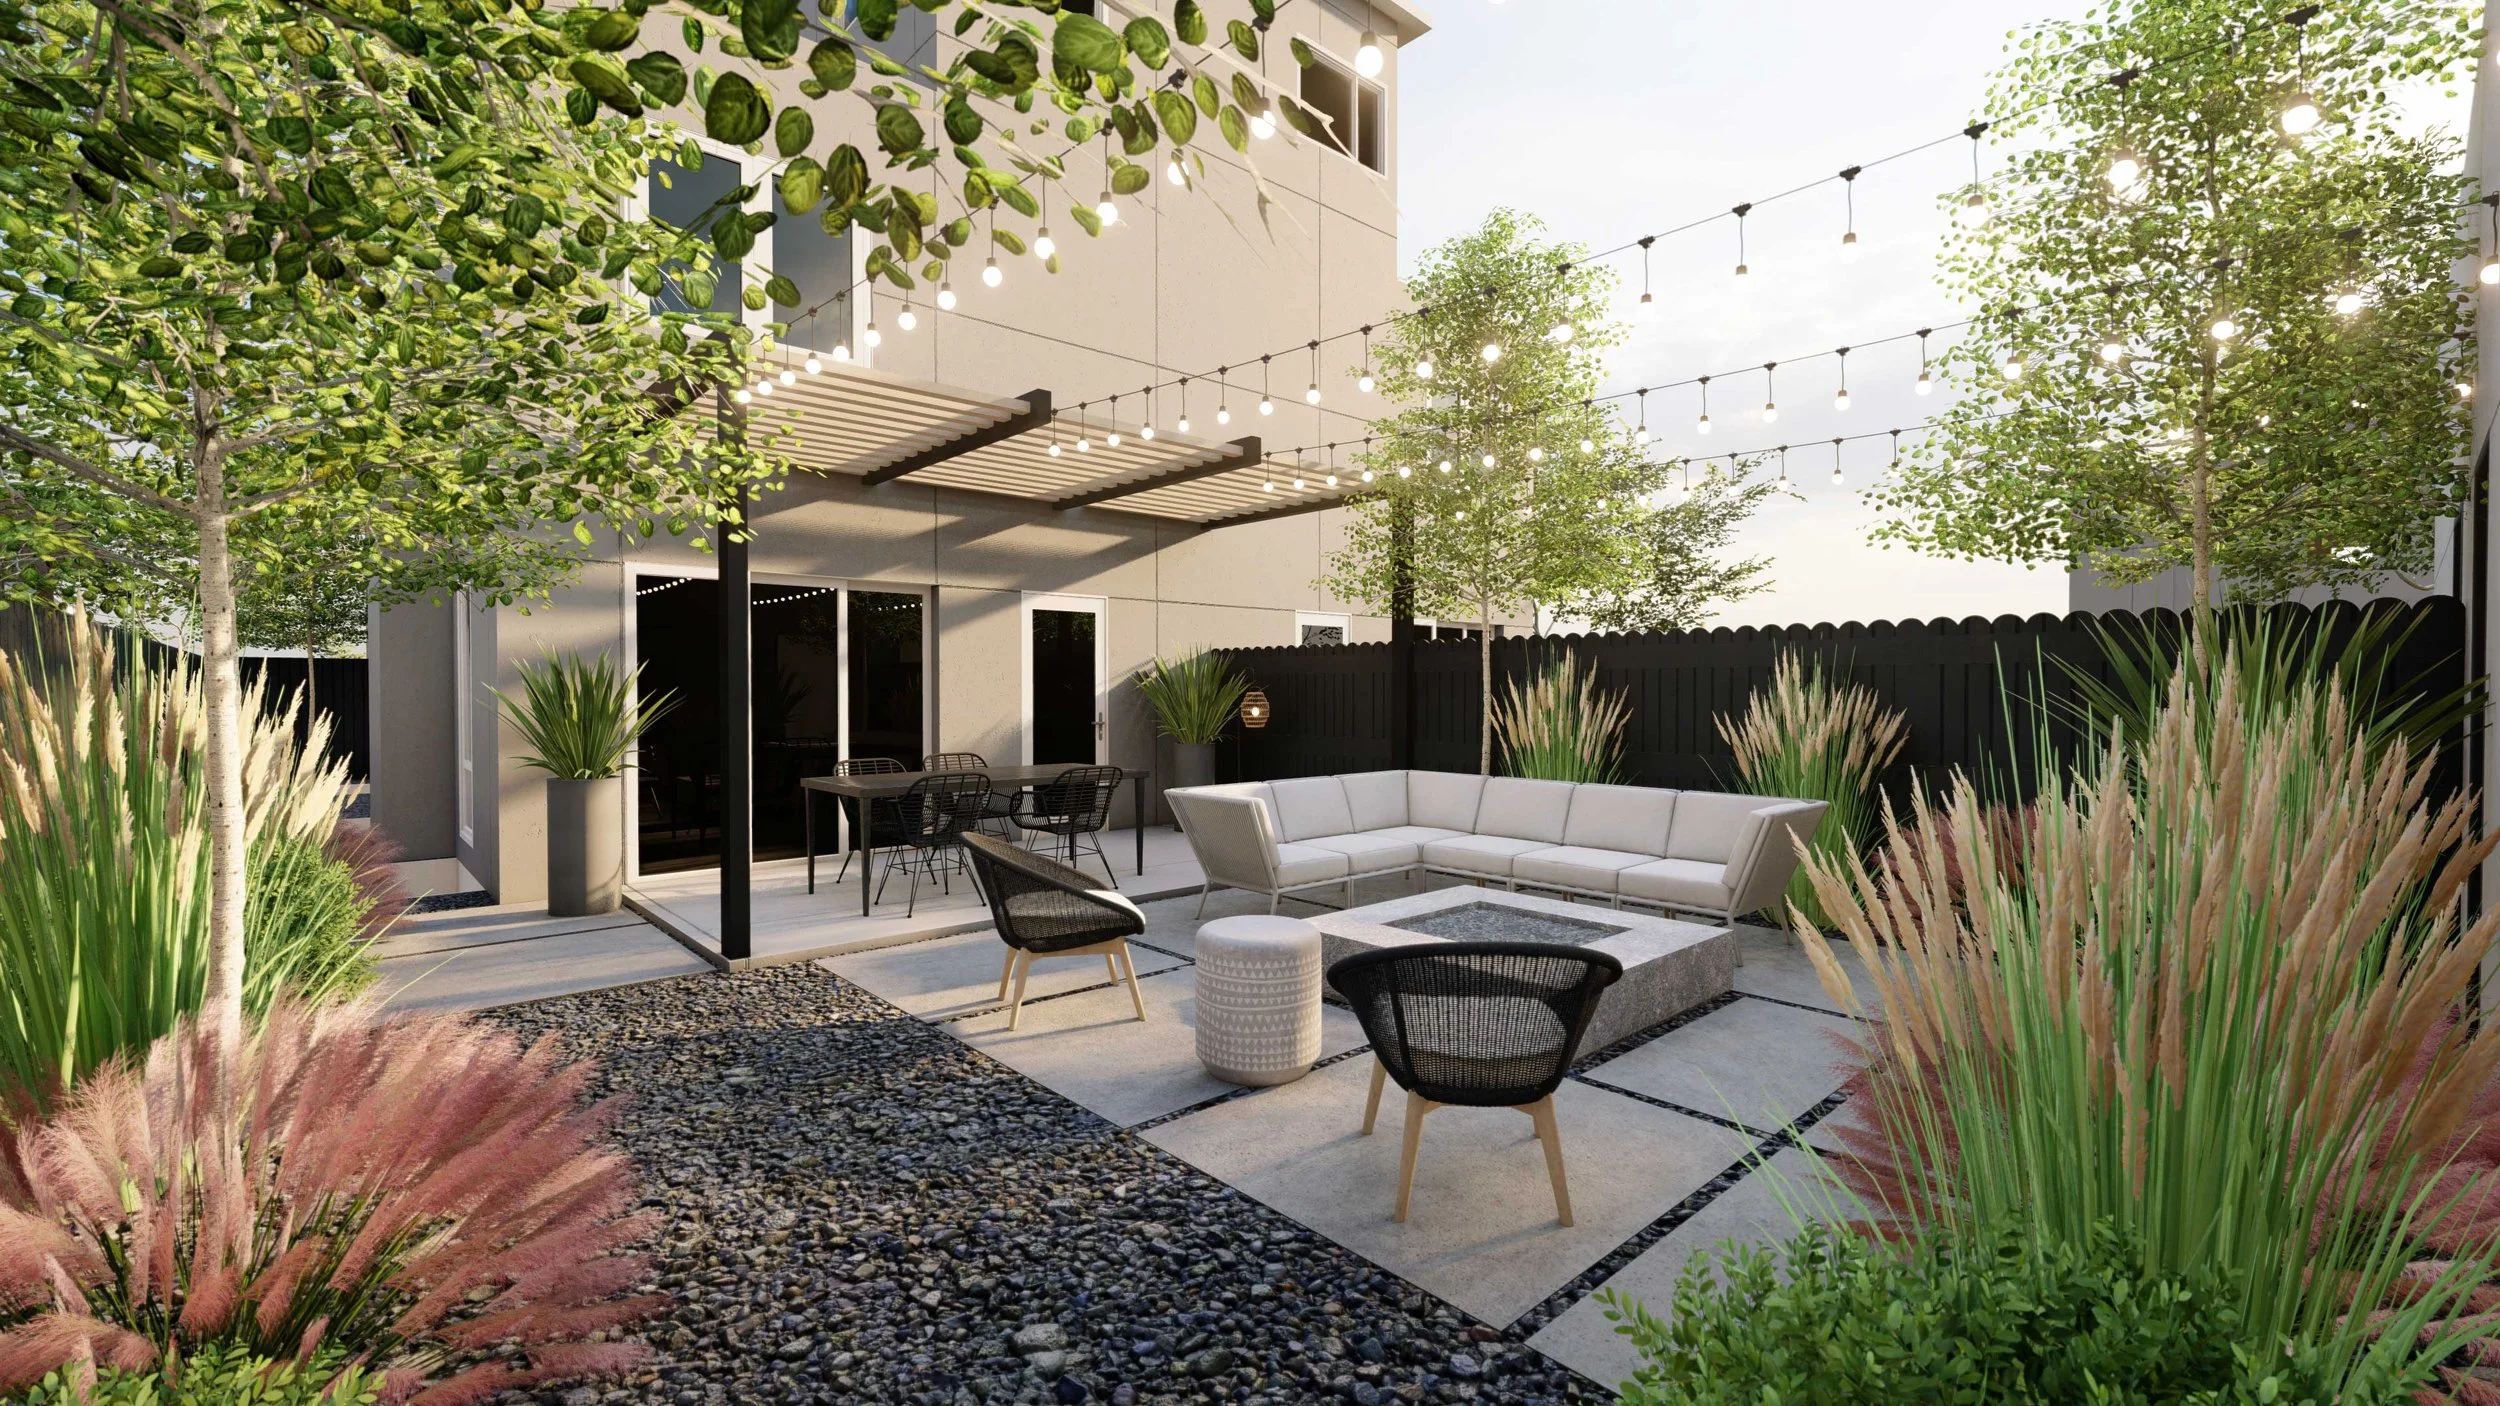
Ornamental grasses and concrete are the dynamic duo of modern landscape design. On the one hand we have fine texture, soft feel, warm coloration, and gentle movement. On the other, we have heft, hardness, cool gray hues, and stillness. The contrast could not be stronger, and yet, it works wonderfully.

Planting in the modern meadow style is dominated by monolithic masses of ornamental grasses. A very short list of grass species - two to four per project often does it - is selected to establish a few distinct height layers. More often than not, you’ll catch a species with that beloved silvery-blue color, like Elymus ‘Canyon Prince’, or Festuca ‘Elijah Blue’, or Dianella ‘Cassa Blue’.

Layers of ornamental grasses can be arranged formally, with rigid rows or block plantings, or naturalistically, with amorphous masses spreading in all directions, wrapping around each other like amoebas at a cocktail party.

Hardscape design contributes to the sense of expansiveness by eliminating boundaries whenever possible. Broad open edges are the default, creating a sense of interconnection between adjacent spaces, and expanding the perceived sense of space as you move through the landscape.

Crucially, hardscape in the modern meadow style also acts as a frame for planting. Concrete slabs, oversized pavers, boardform or corten steel walls, Mexican pebbles, hardwood decking - when wrapped around planting areas, these clean, overtly modern features recast often unruly species in a flattering, intentional light. With a crisp hardscape frame, the planting looks shaggy by intention, something to be admired and displayed rather than disposed of with a weed wacker.

This careful balance between messiness and refinement is the core ethos of the modern meadow style, and has made it one of the most popular landscape styles for the past several years. By far, it is the most requested landscape style among Yardzen clients.

TREND 05

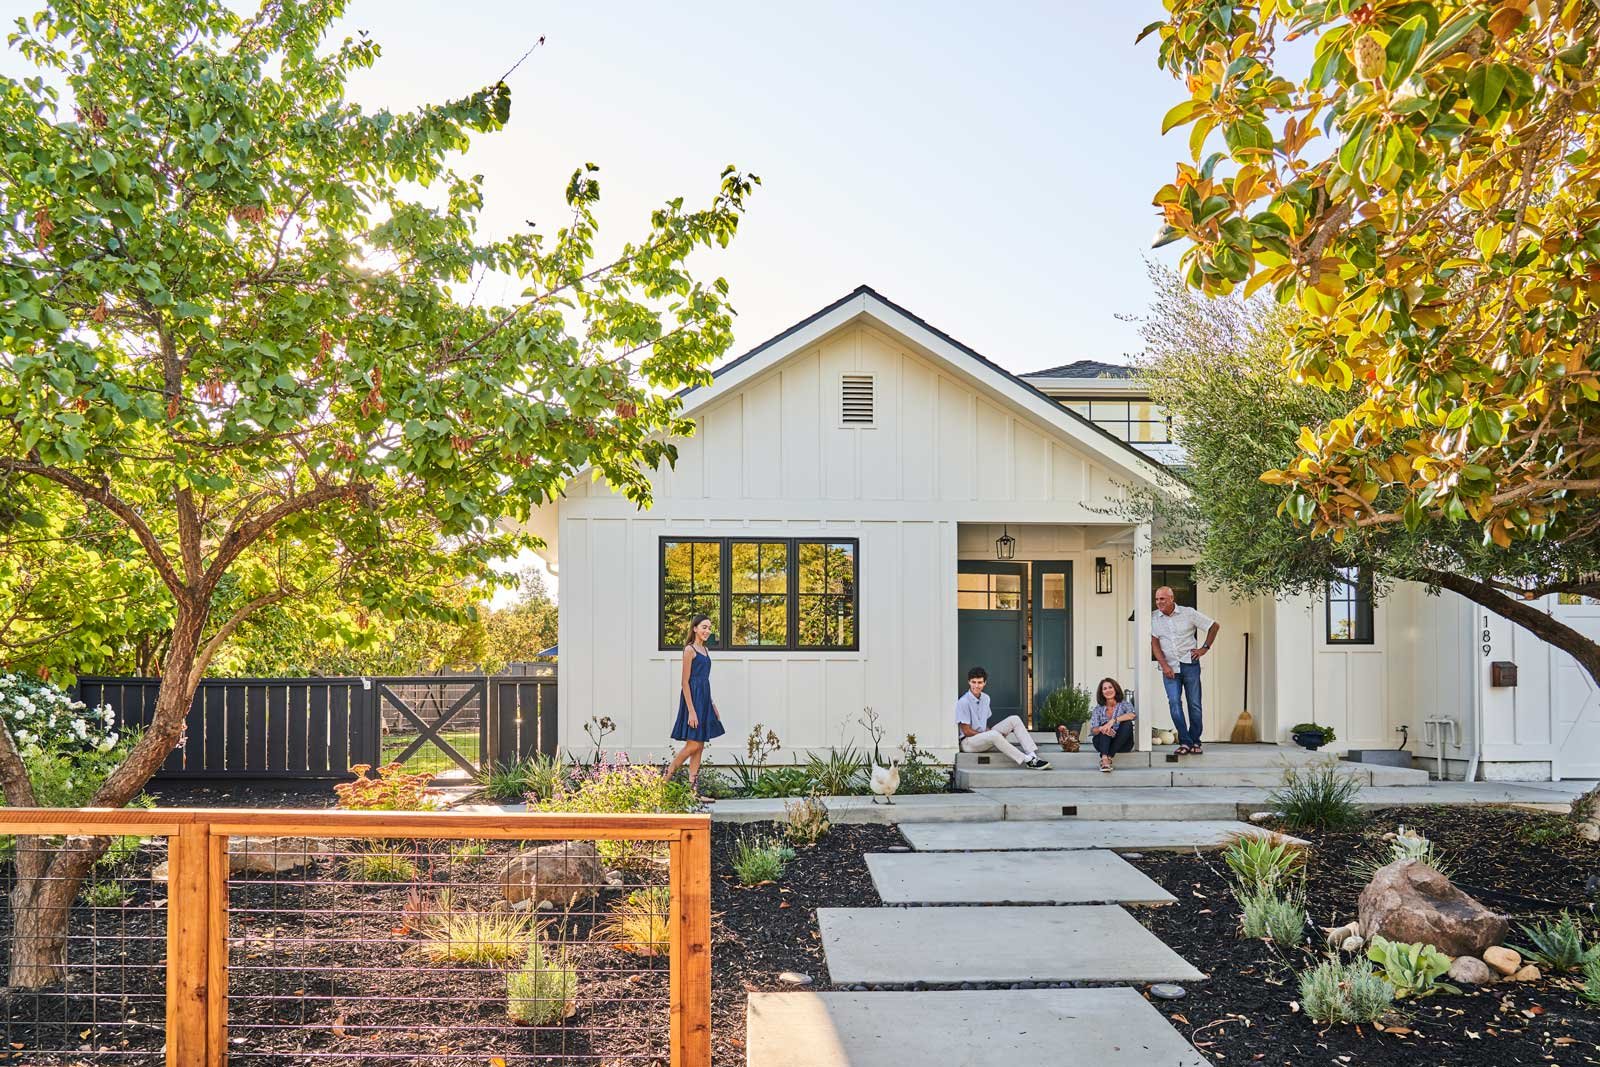
The New Front Yard


150% increase in requests for “functional front yards”

Attitudes are shifting about what we can do with our front yards.

This process was underway before Covid hit. Once lockdown and quarantine entered the picture, the pace of change only hastened. Restricted from our usual external spaces for play, dining, exercise, and socializing, new pressure was applied to our yards to step up and fill the void.

Our clients illustrate the phenomenon clearly: requests for functional front yard design features are up 150%. Whereas the traditional front yard was primarily an aesthetic resource, clients are now requesting seating areas, fire pits, dining zones, play areas, fenceless porches, pergolas, and vegetable beds. Quite often, they hope to fit a few of these features out front. Each of these features has a social component - even veggie beds offer a conversational ice breaker and physical location to kickstart neighborly interaction.

To simply be in your front yard for longer than a walk to the car is a social act, so long as your neighbors can see you, and your yard expresses permission for people to approach. A neighborhood filled with welcoming front yards is a safer, friendlier, and ultimately more appealing place to be than a collection of insular enclaves. In car-centric communities with little foot or bicycle traffic, the need for landscapes that encourage interaction is all the greater.

TREND 06

Sensory Experience


73% of Yardzen clients request at least one sensory element in their yard— smell, taste, sound, touch

Among the many things we rely on our yards for, a sense of peace is way up there. When we step outside, we want to be transported to a new, serene place. By designing landscapes to engage a broad range of senses, we can stack the odds in favor of serenity. The more senses we engage, the more rapid and thorough our transportation can be.

Setting aside sight - every landscape design aims to visually please - scent is an obvious starting point in a sensory landscape design. Jasmine vines, pocket plantings of rosemary, sage, and lavender, corsican mint groundcover laced between pavers, and potted displays of any number of classically fragrant flowers, from gardenias to roses to phlox, are all tried-and-true approaches to lending a fragrant dimension to landscape designs.

Sound offers another area of sensory opportunity. The shuffle of leaves in the wind becomes a gauzy blanket of sound as tree cover increases. Plant more trees, and you’ll get more of that soothing sound (and a host of other benefits!). Opt for fine-textured species, like elms, palms, or even bamboo. Ornamental grasses, sedges, and rushes all audibly swish in the wind, and are a great place to start.

Planting designs can introduce additional sounds by planting for wildlife. Including habitat-rich native plants in a design will draw birds and butterflies to your yard, where their calls and flapping wings can add to the audible array.

Touch is the final sense to engage, again through careful planting design. Given the goal of serenity, softness is the target. Let silvermound, and lamb’s ears overlap path edges, while wooly thyme can wind its way between stone pavers. Each of these species are widely available and exceptionally soft to the touch.

This need for a sensory retreat is greatest for households that are isolated from quality experiences with nature, or otherwise immersed in a harried environment. More often than not, these are homes in urban neighborhoods, with limited outdoor space. Such compact spaces may not accommodate new large trees, but virtually any outdoor space can manage to fit a container plant or two. Luckily, this is all you need to benefit from plants’ sensory offerings.

TREND 07

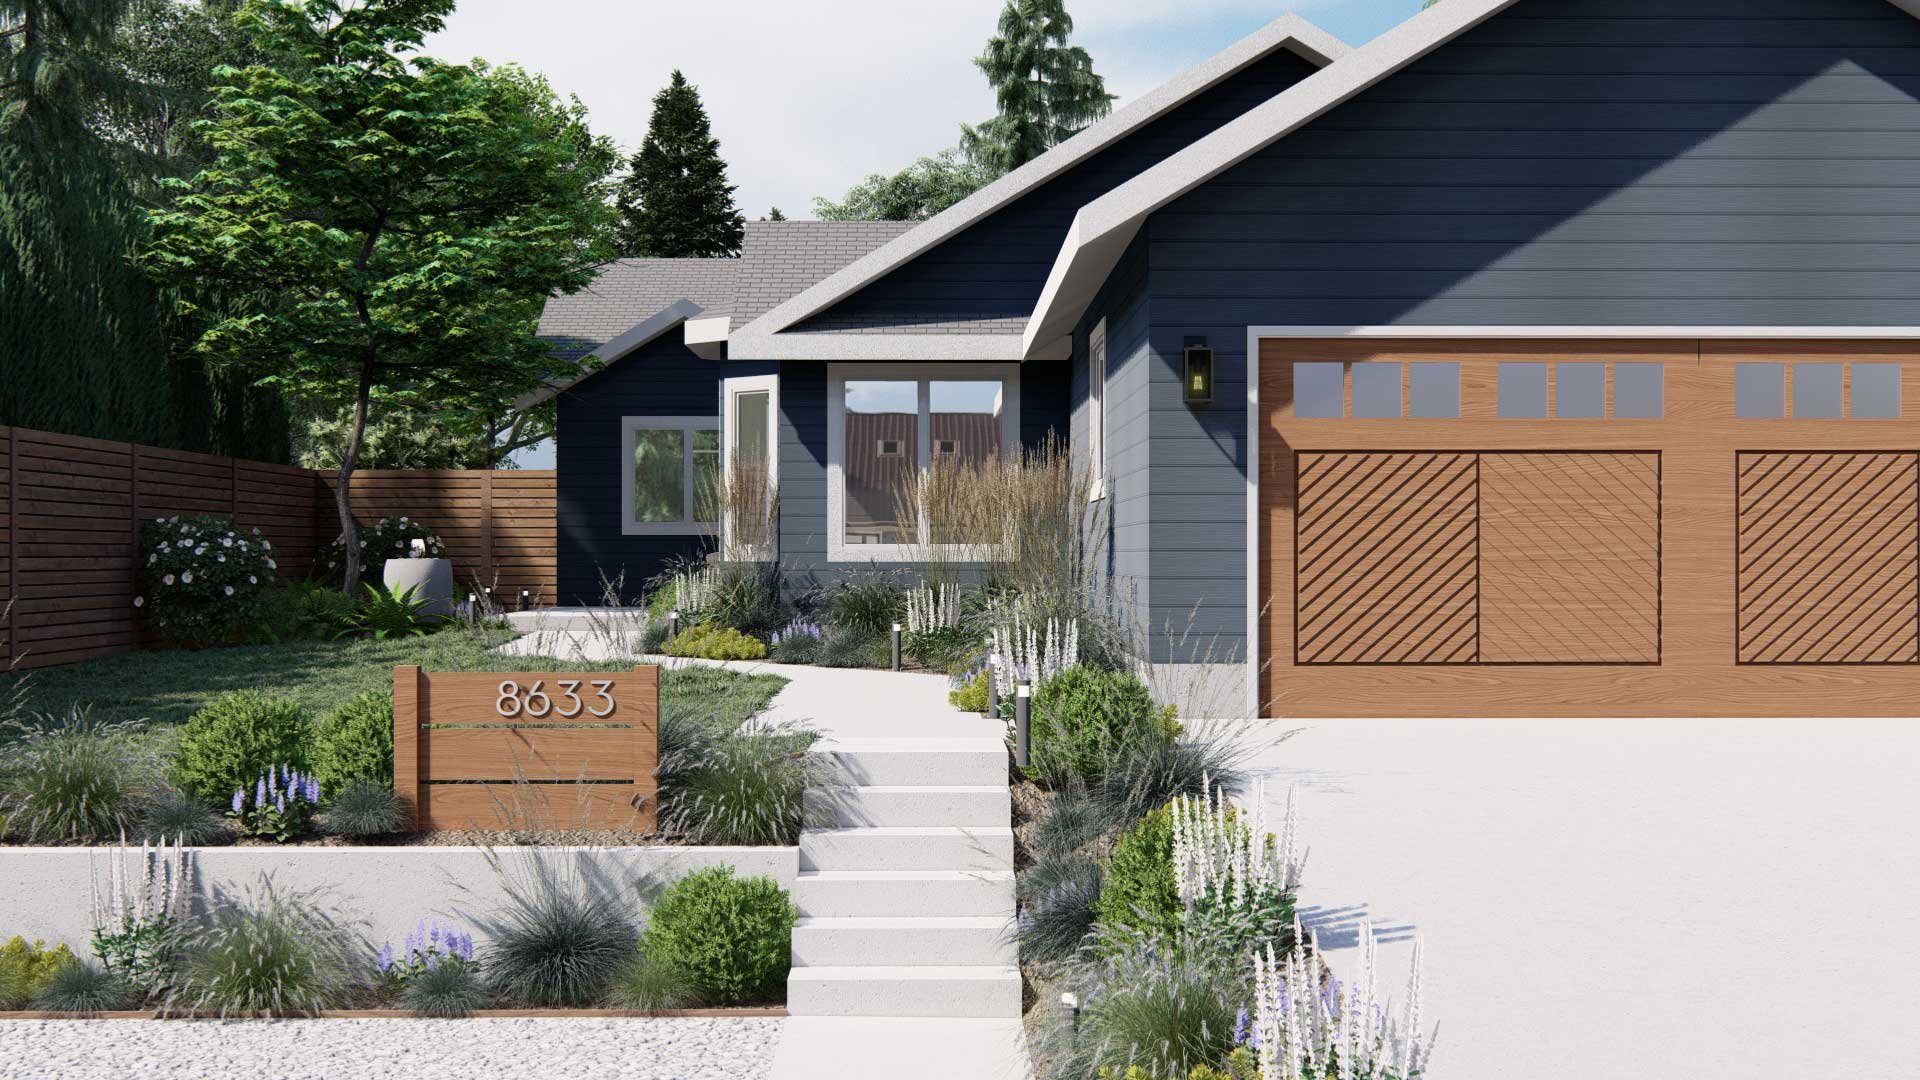
Blue Houses are the New Black


200% increase in blue exterior paint in 2022

40% of Yardzen package purchases include exterior design. The New American Yard thinks of your outdoor space holistically, including the exterior of your home, which sets the backdrop for any landscape. This applies to both the front yard and back.

Yardzen reimagined outdoor design and living with our new exterior designing offering in 2021 alongside paint partner Benjamin Moore, expanding the scope of landscape design to include a home’s paint, windows, doors, lighting, house numbers, and more. Our high percentage of exterior design package purchases signal homeowners’ desire for a considered, cohesive outdoor space, including landscaping and exterior design.

Yardzen’s two most popular exterior paint colors are white (Benjamin Moore Chantilly Lace) and black (Benjamin Moore Graphite), but there is a new cool color on the scene: blue! We’ve seen a sharp increase in requests for dark, dusty blue houses – Benjamin Moore’s Newburyport Blue.

Newburyport Blue signals a shift away from the stark white and black of the modern farmhouse to the richness of classic colors, reflective of the interior trend toward elevated English country (one of our top landscaping trends this year) with rough-hewn textures and muddy tones.

TREND 08

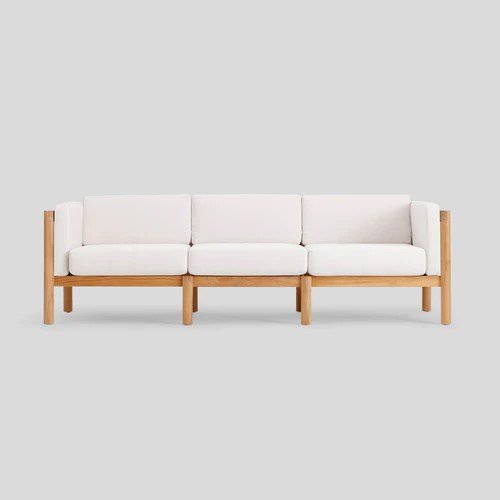
In Praise of FSC-Certified Teak


Strong, water- and rot-resistant, and beautiful to boot. Teak has a lot going for it. Its durability makes it a super sustainable material - buy a piece of teak furniture and you’ll be set for decades.

Being a tropical hardwood, however, teak’s sourcing can be problematic. Illegal logging of tropical hardwoods is a key driver of widespread deforestation, in turn leading to plummeting biodiversity, increased atmospheric carbon, and a host of other environmental ailments.

Fortunately, we can rely on the Forest Stewardship Council, an organization that carefully monitors forestry practices to make sure that wood is produced in an environmentally and socially sustainable manner. You can buy FSC-certified products with confidence in their environmental pedigree.

To that end, there are some fabulous FSC-certified teak products out there that make for exquisite additions to landscape designs.

The sofa and dining set by Neighbor are two such examples, each boasting simple, clean designs that are nonetheless striking. In addition to durable teak frames, they use Sunbrella fabric, pretty much the best stuff you can get when it comes to outdoor furniture.

Skagerak also produces a beautiful array of FSC-certified teak pieces to furnish outdoor spaces. Among many strong offerings, the Lilium lounge chair and Between Lines deck chair are standouts for balancing Danish modern looks with approachable comfort.

TREND 09

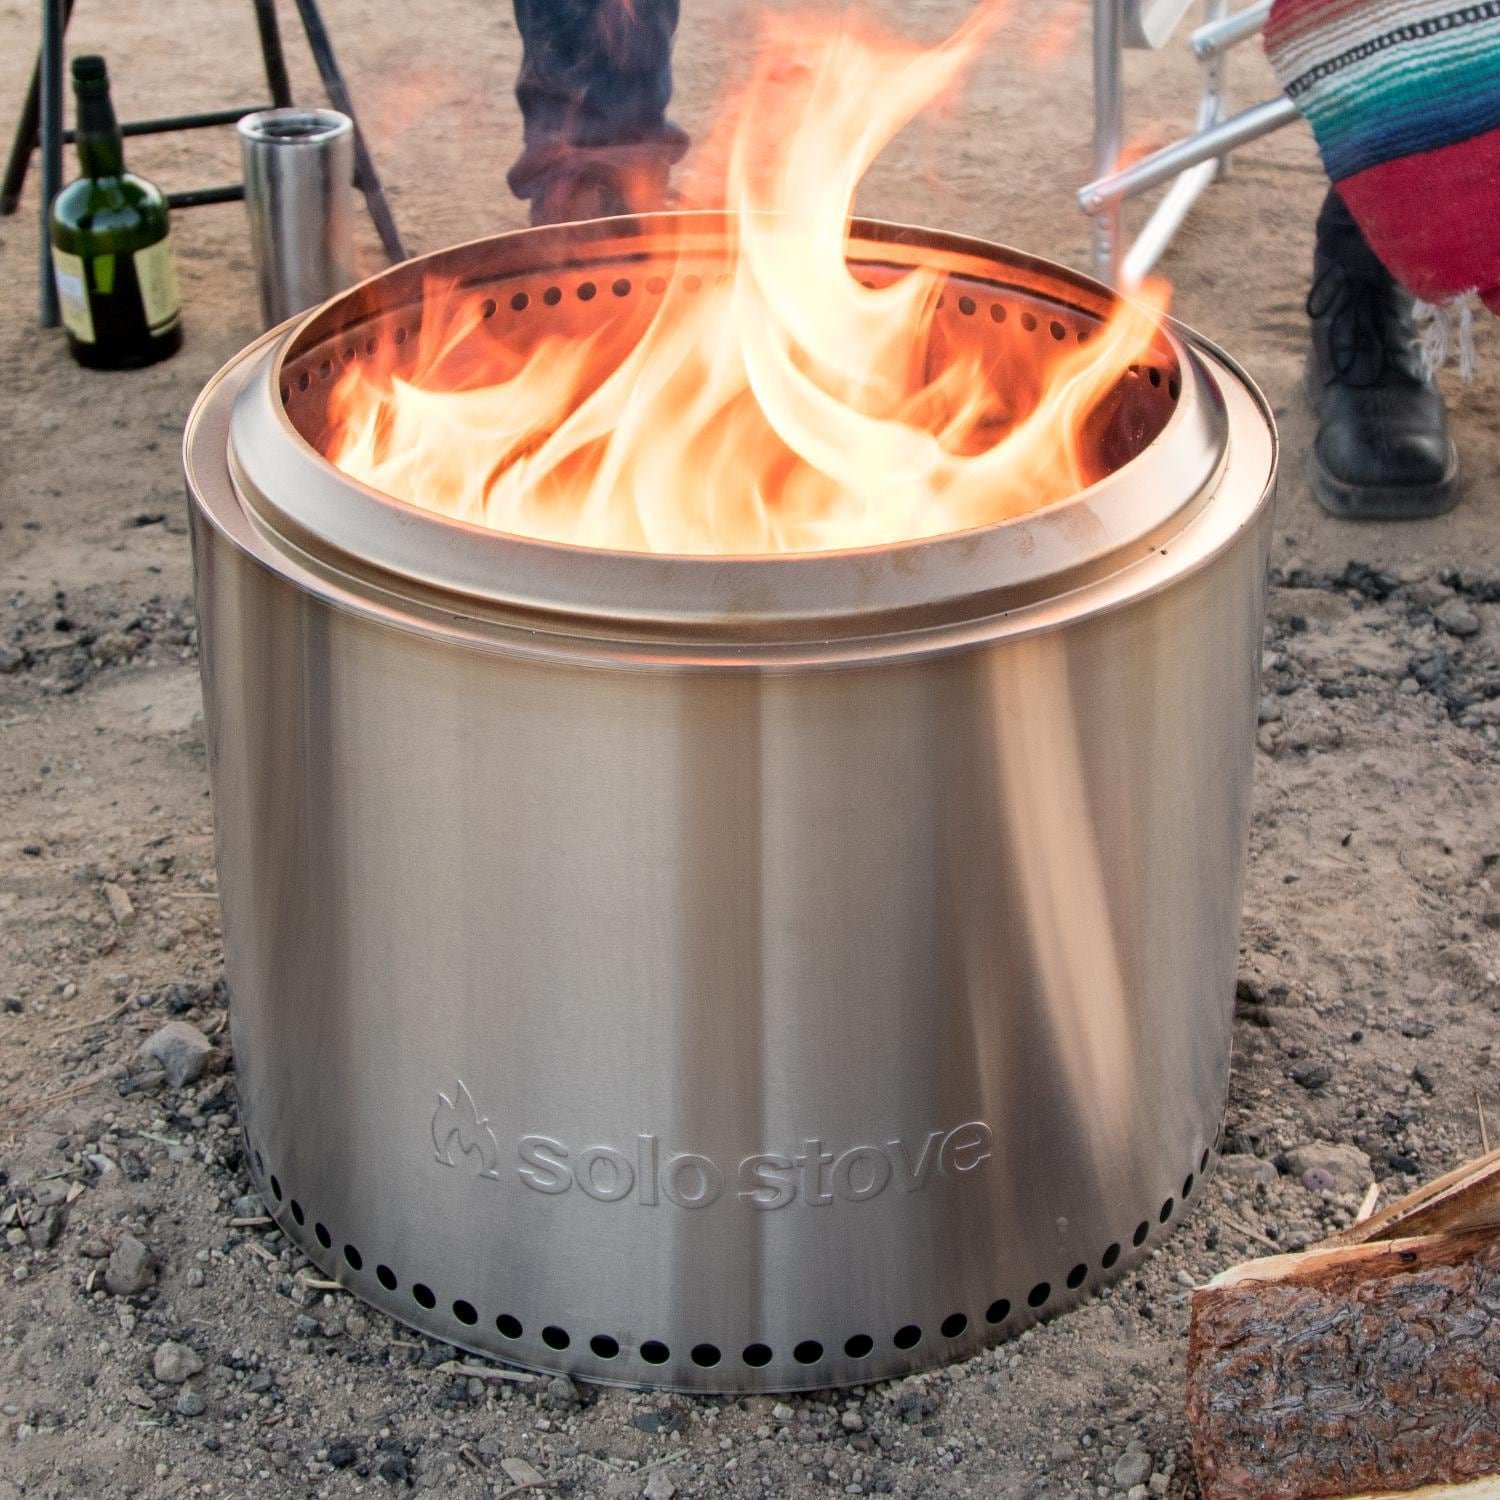
The Backyard Campout


70% of Yardzen clients request a fire pit in their design

During the pandemic, we turned to our yards for outdoor escape – an open space for fresh air, getting dirty, s’mores, and seeing the stars at night. To replicate the coziness, closeness, and freedom of the campout, our clients turned to fire pits and outdoor shelters, including forts, yurts, and tents, to bring the camping experience home.

OUR FAVORITE PRODUCTS


DESIGNING THE NEW AMERICAN YARD FOR CLIENTS ACROSS ALL 50 STATES

Yardzen's award-winning online exterior and landscape design service is tailored to homeowners with both large and small yards in all fifty states in the U.S. Our design process begins with understanding your outdoor space, style, garden ideas, and a discussion of your budget and vision to minimize surprises when it comes time to build. 

Our top-notch designers then develop a personalized vision for your yard, shared through 3D renderings, 2D plan drawings, and plant and material lists. Your design will capture the look, feel, and function you are hoping for, all while keeping costs within range. 

Once your design is complete, we'll help you connect with a local contractor from our Pro Network of vetted professional contractors to install your new design.

Ready to bring your design ideas to life? Create your design profile or explore our professional exterior, side yard, front yard, and back yard landscaping design packages today!

Growing Tomatoes: Tips from a Horticulturist

Nothing beats home-grown tomatoes! Tangy-sweet fruits bursting with summer flavor and available without a trip to the grocery store. This is why at my house we divide the year into “tomato season” and “not tomato season,” and tomato season opens up with much fanfare. Below are my tried and true growing tips for great tomatoes.

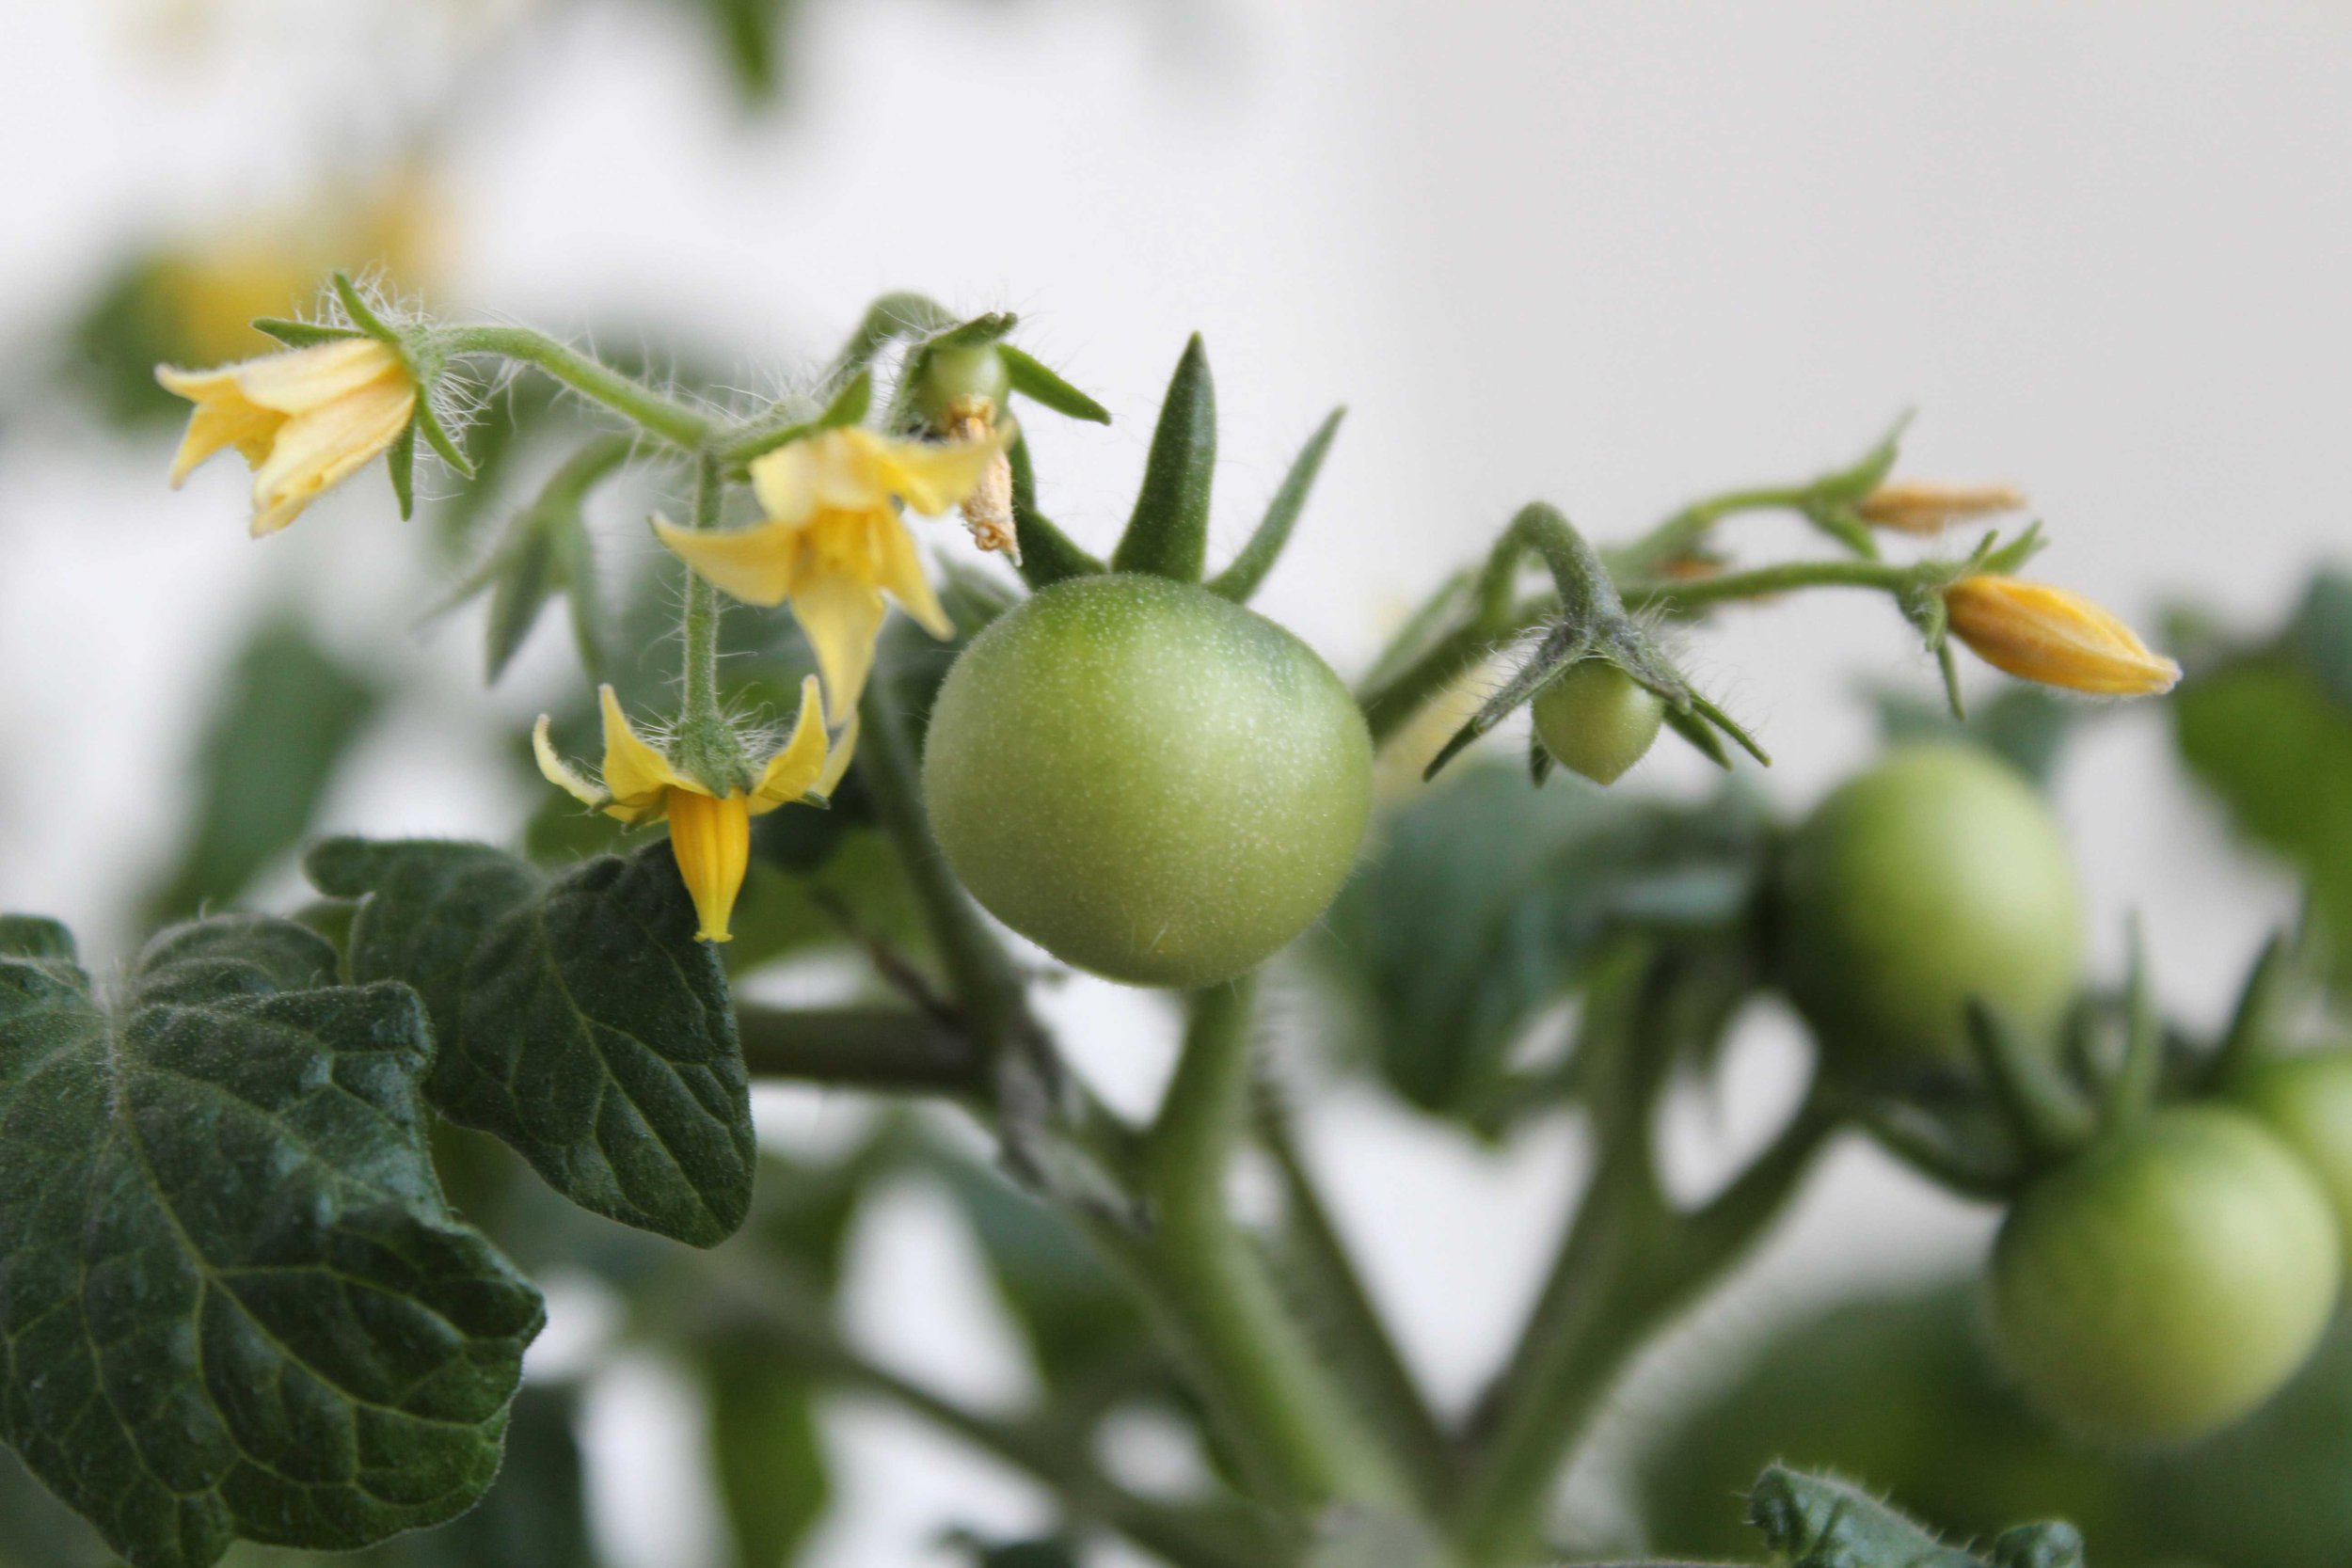
Healthy tomato plant with young green tomatoes and flowers

SOIL PREP FOR GROWING TOMATOES

We begin by ripping out the remaining cool season veggies: bolted lettuce, yellowing pea vines, and tired kale. These crop residues get added to the compost pile to break down and become soil-enriching organic matter for side-dressing our summer crops in a few months. Next, we amend the soil in our raised beds with the previous season’s compost. This replenishes soil nutrients and helps improve soil structure and water-retention properties (I can’t impress enough the importance of maintaining optimum soil health in growing successful plants - don’t forget to feed the soil!). Finally, we make sure the drip irrigation is in good working order (squirrels and other rodents are the main culprits for chewing through dripline). Now we’re ready to plant, right? Not necessarily. 

Container box of freshly planted tomato plants in backyard garden

WHEN TO GROW TOMATOES

Tomatoes are a warm-season crop and can be damaged or stunted if planted too early. That’s why instead of planting based on a specific calendar date, I like to make sure to plant well after the last frost, when nighttime temperatures are reliably in the mid-50s, before setting out tomato seedlings. As in most aspects of gardening (and life) patience is a virtue; but if you can’t resist the urge to get started you may have better success with early-season varieties such as: ‘Stupice,’ ‘Siletz,’ ‘Glacier,’ ‘Siberian,’ or the ever popular ‘Early Girl.’ 

If tomato season hasn’t yet arrived in your neck of the woods, don’t fret! There’s still time to start tomato seeds of your favorite varieties (or plan which varieties to pick up from your local garden center as seedlings or “starts” later) and plan out the perfect tomato patch.

A variety of tomato seedlings growing in a biodegradable seed starter tray

WHAT TOMATO VARIETIES SHOULD YOU GROW IN YOUR VEGETABLE GARDEN?

My first recommendation is to plant the types of tomatoes your family likes to eat. Happy plants can be extremely productive so be sure to choose varieties that suit your needs. There are thousands of varieties among cherry tomatoes, snacking, slicer, paste, and beefsteak types in colors ranging from nearly white, bright yellow, striped, green, orange, red, brown, and almost black. You can opt for open-pollinated heirloom varieties (save some seeds to plant the following year), or modern hybrids.  

Determinate vs Indeterminate Tomato Plants

Next, you’ll consider whether to grow determinate or indeterminate varieties. This refers to the type of growth and overall habit of the plant. Determinate plants stop growing once the branches set flowers, giving them a shorter, bushier appearance. Indeterminate varieties, on the other hand, keep on growing and often take on a more vine-like habit. This type will have fruit mature progressively over the entire season, weather permitting. I usually grow both types -- most heirlooms are indeterminate -- and keep their habit in mind when planning out where to locate each plant in the garden.

Ripe tomatoes ready to be harvested

DAYS UNTIL TOMATO HARVEST

Seed packets and nursery labels are usually clearly printed with the number of days until harvest. This is about how long it will take for plants to bear mature fruit once they are set out in the garden, and will vary between varieties (although determinate types tend to set fruit earlier). 

Planning for harvest times ensures you’re not overwhelmed if several varieties ripen all at once. This is especially true of determinate plants, which set their fruit over a short period of time (a boon if you want to process a large volume at once for canning). One strategy is to set out plants with similar days to harvest over subsequent weeks in order to stagger the harvest.   

Young tomato plant gets transplanted into a terra cotta pot

WHERE DO TOMATO PLANTS GROW BEST?

Full sun is best for all types but especially important for large-fruited varieties, like beefsteaks, which need maximum sunlight to produce large, tasty fruit. Select a site that will get at least 6 hours of direct sun. If you experience extreme summer heat, your plants may benefit from a bit of afternoon shade. 

With proper planning, tomatoes can be grown successfully in-ground (including raised beds) or in containers. Most tomatoes need at least 12 inches of soil depth, but the taproot of larger types may extend 18 inches or more into the soil.

The smaller stature of determinate varieties makes them better suited to containers than their vining counterparts. Check the seed packet or nursery label for key words like “dwarf,” “patio,” or “container variety” for good candidates. Choose a pot at least eighteen inches in diameter and use a high quality potting soil (organic brands are available if you plan on growing organically). Make sure to monitor soil moisture closely, since containerized plants will dry out faster than those planted in the ground. Stake or cage just as you would for planting in the ground.

Plant Tomatoes at Proper Depth and Spacing

Unlike most other plants, tomatoes like to be planted deep. Dig a hole about 10-12” deep and add a small handful of compost or organic fertilizer in the bottom. Remove any leaves that will be below the soil level and gently cover about two-thirds of the plant. The section of stem underground will form adventitious roots which results in a larger, deeper root system to support more vigorous growth. 

To minimize plants shading each other, allow at least two feet between each plant. This will also increase air circulation which will help prevent fungal diseases, as well as make spotting pests like tomato hornworm easier. If planting multiple rows of tomatoes, orienting them North to South and spacing rows about four feet apart will maximize light exposure and airflow, and allow space to walk between rows for pruning and harvesting.

To Mulch or Not to Mulch?

I don’t find mulch necessary in raised beds since plants are grown closer together and shade out any weeds that might try to pop up. Exposed patches of soil can be planted with warm-season annuals like sweet alyssum and zinnias. In addition to adding cheerful pops of color among the jungle of green, these flowers attract pollinators and beneficial insects such as predatory wasps and ladybugs, which deter caterpillars and phloem-feeding insects like aphids and whitefly. Marigolds are also thought to reduce the effect of root-knot nematodes on tomato plants.

There are situations that lend themselves more to using mulch. If you are growing multiple rows of tomato plants with space between, mulch will help suppress weeds and retain soil moisture. Organic mulches improve soil structure as they break down and enter the soil profile. Suitable materials include: weed-free straw, untreated (herbicide-free) grass clippings, shredded leaves, and bark-based products. Apply 2-3” to garner the full benefits, making sure to keep it a few inches away from stems to discourage fungal issues. 

You can also experiment with layered newspaper or cardboard, but might find (as I have in my Southern California garden) that these tend to harbor pests such as earwigs, pillbugs, and slugs -- making the cost of these materials outweigh the benefits. 

Plastic sheeting is yet another option, but isn’t my favorite due to the fact that it is used for only one season and then thrown away. If using plastic, it is put in place before plants are set out in the garden (cut a slit or “x” in the sheet to plant each tomato). One benefit of plastic sheeting is that it traps heat and allows you to plant in the ground sooner than with exposed soil and can help protect young plants from late frosts, as well. 

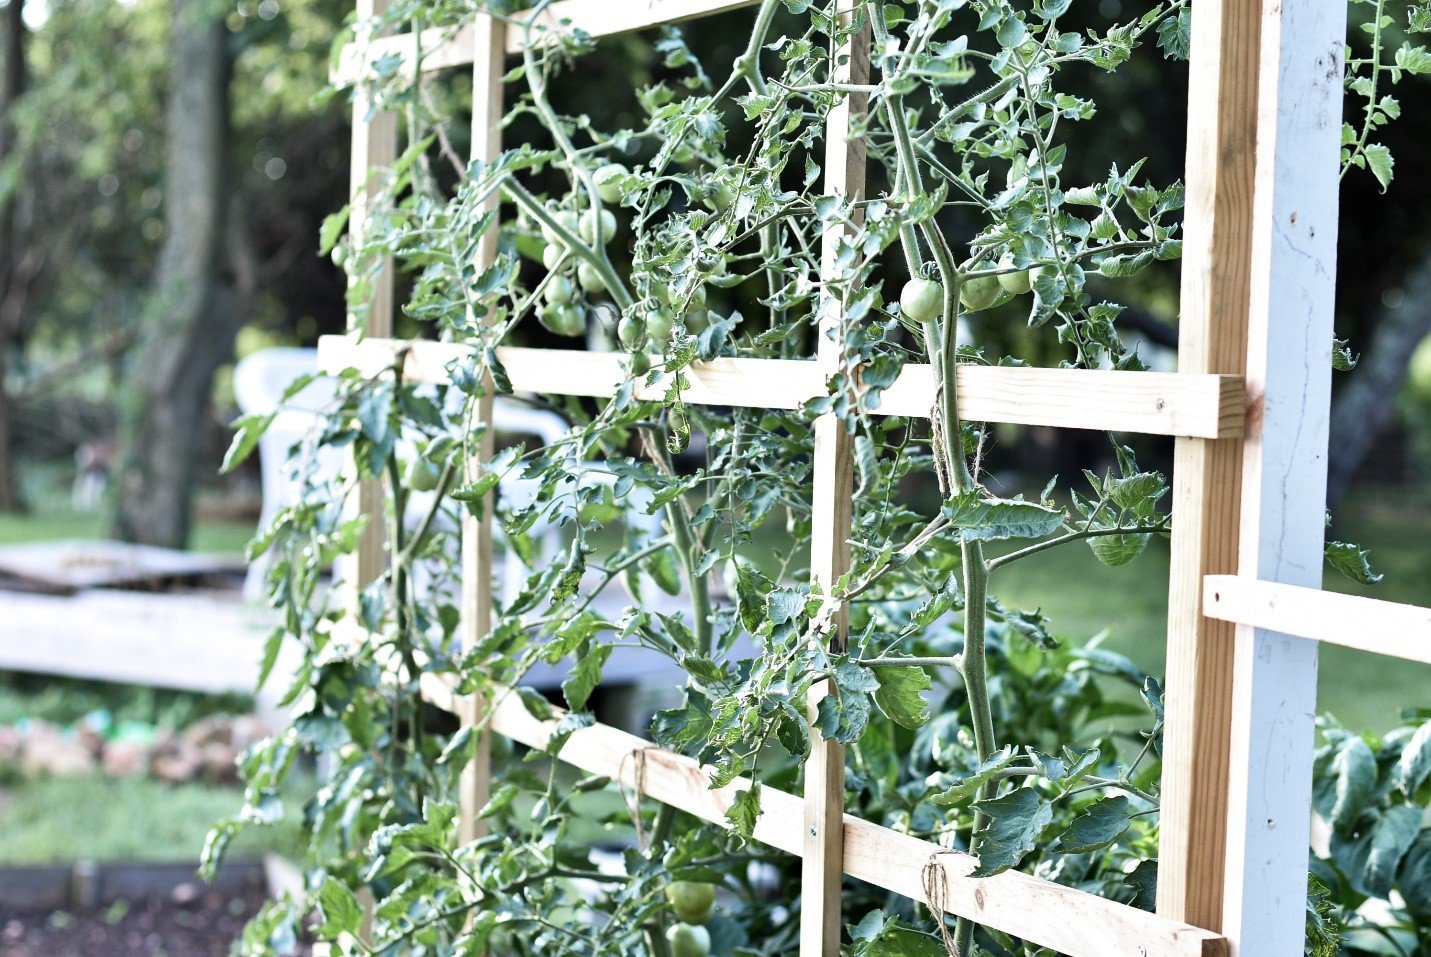
DIY tomato trellis via Clayton Homes

HOW TO SUPPORT GROWING TOMATOES

Due to their vining nature, indeterminate varieties need vertical support to keep plants from sprawling across the garden. This also helps keep fruit off the ground, where it is more susceptible to ground-dwelling pests. Use sturdy posts made of wood (at least 1” diameter) or metal that are at least 6-8’ long, since you’ll sink the first foot or two into the ground to ensure they’re stable enough to support the mature vines and strong winds . Place plants about 4” from the base (you can bury plants at an angle when planting) and periodically tie them up using twine or stretch ties as they grow.

Determinate varieties don’t require as much vertical space and can be staked as above (shorter stakes may be used) or supported by tomato cages or trellises. If using commercially available cages, be sure to select the largest size available. Smaller cages standing around three feet tall are more suitable for peppers -- I wouldn’t suggest anything shorter than four feet tall for tomatoes. 


HOW TO GROW PRODUCTIVE TOMATOES

All tomatoes produce side branches known as suckers. Removing them isn’t necessary with determinate tomatoes since they aren't vigorous enough to overtake the plant and will actually contribute additional fruit. However, if suckers are left unchecked on indeterminate plants, the vines will quickly become a tangled mess and yields may be reduced due to branches shading each other and numerous fruit competing for the same nutrients. Thankfully, spotting suckers is easy once you know what you’re looking for: check where leaves meet the main stem and pinch out any small shoots forming in the joint (axil). Doing this about once a week will help keep indeterminate vines tidy and productive—so you can grow lots of tomatoes—not just tomato leaves!


Best Fertilizer for Growing Tomato Plants 

Tomatoes are heavy feeders, with an especial appetite for phosphorus and potassium (the second and third numbers in the trio printed on fertilizer labels). If you opt for a commercial fertilizer there are both organic and synthetic products formulated especially for tomatoes. With all fertilizers, be sure to follow the package directions regarding application rate, frequency, and timing. 

I prefer to amend garden soil with homemade compost at planting time (sometimes I sprinkle in some bonemeal to provide an additional phosphorus boost), and then side-dress with compost again once or twice during the growing season. I find this provides enough nutrients for my plants’ needs.


How Much Water do Tomatoes Need to Grow? 

Deep, consistent watering is crucial for a healthy fruit set. Fluctuations in soil moisture can lead to a calcium-deficiency disorder called blossom-end rot, as well as cracked skin on maturing fruits. 

Foliage should be kept dry, so watering directly at the soil’s surface is preferable. This can be done by slowly drenching the soil with a traditional hose set on the ground (set a timer to ensure you remember to turn it off), or by utilizing a soaker hose or drip system. The latter two options can be automated via an electronic irrigation controller. You could also take this a step further by installing a smart irrigation controller, which references local weather data and adjusts irrigation cycles and inches of water as needed. 

Whatever your method, make sure to apply enough water to dampen soil at least 8-10 inches below the surface. This will encourage deeper roots, and create a reservoir the plants can draw from until the next watering.

Homegrown tomato harvest

ENJOY THE JOURNEY, AND YOUR RIPE TOMATOES!

Whether you grow just one patio tomato on your sunny urban balcony, or plant multiple rows to share summer’s bounty with family and friends, I hope you enjoy your tomato-growing journey. If for some reason your tomato crop falls short this season, don’t worry -- there’s always next year! Have fun experimenting with different varieties or trying out new fertilizer regimens to find what works for you—and produces the best tomatoes in your yard. Happy planting!

Is Drought Over in California?

Throughout 2021, the Western US grappled with widespread and severe drought, with California being among the most hard-hit areas.

Storms and record snowfall this past winter in California brought some welcome relief to this situation, chipping away at a major snowpack deficit and reducing drought intensity across much of the state. As SFGate reports, the storms helped to lift most of California out of “exceptional drought” levels, though Central California remains classified at the more intense “extreme drought” level.

Low water back yard planting via Sun Sentinel

Low water back yard planting via Sun Sentinel

IS CALIFORNIA IN A DROUGHT RIGHT NOW?

This is great news, but we should be clear: we are very much still in a drought.

As if to emphasize the point, California officials launched new water saving regulations to curb water waste early this year, cautioning that statewide drought persists and that we should all continue to take water saving measures.

Drought is not limited to the West, either. While the winter storms improved drought conditions in California, the Southwest, and the Pacific Northwest, drought “coverage expanded to include more than a half of the contiguous U.S. during the 2021-2022 winter, and Texas had one of the state’s warmest and driest Decembers on record. As of April 5, 2022, 57.97% of the lower 48 states remain in drought.

Drought assessments compared to usual for the same time of year via Drought.gov

WHAT CAN WE EXPECT?

Recent precipitation may suggest a shift to wetter times, but these storms are more accurately viewed as the latest in a long line of extreme weather events linked to climate change. The current precipitation spike is further fueled by La Niña conditions, which will likely yield more heavy rain and snow in the next few months (for those interested, see the National Weather Service’s forecast for La Niña’s impact across the US). 

Even as these extreme precipitation events continue, they will not last. Bottom line, we can and should prepare for drought conditions to continue.

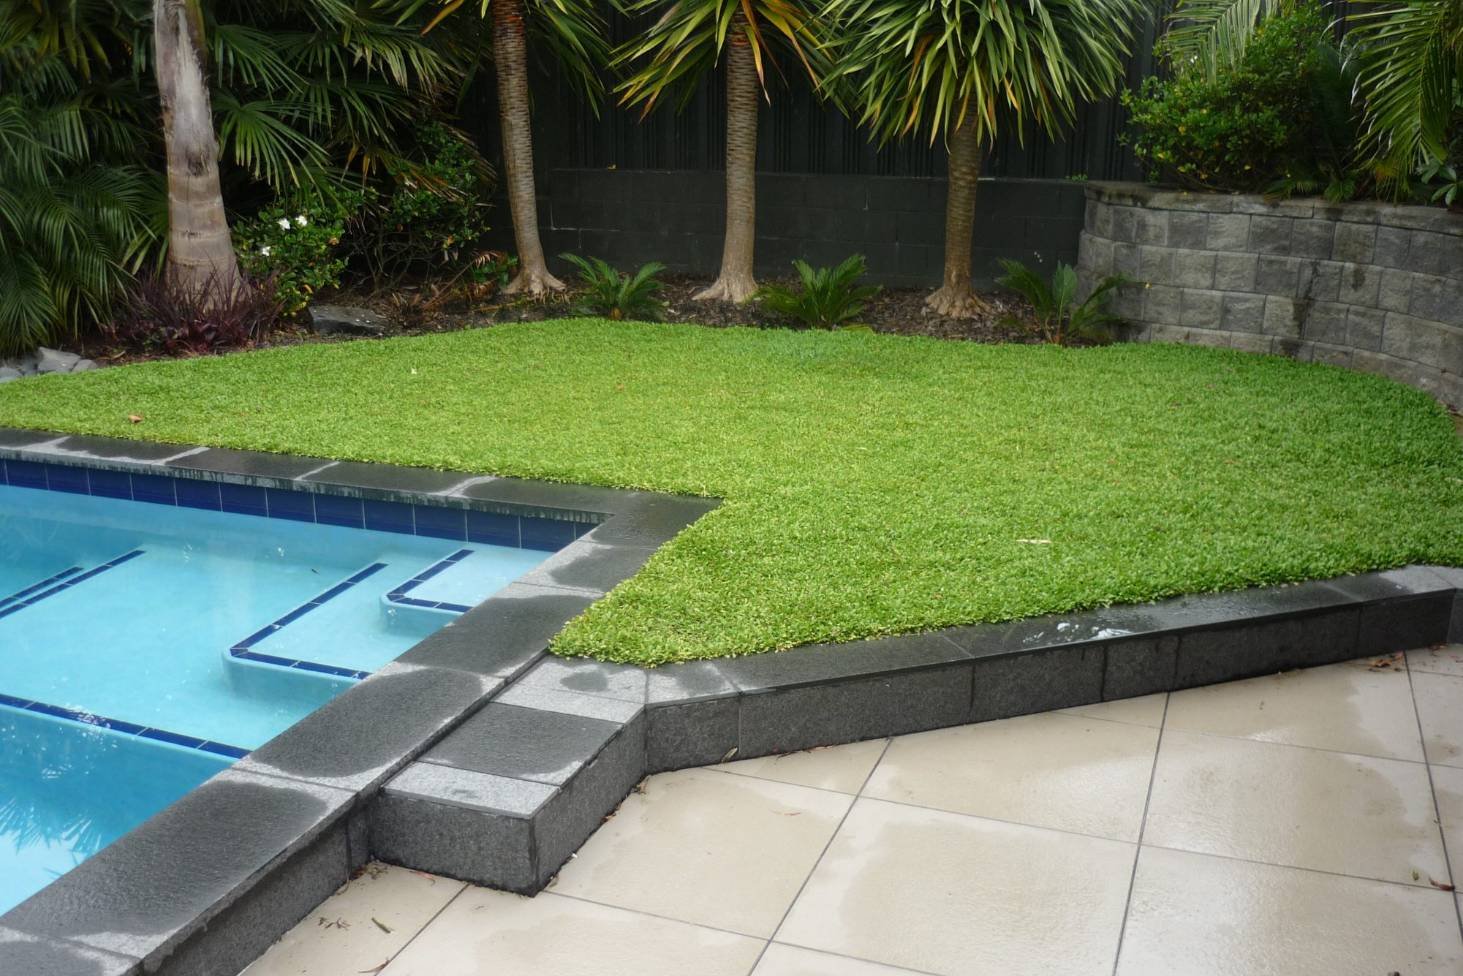
Selliera micrphylla is a “no-mow” low water lawn alternative via Stuff

Selliera micrphylla is a “no-mow” low water lawn alternative via Stuff

WHAT CAN HOMEOWNERS DO?

Nationally, landscape irrigation accounts for a major percentage of residential water use - up to 30% on larger properties (per the EPA) and from 60%-90% in the arid Southwest (per the Journal of the American Water Works Association). Lawns are particularly thirsty, accounting for the majority of irrigation water on most residential properties.

Faced with ongoing drought, we should do what we can to reduce our landscape water consumption. How do we do this? We have some suggestions!


Right plant, right place

You can slash your irrigation requirements by choosing plants that are appropriate for your local climate.  

We suggest starting with low water native plants. Having evolved to thrive in the local climate, natives tend to require the least inputs of water, fertilizer or maintenance. Plant them in conditions akin to their native range, and your irrigation needs will be minimal.

Climate-adapted plants with low water requirements are another good option. Look for species that evolved in climates and ecosystems similar to your own. For California, many plants from Australia, the Mediterranean, and South Africa are solid low water performers. 

While climate-adapted, introduced plant species will not offer the same habitat value as natives, they will tolerate dry conditions and reduce your irrigation needs.

Native or climate-adapted, you can make a major impact on your irrigation needs by selecting species with low water requirements.

Reduce Lawn

Particularly in hot and dry climates, lawns require vast amounts of irrigation to stay alive. They are also commonly overwatered, frequently receiving as much as double the water they need to survive.

Particularly in dry climates, we advise limiting functional lawns (play areas, etc) to a minimum viable size, while keeping purely decorative lawns as small as possible (or avoiding them altogether). 

If you already have a lawn, you can let it die back during warm months, or put it on a water diet by watering it deeply but less frequently.

Blue fescue uses a fraction of the water versus conventional grass via Marin Independent Journal

Blue fescue uses a fraction of the water versus conventional grass via Marin Independent Journal

Irrigate Responsibly

A well-designed, properly-functioning irrigation system can yield significant water savings. 

  • Use drip irrigation for all landscape planting except lawns (use spray for lawns) - this will improve the efficiency of your irrigation system. 

  • If you do spray, make sure the water lands on plants, and not on adjacent hardscape.

  • Apply irrigation in the evening to reduce loss of water to evaporation. 

  • Conduct routine checks on your system to make sure there are no leaks.

  • Use a weather sensor, or, simply turn off your system when rain is expected or during cooler winter months.

Plant in Hydrozones

Hydrozones are clusters of plants in a design that all share similar water requirements. 

Low water plants often end up receiving more water than they need when planted next to high water plants. By clustering all the low water plants in one area, and all the high water plants in another, you minimize the loss of water to over-irrigation. 

We’d add to this: try to avoid high water plants entirely if you live anywhere that experiences drought. There are plenty of fabulous low water plants to choose from!

Dark mulch used in low water front yard in Los Gatos, California

Dark mulch used in low water front yard designed by Yardzen in Los Gatos, California

Insulate the Soil

Use mulch or groundcover planting to cover up bare soil. This traps moisture in the ground, making it available to plants. 

Mulch and groundcover planting also keep the soil nice and cool (warm soil causes plants to use water less efficiently, requiring more irrigation to keep them alive).

Speaking of soil temperature, if you use gravel or rock as a mulch, restrict it to shadier zones. If you must place it in full sun, use it with heat tolerant plants. Rock mulches absorb and reradiate solar heat, and will heat up the soil beneath them in sunny areas.


Capture Water Onsite

By soaking water back into the ground, you can recharge groundwater supply (you’ll also help to mitigate flood risk and reduce water pollution). 

Try to maximize permeable surfaces in your yard - these are areas like planting beds or gravel patios where the water can soak back into the ground. 

To capture runoff from impermeable surfaces, like concrete driveways, surround them with permeable areas like planted swales. 

Vegetation, especially groundcover planting, slows surface water down, buying time for it to soak back into the ground rather than allowing it to flow offsite into the drainage system. Roots from plants also break up the soil, increasing its ability to quickly absorb water.

Fruitless olive trees planted in back yard designed by Yardzen in San Rafael, California

Fruitless olive trees planted in back yard designed by Yardzen in San Rafael, California

Plant Trees

We’re aware of many of trees’ myriad benefits, from the boost they give to property values, to the reduction they yield in home energy consumption. 

Trees also can help reduce your landscape water consumption. Plants that enjoy the cooling effect of a tree canopy will require less water than plants exposed to full sun.

Tree roots, like plant roots, also improve the rate at which water soaks back into the ground, helping to fortify groundwater reserves and thereby reduce the need for supplemental irrigation.

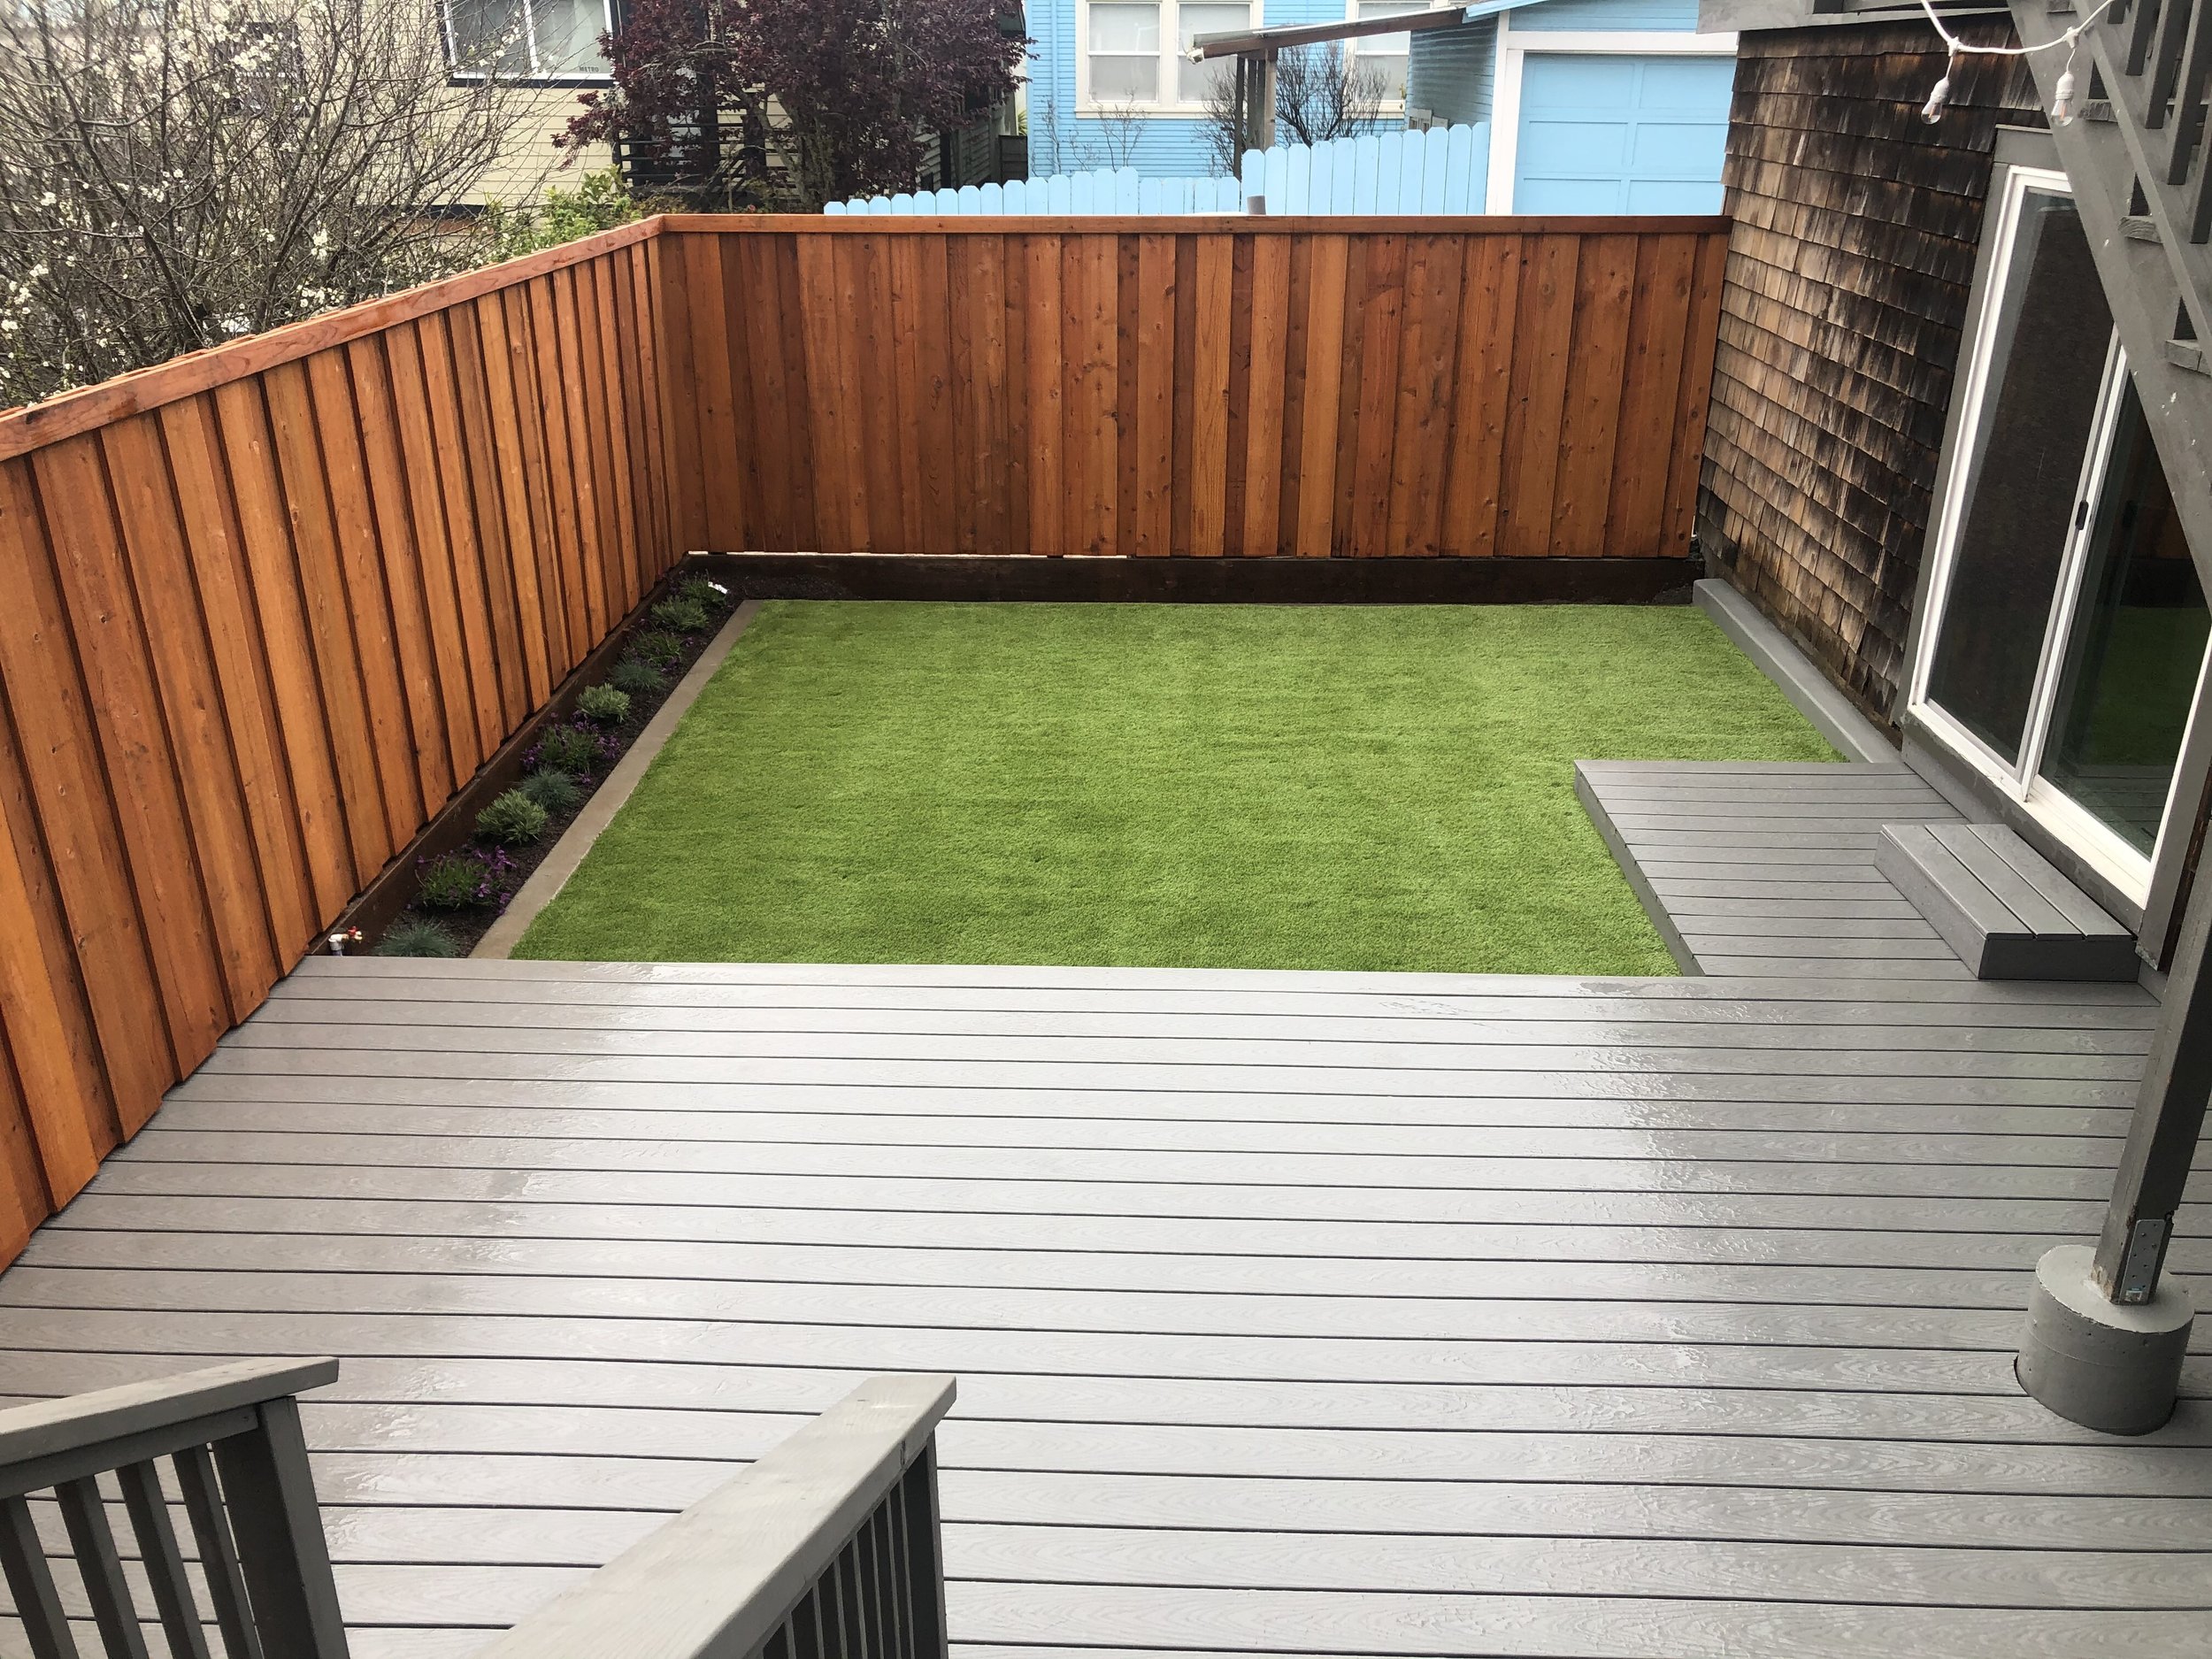
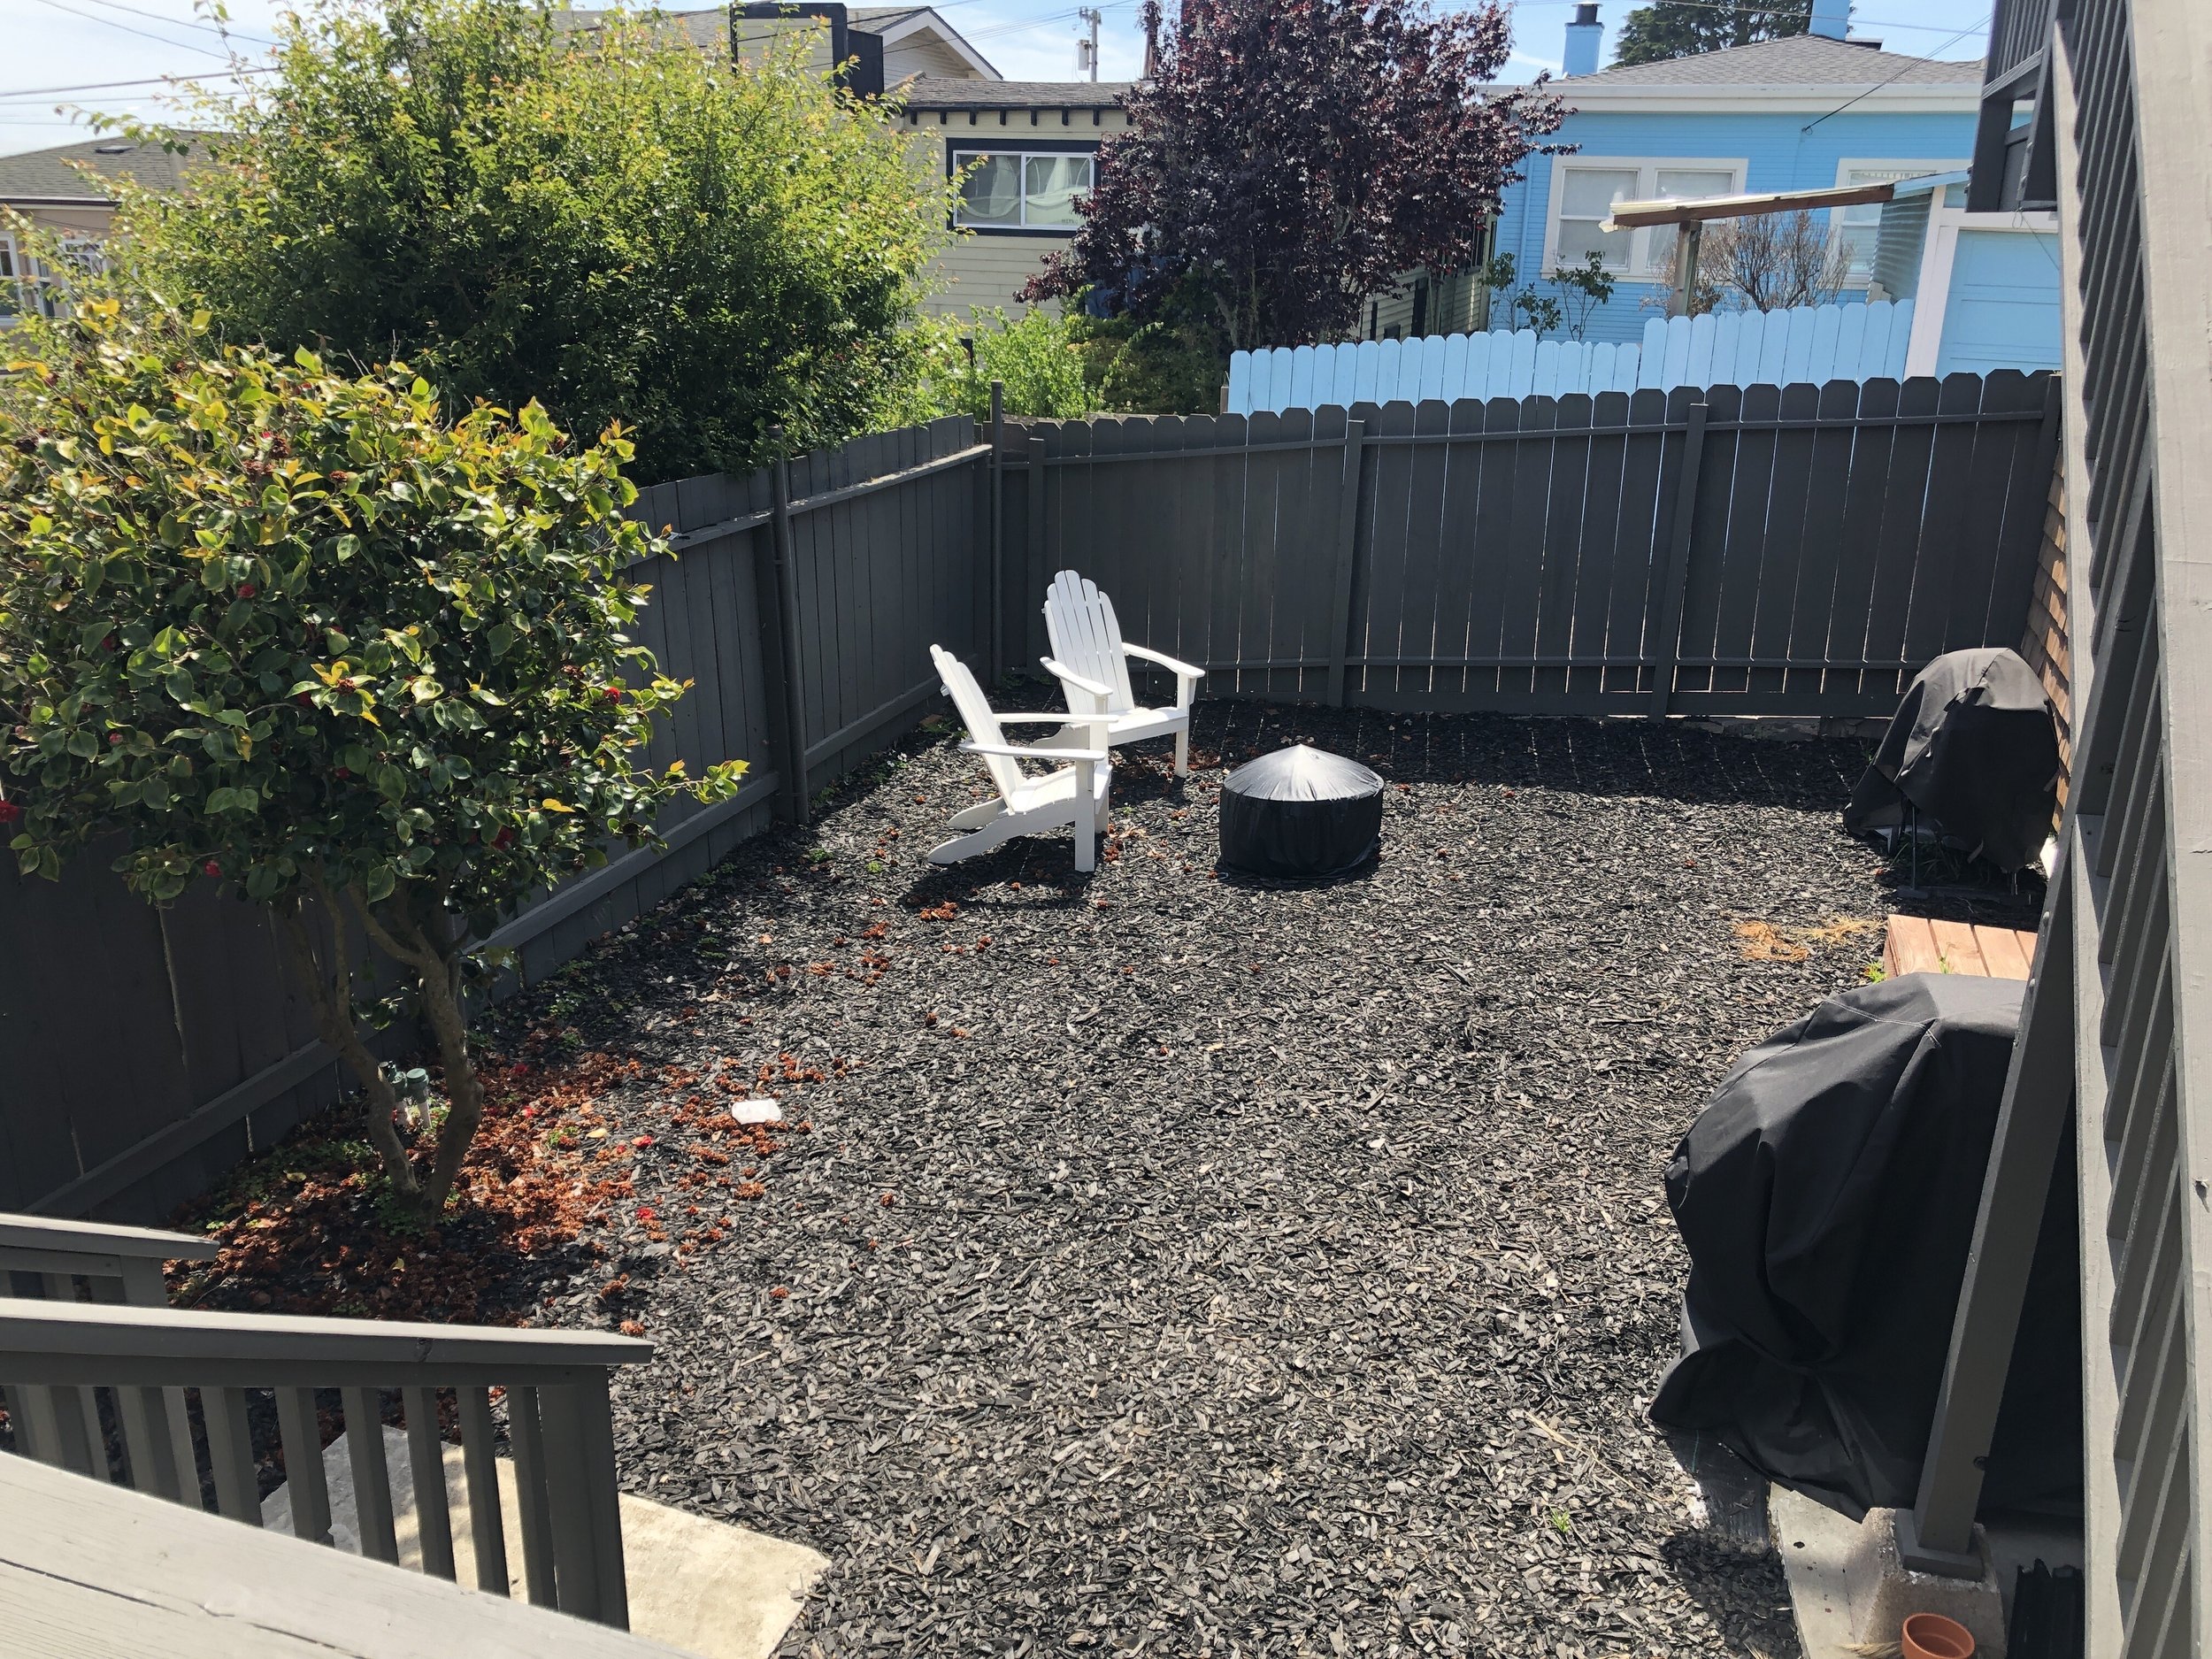
A sloped Yardzen yard transformed by artificial turf and smart landscape design decisions

A sloped Yardzen yard transformed by artificial turf and smart landscape design decisions

EMBRACE DROUGHT TOLERANCE IN DESIGN

Drought may be with many of us for a while to come, but this does not mean our designs must suffer! 

As we’ve discussed before, drought tolerant planting comes in a wide array of styles, extending well-beyond the succulent-heavy desert-scapes that commonly come to mind. 

From meadow grasses, to sculptural shrubs, to bold perennial blooms, a huge variety of drought tolerant planting is available for our homes’ landscapes. The trick is choosing which of the many available species are best suited for our particular sites, and among those, which we love the most.

GET STARTED WITH YOUR WATER WISE LANDSCAPE DESIGN BY YARDZEN

Yardzen's award-winning online landscape design is tailored to clients in all fifty states in the US. Through the American Rewilding Project, we are committed to creating designs with climate-adapted plants and water saving landscaping in drought-prone regions unless homeowners specifically opt out.

Our design process begins with understanding your space, your aesthetic preferences, and a discussion of your budget and vision to minimize surprises when it comes time to build. 

Our top-notch designers then develop a personalized vision for your yard, shared through 3D renderings, 2D plan drawings, and plant and material lists. Your design will capture the look, feel, and function you are hoping for, all while keeping costs within range. 

Once your design is complete, we'll help you connect with a local contractor from our Pro Network of vetted professional landscapers to install your new design.

Ready to level up your curb appeal and sustainability with drought-tolerant landscaping ideas? Create your design profile or explore our design packages today!

Landscapes Designed for Hosting: How to Create Outdoor Spaces Perfect for Entertaining

Few things are more pleasant than an evening outside with friends and loved ones. Perhaps this is why outdoor entertainment areas are among the most frequent design requests we receive. 

To get your yard ready to host, we’ll walk through some key strategies for designing spaces for entertaining.

BIG PICTURE

Let’s begin with the big ideas. First, what are we talking about when we refer to entertaining guests? You could be cooking, dining, having cocktails or coffee, playing games, enjoying an outdoor movie, or just having a chat. The group could be small, or big. The common thread is people gathering in a single space.

How do we best accommodate groups big and small doing a variety of things?

There are three overarching goals to pursue:

  • Create a space that is functional

  • Create a space that is inviting

  • Create a space that is practical

Let’s take a look at each.

Flexible patio space in Huntington Beach, CA can quickly transform to accommodate more guests

Flexible patio space in Huntington Beach, CA can quickly transform to accommodate more guests

CREATE A FUNCTIONAL SPACE: FLEXIBLE USE

A design that accommodates a variety of activities offers you the most versatility and value. For small yards or yards with limited usable space, designing for flexibility is particularly important. 

When designing entertainment areas for flexible use, consider both hosting and non-hosting functions. Entertaining may be the primary goal of the space, but for the many days when you don’t throw an outdoor party, your entertainment area should double a resource for day-to-day needs. 

Larger yards, coupled with larger budgets, may make it possible to provide multiple areas for entertaining. This can relieve pressure from your design - one space won’t need to handle every functional need. 

If you are designing multiple entertainment areas, make sure each one offers a distinct experience - there’s no sense in providing redundant spaces, make sure each one has something unique to offer.

How do we design for flexibility?


MINIMIZED BARRIERS
Free-flowing circulation and movable furniture allow people to gather in virtually any configuration, and help a space absorb groups of different sizes. 

Avoid built-in planters and seating, or, position them along walls where they do not block circulation or divide up floor space.

OPEN EDGES
Use plant containers or decorative objects to punctuate corners and thresholds, but keep boundaries pretty open. This fosters a sense of connection with the surrounding yard, and allows for overflow into adjacent spaces when groups get larger.


SIGHT LINES
Establish clear views to link your entertainment space to the far reaches of your yard. Long sight lines make spaces feel larger, and in turn more comfortable for larger gatherings.

IMPLIED SPACES
Use furniture arrangements to imply spaces, rather than wrapping spaces in boundaries. A cafe table and chairs tucked in the corner creates a distinct nook within a larger patio, but can be cleared away when a bigger space is required. 

Choose and arrange furniture to suit the gathering size you most often expect to host (factor in daily needs, too). For bigger or smaller events, rearrange furniture to imply spaces suitable to the group size.

Use groundcover materials like paving or aggregates to establish adjacent, modestly-sized zones suitable for smaller gatherings. When you need a bigger area, you rearrange furnishings to imply a merging of different groundcover zones into a single functional area. If all zones are at the same elevation and have clear, shared edges, this trick will be easier to pull off.

Modern outdoor kitchen with built-in gas grill, charcoal grill, sink, and mini fridge in Millburn, New Jersey back yard design

Modern outdoor kitchen with built-in gas grill, charcoal grill, sink, and mini fridge in Millburn, New Jersey back yard design

KITCHENS
When budget and space allow, an outdoor kitchen can be a great addition to an outdoor entertainment area. It’s convenient to keep a kitchen at the periphery of a gathering space (and near the indoor kitchen), and nice to keep those working the grill close enough to chat with other guests while they cook.

The trouble is that kitchens are fixed and massive - they’re effectively thick walls - and can negatively impact the flexibility of a space. As with built-in planters and seating, try to keep kitchens from sub-dividing spaces or closing off edges.

The risk of designing for flexibility is blandness. By not committing to a singular function, a space runs the risk of not offering much character. Let’s explore how to avoid this pitfall.


CREATE AN INVITING SPACE: THE LOOK & FEEL

An entertainment area only succeeds if people want to spend time in it. If it’s not inviting, it won’t be used, and it becomes a waste of space. To be inviting, your space needs to look and feel good.

Outdoor fire pit with seating near a pergola covered outdoor kitchen and lounge area in California back yard design

Outdoor fire pit with seating near a pergola covered outdoor kitchen and lounge area in California back yard design

How do we manipulate look and feel?

SCALE
Size entertainment areas appropriately. Spaces that are too big inhibit intimacy, and make people feel uncomfortably small. 

Spaces that are too small are loud and crowded - there may not be room to set down a drink or kick up your feet. Design spaces to comfortably fit a group, leaving them feeling neither dwarfed nor cramped by the dimensions.  

Pergola covered in white creeping roses creates a cozy and beautiful outdoor fire pit area in Oklahoma back yard design

Pergola covered in white creeping roses creates a cozy and beautiful outdoor fire pit area in Oklahoma back yard design

ENCLOSURE
Consider the spectrum of enclosure: on one end is openness and connection with the surrounding yard, on the other is enclosure and seclusion from the yard. 

Open boundaries, long sight lines, and minimized barriers - principles of flexible use - make spaces feel more open and connected. Especially in small yards, pursuing openness through these practices is a good default choice. 

This being said, if coziness is your aim, consider a more enclosed space. 

Spaces with a high sense of enclosure are typically smaller, and edged by elements that create a sense of isolation from the surrounding yard, typically by blocking views. These are spaces for quiet conversation or refuge from the crowd. (They also perform well as reading nooks or outdoor offices when not in hosting mode.)

One or two walls can be useful to achieve enclosure, but don’t fully wrap a space with structure - you’ll end up with a cell. 

Instead, use planting to achieve enclosure. Where walls are fully opaque, plants can be manipulated to achieve a desired level of isolation. Low canopy trees can offer a less intense sense of enclosure than hedges - the view at trunk height is only partially obstructed by tree canopy, but fully obscured by a dense hedge.  Layered ornamental planting that tops out with tall, airy grasses or spacious perennials will land you somewhere between the openness of trees and the density of hedges. 

Space and budget allowing, a design would ideally include spaces with varying character - some that offer openness, others that offer enclosure.

Italian cypress, Goodwin Creek gray lavender, and waxleaf privet surround an outdoor dining area in Austin, Texas

Italian cypress, Goodwin Creek gray lavender, and waxleaf privet surround an outdoor dining area in Austin, Texas

STYLE
There is no one inviting style. Choose the style you like and commit to it throughout the yard. Whatever your look may be, you can express it through a few key indicators:

  • The form of spaces and edges can imply either modern or traditional aesthetics. In general, long, graceful curves lean traditional, while straight lines and sharp angles skew modern. 

Pro Tip → avoid tight, wavy edges. They aren’t particularly attractive, and limit the functionality of edges.

Planting design around and within entertaining areas influences their feel. 

We could write several posts about planting design -  for now, we’ll stick to a few general suggestions:

  • Create a more modern feel by using plants with few or no flowers. Emphasize differences in plant height, texture and foliage color. Lean on structure to imply formality (rigid, geometric rows) or informality (wild, amorphous masses framed by crisp hardscape edges).

  • For a less modern feel, use elements that signal different flavors of traditional planting. Consider sculpted hedges, monolithic rows of chunky flowers like roses or Hydrangeas, or highly mixed, heavily floral designs reminiscent of cottage gardens. More color = less modern.  

Planting style is not about single species, but about the relationships between species and how plants are placed. Let your designer know the style you’re after, and they’ll craft a planting design to achieve it.

Wood pergola shades an outdoor seating area with fire pit near an open air dining table with seating in Naples, Florida back yard design

Wood pergola shades an outdoor seating area with fire pit near an open air dining table with seating in Naples, Florida back yard design

MATERIALS
Landscape materials like paving, mulch, stone, and wood all impact the look and feel of a space. Rough materials yield a casual feel. Fancy materials create an upscale vibe. Think of the difference between spaces paved with decomposed granite, weathered brick, saltillo tiles, and cut stone - the impact on spatial character is significant.  

Before you work with a designer, it’s worthwhile to browse inspiration images to see what catches your eye. Sharing visual references will help your designer hit your style goals.

FURNISHINGS & DECORATIVE ELEMENTS
What we’ve said of materials also applies to seating, tables, plant containers, and other elements used to furnish and decorate a space. The elements you chose will greatly impact the overall feel of your space. Take time up front to find and share examples that express the style you hope to achieve.

CREATE A PRACTICAL SPACE: FACILITATE USE

If look and feel are the lure to bring people to an entertainment space, practical function is the hook that keeps them there. If spaces don’t perform functionally, they won’t be used. 

Don’t forget to consider the following when designing your entertainment areas:

How do we DESIGN A SPACE THAT’S USABLE?

FURNISHING & DECORATIVE ELEMENTS
Not only does the style of your furnishings matter, their performance should be considered. To achieve the goals of an entertainment space, furnishings should look good, feel good, and withstand the rigors of life outside.

For flexible entertainment spaces, at least some furniture should also be portable. A few immobile pieces can be ok - say a couch along the periphery that doesn’t impact flow - but at least some pieces should be easy to move to allow for temporary changes of furniture layout.


CLIMATE
Heaters, ceiling fans, shade structures, windscreens, and even baskets with warm blankets are all highly practical - and sometimes critical - adaptations to make outdoor spaces comfortable enough to spend time in.

Whether it’s heat, cold, wind, rain or snow you have to contend with, incorporate the necessary measures to make your entertaining area usable for as much of the year as possible. Comfort is critical to ensuring a space gets used.

Outdoor movie theatre with retractable screen in Phoenix, Arizona back yard design

Outdoor movie theatre with retractable screen in Phoenix, Arizona back yard design

MOUNTING INFRASTRUCTURE
For climate adaptations like shade sails, windscreens, fans or heaters, as well as for lighting or even outdoor TVs, it’s useful to have something tall to hang things from. 

Overhead structures like pergolas can be a good solution. They establish distinct spaces, yet their open sides keep circulation clear and connections to surrounding areas strong.  

LIGHTING
Entertaining often happens at night, so you’d better make sure your entertaining areas are lit. Use path and deck lights to direct light downward - you want to avoid uplights near paths or seating areas. 

Instead, use uplights on focal trees or structures to lend drama to key views from your entertaining areas. 

If you need lighting on the cheap, try simple LED string lights mounted to existing tall structures. Less is more with string lights - they may look good at night, but they look like power lines during the day, so try to keep them inconspicuous.

Pro Tip → Turn your lighting off when you are done entertaining. Lights left on all night are harmful to local ecosystems.

Custom outdoor fireplace under a pergola created the perfect evening entertaining space in Novato, CA

Custom outdoor fireplace under a pergola created the perfect evening entertaining space in Novato, CA

SITING & ACCESS
Spaces get more use when they are easy to access. Often, this means keeping them near the house for quick access to the kitchen and restrooms. 

It also means siting entertainment areas in locations that don’t require steep climbs or other accessibility challenges. Perhaps the view atop a steep slope would merit a secondary hangout zone, but primary entertainment areas should be located in areas that adults, toddlers, and grandparents can all access with ease. 

Pro Tip → Try to create outdoor spaces that feel like a continuation of indoor areas. Not only will accessibility be simple, you’ll expand the perceived size of your entertainment area by merging the indoors with the outdoors.

CREATING A SOCIAL YARD DESIGN TAILORED TO YOUR NEEDS

Yardzen's award-winning online exterior and landscape design service is tailored to homeowners with both large and small yards in all fifty states in the U.S. Our design process begins with understanding your outdoor space, style, garden ideas, and a discussion of your budget and vision to minimize surprises when it comes time to build. 

Our top-notch designers then develop a personalized vision for your yard, shared through 3D renderings, 2D plan drawings, and plant and material lists. Your design will capture the look, feel, and function you are hoping for, all while keeping costs within range. 

Once your design is complete, we'll help you connect with a local contractor from our Pro Network of vetted professional contractors to install your new design (if you don’t plan on a diy build).

Ready to bring your design ideas to life? Create your design profile or explore our professional exterior, side yard, front yard, and back yard landscaping design packages today!

Making Design Changes After Landscape Construction Begins

A bit about design changes in landscape projects… 

  • Changes are good. In the design phase, we test-drive and revise ideas until we land on a design that achieves our client’s goals and priorities. Change is part of the process.

  • Changes can also be inconvenient. When installation is already underway, new design changes can add expense, delay, and hassle, which everyone would rather avoid.

Contractor installing cement walk way

Contractor installing cement walkway

Ideally, all changes would happen during the design phase of a project. 

In reality, it’s quite common for designs to undergo additional changes during the build phase of a project, when a client is working in the field with their contractor. 

This is a good thing! Particularly when designing online, working with your contractor to develop last-mile design adjustments is a key step to make sure your design properly accommodates your site and your budget

Below, we’ll talk through some design changes common to the build phase, and share a few tips for handling those changes as productively and efficiently as possible.


Yardzen Pro contractor shares build progress compared to 3D rendering in Menlo Park, CA

BE A GOOD PARTNER

Be mindful of how you work with your contractor. A positive relationship between client and contractor yields the best project outcomes. 

Stay engaged and communicative. You’ll arrive at the best design adjustments most efficiently if you understand both the underlying issues and the design options available to deal with them. Make sure you establish clear communication channels with your contractor early on, respond to any questions they have expediently, and align with them on their work plan.

FOCUS ON GOALS

Most projects end up installed differently than their designs indicate. Sometimes the differences are slight, other times more noticeable, depending on the factors affecting the project. 

Keep an open mind when your contractor suggests design solutions, and stay focused on your goals for the look, feel, and function of your design. It’s easy to fall in love with the design that emerges from the studio, but it pays to hang on to the spirit of iteration and stay open to new ideas all the way through to project completion. Design solutions put forward by your contractor will be rooted in real world experience, solutions-oriented, and worth your consideration. 

(If you do want a second opinion on changes that you and your contractor are considering, you can always feel free to reach out to your Yardzen contact for assistance.)

Completed back yard by Yardzen Pro in La Mesa, CA

Completed back yard by Yardzen Pro in La Mesa, CA

CHANGE EARLY

It’s best to make adjustments to your design as early in the build phase as possible, namely during the bidding process. 

Contractors usually begin a project by walking the site, evaluating the design, and then producing an installation cost estimate, or “bid”, for the client to approve

This process can reveal unforeseen circumstances, costs, and opportunities, all of which can require you and your contractor to work together to develop design changes. These changes may be necessary to adapt to new site conditions, to reduce project costs, or to implement design gains the contractor may have identified. 

It’s very common and relatively efficient to deal with these changes at this early stage in the build process. Doing so later, after a contract is signed or ground has been broken, is more complicated and costly.

Yardzen Pro contractor putting finishing touches on Yardzen designed back yard

Yardzen Pro contractor putting finishing touches on Yardzen designed back yard

MATERIAL SUBSTITUTIONS

Material substitutions are among the most common changes to occur during the build phase.

For certain materials like pavers, stone, or retaining wall blocks, Yardzen designs suggest a design, size, and style, but leave final material selections to the client and their contractor. This is because many materials are best sourced locally, for cost, sustainability, and design suitability reasons. Your contractor is the best source of insight into which locally-available building materials make the most sense to achieve the look established in your Yardzen design.

This approach ensures the right materials are used for the job, but it leaves some room for material prices to change between the estimated costs of the design phase and the costs listed in a bid

When materials are bid higher than anticipated, work with your contractor to identify more cost-effective material substitutions. Alternately, you can identify other areas of the design to cut budget, should keeping certain materials be a high priority for you. 

Materials substitutions can also be triggered by availability. Materials like gravel and mulch, as well as products like light fixtures, pergola kits, or composite decking, may not be available within your region or timeline in the exact style shown in your design. In this event, you’ll want to work directly with your contractor to find a suitable replacement. 

When selecting materials, we recommend getting samples - and doing so early - to help you confirm your choices. Aim to commit to materials before final bids are prepared. Knowing the exact materials you will be using allows your contractor to be as accurate as possible when preparing your final bid, and lowers the chance of budget surprises later in the build process.


Yardzen Pro contractor shares progress on the planting of privacy trees in Greenwich, CT

PLANT SUBSTITUTIONS

Plant substitutions are also common in the build phase. Yardzen takes care to use plants that are commonly available at nurseries, but occasionally plants indicated in a design will not be locally available. When this occurs, your contractor and your local nursery will be ready to help you choose appropriate replacement species. Often, it can be best to simply repeat a species used elsewhere in your design - repetition of species is a tried and true approach to making planting designs feel cohesive. 

Our advice: talk to the nursery, they’ll know about what plants perform well in your area better than anyone.

Differences in anticipated and actual light patterns on a site can also lead to substitutions. Poor satellite imagery or heavy tree canopy sometimes make estimation of light patterns challenging, particularly at a small scale. When a design places plants in unsuitable light conditions, you’ll want to work with your contractor to sub in species that thrive in the actual light conditions. 

Again, we suggest considering other species already used in your design to act as substitutes to maintain a cohesive planting aesthetic, and encourage you to speak with local nurseries for insight on plant performance in your area.


PLANT SIZES

Smaller plants (one gallen, rather than five gallon) are cheaper to buy, but take longer to grow before they achieve maturity. Buying smaller plants is a common strategy to reduce project costs when bids come in over budget, provided you can tolerate the wait. 

There are pros and cons to buying small vs. big. We often suggest buying  big on a few key plants - the ones with the most visual impact on your yard - but going small on less noticeable plants. Talk through your options with your contractor to confirm an approach that makes sense for you. Once you decide on sizes, stick to that plan.


PREPARE FOR PERMITS

Your contractor will know whether any features in your design require a permit. If they do, develop a plan with your contractor for who will handle the permitting so there is a clear owner of that process. 

In some cases, it may be better to revise a design so that it no longer requires a permit, rather than go to the effort and expense of getting a permit. Discuss this option with your contractor. Whatever direction you go, make sure you are both aligned on a plan to deal with permit requirements. Doing so will minimize the impact permitting has on your project.


San Francisco, CA Yardzen project progress shared from Yardzen Pro contractor

CAD REVISIONS

While it’s always a good idea for you to remain informed about the “what” and “why” of changes happening to your design, it’s not always necessary to officially document those changes. 

When design changes are identified during the build phase, contractors tend to approach them differently. 

Many contractors will simply work the changes into their bid and work plan. This is especially common for small-scale changes or plant and material substitutions. 

Other contractors may want to update your plan drawings  to make sure the changes are accurately reflected. This approach has the advantage of aligning everyone around a common set of documents, and is useful with larger scale or complex design adjustments. 

Updating plan drawings can also be necessary when HOAs or other regulatory agencies need to approve a project. 

 Yardzen is happy to offer free plan drawing revisions throughout the build phase. Should you or your contractor wish to update your plan drawings, simply mark up your existing set with editorial marks to tell us what needs to change, share them with us, and we’ll provide updated plans to you in a matter of days.

Yardzen Pro contractor installing artificial grass for a Yardzen project in Winter Park, Florida

Yardzen Pro contractor installing artificial grass for a Yardzen project in Winter Park, Florida

CHANGES DURING INSTALLATION

Sometimes design changes during the installation are unavoidable. 

You can mitigate the impact of mid-installation changes by staying present and available throughout the installation phase. Nothing beats being on site to immediately respond to questions your contractor may have for you about how your design should respond to new issues. If you have to be away, try to stay available via phone. 

The type of contract you have can also make it easier or harder to deal with changes during installation. 

A time and materials contract estimates a price prior to installation, but ultimately invoices you based on predefined labor and material rates. This kind of contract is fairly flexible with respect to design changes - the predefined rates are applied to the new design features, and the project will continue. 

A fixed price contract, which sets a final price prior to breaking ground, is less accommodating. These usually require a change order to update the scope of work and project cost in the contract. Dealing with change orders is costly and time consuming, and can be a morale killer for a project. They are best avoided whenever possible. 

Occasionally, contractors working under fixed price contracts are willing to invoice changes separately and skip the change order process, but don’t count on this. If you are going with a fixed price contract, take extra care to outline all design changes with your contractor prior to installation.


In the right context, change can be an asset, even when it occurs during the build phase. Follow the tips above and embrace collaboration with your contractor and you’ll be able to navigate any surprises that come your way. And of course, feel free to reach out to Yardzen for any extra assistance you may want during the build process!

Small Back Yard Landscaping Ideas from Our Design Team

Short stories are notoriously difficult to write. Writers must squeeze the full weight of a novel into scant few pages. Small yards present a similar challenge. When space is limited, designs must distill down to the most essential features to achieve a client’s goals. 

We love to design small yards—in many ways, they are like a puzzle, and, perhaps counterintuitively, they offer tons of room for creativity. Below, we’ll dig into some overarching strategies and brass tacks tips for getting the most from your small yard.

Design for Seattle condo maximizes new deck space for planters, outdoor dining, and seating area

Design for Seattle condo maximizes new deck space for planters, outdoor dining, and seating area

01 SET GOALS & PRIORITIES

Step one of any landscape design is to identify your goals and prioritize the features you hope to include in your design. 

Your design goals should address the functions you hope to achieve—what will you do in your yard?—and the look or feel you’d like to express. Will it be cozy or open? Lush or minimal? Formal or casual? Hot tub or seating area with outdoor furniture?

With small yards, prioritization is extra important. With limited space, it’s best to be open to compromise, letting some lower priority items go to do proper justice to the most important features.

Small back yard makeover in Berkeley, CA with hardscaping and dining area

02 DESIGN FOR FLEXIBILITY & OPENNESS

Every square foot counts in a small yard design. Our advice: design for multiple uses within a single back yard space. Choose movable furniture that can be shifted as needed, and keep edges clear to allow for open circulation and long sight lines. 

Avoid dividing up usable spaces with barriers like walls or built-in seating, and remove impediments like thick rows of planting to keep edges clear. Pockets of planting for punctuation are great, but keep the majority of edges between spaces wide open, not walled in.

Maximizing openness and minimizing clutter makes spaces functionally adaptable. They also make them feel bigger, which is a good default goal for most small yards.

A small but lush New York City garden filled with New Jersey Tea & Crape Myrtle trees, Climbing Hydrangea, and Wild Ginger.

A small but greenery-filled New York City back yard garden design filled with New Jersey Tea & Crape Myrtle trees, Climbing Hydrangea, and Wild Ginger.

03 MANIPULATE SPACE

Small yards are often narrow rectangles, not unlike hallways, and can feel like spaces to move through rather than places to linger. 

Even if straight lines and boxy spaces are your thing (they’re a hallmark of modern designs), it’s nice to use design to make small yards feel less defined by their rectangular shape. Our advice: manipulate space by playing with edges.


Width

Push some edges a bit toward the middle to create narrow moments. These will feel like thresholds to pass through. 

Move other edges toward the periphery to create wider spaces. These will feel like areas to spend time in. Combined, you’ll create a sequence of spaces that follow a wide-narrow-wide rhythm. 

Don’t get too fussy - it’s generally better to have fewer, larger spaces, but a little spatial diversity adds depth to a design. Two or three areas make sense. Ten do not.


Style

For a more traditional feel, make your edges gently curve (but avoid tight, wavy edges). To keep things modern, stick to straight lines and sharp angles.

Maximizing limited space in a Connecticut back yard design

Maximizing limited space in a Connecticut back yard design with a fire pit, pergola, and perennial flower beds

With and against axes

Rectangular yards automatically imply an axis down their middle. Designing along this axis emphasizes the rectangularity of the yard - not necessarily a bad thing, but not particularly novel. If you go this route, employ symmetry, and put a worthy focal point at the axis’s end: a tree, a water feature, a patio with a standout element. 

For a more unique and less boxy design, play with diagonal lines. Diagonals break from the default center axis, establishing new, angled edges that make the rectangular shape of a yard melt away. Spaces with diagonal edges tend to feel a little bigger too, especially if they enjoy long sight lines.

Give diagonal edges to your paths, planting areas, or patios, but don’t introduce too many different angles. It’s best to keep your diagonal lines parallel or perpendicular to each other.


Nature abhors a straight line

Curving edges are super effective at conveying a natural feel. A careful sequence of planting areas with curved edges is a strong approach for those seeking to design a garden oasis. 

Try pin-balling planting areas from one side to the other and back. The alternating curved edges of opposing planting areas will imply a gently meandering path between them. Go for fewer, larger planting areas, not a bunch of small planting islands.  

A cozy back yard in Denver, CO with low maintenance and low water grasses

A cozy back yard in Denver, CO with low maintenance and low water grasses

Conceal and Reveal

Curves are also excellent at creating mystery. As you round a curve, new views or spaces are revealed. 

Use planting—a small canopy tree with a clear understory, an upright grass or shrub at waist height—at the apex of curves to heighten this drama and establish two smaller, cozier spaces on either side.


Get Cozy

Small spaces feel cozier than big ones. We’ve been advocating ways to make small yards still feel roomy, but sometimes it’s best to simply embrace the coziness

Use taller planting, existing vertical structures, or other tall elements along the edges of spaces to ramp up the coziness factor. Yes, this directly contradicts our advice for seeking openness.

If you are going for coziness, take care to keep your living space inviting. Bare walls at the edge of a space are unfriendly. Plants that balance privacy with a little visual permeability are a much nicer boundary to sit beside. Consider how rustling leaves overhead, swaying grasses below, or even a bubbling water feature nearby could lend a comfortable character to more intimate spaces.

For all of the above manipulations of spaces and edges, maintain your focus on openness. When you make those narrow thresholds or create those curving reveals, do so subtly. Remember that the yard is small, and breathing room is essential to comfort, even in cozy spaces.

Outdoor kitchen and dining area in Los Angeles, CA back yard

Outdoor kitchen and dining area surrounded by garden beds, container plants, and herb garden in metal raised beds in Los Angeles, CA back yard

04 REFINE, REFINE, REFINE

Bottom line, you have less room to work with in a small yard. You can’t change this constraint, so it’s best to embrace it. Any design requires a bit of trimming the fat to get to the essential elements, but with small designs this is the designer’s greatest responsibility. 

In all aspects of the design, whether picking the number of distinct spaces, choosing furniture types and quantities, or selecting and placing plants—try to only include what is essential. You don’t need to be minimalist. Small yards can have lush planting, decorative flourishes, and plenty of visual detail.  

You should, however, get rid of anything that does not play a crucial role. This may mean one seating area instead of three, five plant species instead of ten, or a single path (or none at all) instead of several. Designs almost always improve when non-essential features are removed. Be a little ruthless.

Creating new outdoor seating area in small sloped back yard in California

Creating new outdoor seating area in small sloped back yard in California

05 EMPHASIZE CHARACTER

When your design is refined down to the essential elements, each component that remains needs to carry its weight in terms of expressing character. 

Not everything must be loud. Background elements are often more important than showpieces, but each ingredient must support a consistent, cohesive aesthetic. Bouncing from one style to the next looks unintentional in larger yards, and looks even less flattering in small yards.

Run each choice through the filter of your overarching aesthetic goals. That means your planting design, materials selections (paving, mulch, wood, gravel or decorative rocks), and elements (furniture, plant containers, decorative items) should all work together as parts of a consistent aesthetic whole. 

It’s fine to have a diversity of materials - say a paver, some concrete, and some gravel all sharing paving responsibilities - but make sure the materials you choose express a consistent look and feel. 

Furniture and plants offer great opportunities for key character-defining accents. Go for it and embrace a few key accents - a specimen tree, a water feature, a set of boldly colored chairs -  just give each focal element its own space. Placing loud accents too close together makes them compete for attention, and detracts from the legibility of your design.

Monochromatic planting design for back yard in Chicago, Illinois

Monochromatic planting design for back yard in Chicago, Illinois

06 PLANT CAREFULLY

Plants are a crucial and versatile part of small yard designs.

Layer plant heights

Put low plants along the edges of paths and occupiable spaces. Increase plant height in distinct layers as you move toward the back of planting areas. 

If you seek coziness, a canopy tree, waist high planting, or larger container plants can create a more formidable boundary to a space without entirely blocking circulation or views.

Use groundcover

Use  low groundcover species to fill gaps between scenes of larger ornamental planting. This spreads green over a large surface area to establish a natural feel, yet keeps the total bulk of planting under control, so your planting design doesn’t feel like it’s compromising the openness of your yard.

Look up

Trees, tall plants, and even planters mounted to walls all help expand the sense of perceived space by drawing the eye upward.  

Trees!

You may not have room for many trees, but you can achieve a lot with just one or two well-selected and well-placed trees

Choose species that suit the scale of the space - namely smaller canopy trees or narrow, upright evergreens. Avoid huge species that will dwarf the yard.

Low canopy trees can imply outdoor rooms, provide privacy from neighbors, and subtly distinguish spaces while maintaining clear views at trunk height. 

Plant for habitat

Include trees and plants that attract birds and butterflies - natives will be your best bet. Small yards are often in urban areas where nature may be scarcer, so it’s extra nice to be visited by local fauna.

Be choosy

With less space to utilize, it's often best to use fewer species in a small yard design.

Your design will look more legible by clustering several plants of a single species together, rather than intermixing individual plants from a larger number of species. Take care to choose species that still provide the same variety in plant height, texture, and foliage color that you’d expect from a larger yard’s design - each species you choose will just have to do a little more lifting to get to this requisite level of diversity.

It doesn’t matter if you seek a geometric or naturalistic design, you’ll achieve greater legibility in limited spaces by limiting your species count.

Southern Wax Myrtle create uniform privacy wall for Miami townhouse back yard

Southern Wax Myrtle create uniform privacy wall for Miami townhouse back yard

07 KEEP IT FUNCTIONAL

A yard only succeeds if it is easy to use and maintain. Lighting is a must for nighttime use, but don’t go overboard. Keep lights to the edges where they will not cause glare or pose trip hazards. One path light every 15’ is usually plenty—less is more, especially in small yards. 

String lights can be fun, but again we advise using them modestly to avoid too many dangling black cables detracting from the daytime appeal of your design. Try to avoid hanging string lights over key views, opting instead to keep them to the periphery of patio spaces.

If storage is required for outdoor cushions, children’s play equipment, or other such items, try to find concealed but convenient areas. Storage benches are a great option, as are small nooks tucked under raised porches or staircases. 

Default to low maintenance plants, particularly natives, and provide easy access to planting areas so they can be maintained with little hassle. 

We often suggest avoiding lawns in small yards, as they get more difficult to mow and irrigate when corralled into narrow spaces. If you need a play space, artificial turf can be a good alternative.


Small yards can, and should, still pack a big design punch. There’s no need to expect less in terms of satisfaction, though adapting your expectations to the reality of a small space is a key step.

As with any project, healthy dialogue with your designer and your contractor is a key ingredient to achieving a successful outcome. Keep communication clear, consistent, and respectful, and you’ll be well on your way to a fabulous small yard design.


CREATING A SMALL BACK YARD DESIGN TAILORED TO YOUR NEEDS

Yardzen's award-winning online exterior and landscape design service is tailored to homeowners with both large and small yards in all fifty states in the U.S. Our design process begins with understanding your outdoor space, style, garden ideas, and a discussion of your budget and vision to minimize surprises when it comes time to build. 

Our top-notch designers then develop a personalized vision for your yard, shared through 3D renderings, 2D plan drawings, and plant and material lists. Your design will capture the look, feel, and function you are hoping for, all while keeping costs within range. 

Once your design is complete, we'll help you connect with a local contractor from our Pro Network of vetted professional contractors to install your new design (if you don’t plan on a diy build).

Ready to bring your design ideas to life? Create your design profile or explore our professional exterior, side yard, front yard, and back yard landscaping design packages today!
8 Sacramento Landscape Design Ideas We Love

In terms of landscape, Sacramento is where big things meet. The city rests at the confluence not only of two rivers, but of two geographic features: the massive Sacramento Valley, and the grand Sierra Nevada mountains, whose foothills stand guard just a short drive away.

The best Sacramento area landscape designs pay tribute to this unique geography, using natural elements to reflect the river, valley, and mountain ecosystems that help form the city’s identity.

With toasty summers and pleasantly cold winters, they also prioritize outdoor living, helping homeowners to spend more time outside enjoying their unique and lovely slice of California.

From Auburn to Elk Grove, Yardzen has helped homeowners all over the greater Sacramento area get the most from their yards. Below, we’ll take a look at a few of our favorite Sacramento designs.

01 SOCIAL FRONT YARD

This design delivers on the clients’ request for a flexible front yard social space.

White stucco retaining walls support an expanded front patio, elevated to be flush with the front door for that coveted indoor/outdoor feel. A handsome wood pergola extending off the front facade continues the theme by defining a minimal and comfortably shaded outdoor living room.

One step down, a minimalist wood deck ramps up the modern vibes, offering a versatile, shaded space to accommodate any number of activities. Big, open boundaries between the patio and deck help to link the spaces, making each feel larger and encouraging circulation between them.

For front yard party types, this design is a winner.


FEATURED PLANTS

CALIFORNIA GREY RUSH

blue flame agave

BLUE FLAME AGAVE

Image via Green Acres

FRUITLESS OLIVE TREE


02 BEAT THE HEAT

It bears repeating that summers in the Sacramento area are hot.

To beat the heat, this Folsom family came to Yardzen for help reimagining their backyard pool area. The goals: more space for kids to play, lower maintenance planting, and an overall boost in style.

This design nails each goal, with a versatile artificial turf play zone for the kiddos, beds of drought tolerant planting to soften hardscape edges, and modern pergolas and furnishings throughout. Factor in the new outdoor kitchen, and you have clean and adaptable outdoor space built for summers outside.


FEATURED PLANTS

Westringia Grey Box plant

WESTRINGIA GREY BOX

Image via NNPlant

Spanish Lavender plant blooming

SPANISH LAVENDER

Image via The Spruce

Shrubby Yew Podocarpus

SHRUBBY YEW PODOCARPUS

Image via Pinterest


03 STYLIST AND SPACE EFFICIENT

This Sacramento landscape design makes the most of a shared townhouse backyard and a limited design budget.

The design uses lightweight seating, which can be easily moved to maintain a clear walkway between buildings, or stored to make space for larger events. An outdoor rug distinguishes a lounge zone within the patio, while also saving the expense of replacing existing pavers.

Gravel mulch picks up the color scheme from the rug, as do the chairs and cushions. In this allegiance to a limited color palette, both hardscape and softscape features establish a cohesive look and feel across the space.

Trees situated along east and west fences provide shade in the morning and afternoon hours, and help to draw the eye upward to help the compact space feel larger.


FEATURED PLANTS

Deer grass plant

DEER GRASS

Image via Wikipedia

'NATCHEZ' CRAPE MYRTLE

Blue fescue plant

BLUE FESCUE


04 HERE’S LOOKING AT YOU

This drought tolerant landscape design beckons you outside by situating a row of luxurious, begging-to-be-used chaise lounges on an elevated platform directly across from glass living room doors. Just beyond the sunbathers’ toes, twin waterfalls spill from a crisp concrete wall into the pool, adding even more allure to the living room view.

To the side, a large pergola with a retractable canvas canopy maxes out shade coverage during the day while keeping night sky views available during evenings spent around the fire pit.

A cooking and dining area rounds things out, sited just off the interior kitchen for easy trips indoors to grab ice and extra utensils.

The garden design skips fuss (and expense) by opting for water-wise, climate-adapted species like the Mediterranean Bay Laurel and Australian Blue Flax Lily.


FEATURED PLANTS

Blue flax lily plant

BLUE FLAX LILY

Image via NGA

Bay laurel tree

BAY LAUREL

Image via Nature & Garden

Rocky mountain juniper tree

ROCKY MOUNTAIN JUNIPER

Image via The Spruce


05 THE GREEN ROOM

Plants define the room in this new landscape design.

Walls: a fine-textured screen of Italian Buckthorn for privacy and shade. Ceiling: a climbing Star Jasmine vine, casting shade and sweet fragrance beneath it.

A minimal black pergola takes the baton from the Jasmine, forming a slatted ceiling to cast a little shade (or a lot when a removable shad cloth is attached) while supporting string lights for evening glow. Low slung, modern dining furniture looks at home in a uniform field of stately gray paving, cementing a calm and upscale aesthetic.

Off-screen (but within earshot) a small water feature nestles within a planting bed, offering a soothing burble to the already serene environment.


FEATURED PLANTS

Italian buckthorn tree

ITALIAN BUCKTHORN

Image via Pith & Vigor

blooming star jasmine plant

STAR JASMINE

Raywood ash tree

RAYWOOD ASH

Image via Plantmaster


06 CONTEMPORARY OASIS

We love the careful balance of looks and performance in this contemporary backyard oasis.

Horizontal wood walls and fences complement a low-slung deck, while beachy, minimalist chairs and bright concrete pool decking express a decidedly modern feel. The deck sits just high enough to accentuate a tree-shaded corner seating area, making it feel connected to both adjacent and distant spaces in the yard.

A lawn runs right up to the pool, creating a barrier-free play zone for kids to get their energy out in any season.

Planting throughout the design is water-wise and drought-tolerant, with a combination of native and climate-adapted plants, including Mediterranean fruitless olive and dwarf strawberry trees, and Texas/Mexico native Dichondra ‘Silver Falls’, a crowd-pleaser groundcover for spilling over retaining walls.


FEATURED PLANTS

Silver falls dichondra plant

SILVER FALLS DICHONDRA

Image via Grow Joy

firebird flax plant

FIREBIRD NEW ZEALAND FLAX

Image via My Weekly

dwarf strawberry tree

DWARF STRAWBERRY TREE

Image via The Spruce


07 MODERN BOTANICAL GARDEN

This front yard landscape project had two goals: boost curb appeal and fulfill the client’s dream of a “modern botanical garden” experience. The client enlisted Yardzen’s design services to translate these goals into a built reality.

Lush, foliage-forward planting presents a loosely symmetrical design, divided evenly by an axial path of large concrete pavers interspersed with gravel gaps. Here and there, groundcover creeps across the path edges, a small but meaningful gesture to let us know that plants are running the show.

Low water plants like the bushy ‘Little Ollie’, a water-saving drip irrigation system and a blanket of brown bark mulch allow the homeowners to have the densely planted scene they hoped for while prioritizing water conservation.


Featured plantS

berkeley sedge plant

BERKELEY SEDGE

Image via PlantMaster

dwarf olive tree

LITTLE OLLIE DWARF OLIVE

Image via Hort Mag

variegated flax lily

VARIEGATED FLAX LILY


08 NATURAL BEAUTY

Looking for cost-effective design ideas to create a relaxing, natural environment, this client came to Yardzen to reimagine their backyard.

The result? A simple but effective series of spaces that offer style, function, and a variety of experience without breaking the bank.

The dining area dresses up an existing concrete slab with an outdoor rug and prefab aluminum pergola, which casts cooling shade with the help of the fast-growing creeping fig vine.

The dining area gives way to a fire pit patio, paved in crunchy gravel with string lights swooping overhead. A stylish path of precast concrete pavers cuts across one edge, linking the patio to the rear lawn, which was left broad and undivided to offer maximum value as a play surface for the homeowner’s three young children.

The side yard offers additional functionality with a small edible garden.

Each space meets the next with broad, clear boundaries, encouraging free-flowing circulation while fostering a sense of connection among the distinct zones.


Featured plantS

Walker's low catmint

WALKER’S LOW CATMINT

Lindheimer’s Muhly plant

LINDHEIMER’S MUHLY

Image via Hoffman Nursery

Tasred Flax Lily

TASRED FLAX LILY

Image via Dig Plant Co


DESIGNING A SACRAMENTO LANDSCAPE TAILORED TO YOUR NEEDS

Yardzen's award-winning online landscaping design is tailored to clients in Sacramento. Our design process begins with understanding your space, and a discussion of your budget and vision to minimize surprises when it comes time to build.

We want to make sure our design team can personalize your yard, delivering a vision that includes what’s most important for your outdoor life and unique California environment while keeping costs within range. We do this by utilizing our in-house Build Team made up of former contractors and our Pro Network of vetted professional landscapers across the country.

Ready to level up your home improvement with a professional landscape design? Create your design profile or explore our design packages today!


9 Landscaping Ideas Designers Use to Create Privacy

Yards are extensions of our homes, and like our homes, we rely on our yards for privacy. 

Private spaces let us feel comfortable and free. Depending on your personality, privacy can be crucial to your enjoyment. Design ideas that create privacy can be highly effective, but often impact the feel and function of a space in the process.

Below, we’ll walk through a few privacy ideas, and share some tips on how to mitigate the impact of privacy measures on your overall landscape design.

Layered planting creates visual interest along with privacy

Layered planting creates visual interest along with privacy via PlantMaster

PRIVACY LANDSCAPING PROS AND CONS

Designing for privacy involves creating barriers of one type or another. While barriers may block views from prying eyes, they also can impede circulation in a design. As a best practice, particularly when space is at a premium, designs should maximize free-flowing spaces and minimize barriers that separate them. 

Barriers tend to shrink spaces. A small space enclosed by tall hedges feels even smaller and more isolated than a space that enjoys open edges and distant views.  When designing for privacy, this inverse relationship between enclosure and perceived space must remain in mind - in general, and particularly in smaller yards, aim to maximize perceived space by maximizing openness. 

While privacy measures impact perceived space internally, externally they affect how welcoming a landscape feels. 

Opaque boundaries express a desire for privacy, while transparent edges invite the outside world in. When creating a “social front yard”, fences with large gaps like hogwire or row fences trade a lack of privacy for a wealth of sociability and openness. 

If you don’t want to throw privacy entirely out the window, use design elements to create a semi-opaque boundary that maintains an inviting feel while leaving some interior spaces obscured from view.

Palm trees extend privacy past the legal maximum height for walls in Phoenix, AZ front yard

Palm trees extend visual barrier past the legal maximum height for privacy walls in Phoenix, AZ front yard

PLANTING FOR PRIVACY

Our favorite tool for privacy, by far, is planting. Here are a few approaches you can take to boost privacy through planting design.

01 FORMAL PRIVACY HEDGES

Tall hedges are the archetypal privacy planting. Evergreen shrubs sheared into a monolithic wall are unbeatable as far as year-round privacy goes—you’ll never see a thing through them. Going with a deciduous hedge means sacrificing privacy in the winter months, which may or may not be desirable.

Formal hedges strongly connote traditional landscape styles, notably formal European gardens and their American estate garden counterparts. If this is your vibe, formal hedges will go a long way toward achieving that look for you.

This style relationship being said, you see tall formal hedges all over the place - often, they are included in a yard as a purely functional measure, completely distinct in style and species from the rest of the yard. This is not necessarily a good thing from a holistic design perspective, but it does achieve the singular goal of blocking views and lends much more aesthetic appeal than a tall fence.

Formal hedges in Massachusetts back yard design

Formal vertical arborvitaes creates privacy around a seating area in this Massachusetts backyard design

We recommend tall, formal hedges under certain conditions:

  • Your style leans toward the formal and traditional 

  • You have other geometric or symmetrical elements in your design (to make the geometric form of the hedge feel like part of the broader design language)

  • You can handle the upkeep of trimming hedges

  • Your climate supports the medium-water species that are commonly used for formal hedges

  • If you don’t have an overtly formal style, or don’t want to deal with the maintenance, we’d advise a different planted approach to privacy.

Informal hedges in Seattle back yard design

Informal hedges in this Seattle backyard landscape design with gravel and concrete paver hardscaping

02 INFORMAL PRIVACY HEDGES

They are like formal hedges, but with less fuss, and more shag. Leaving tall hedge plants in their natural form expresses a softer, more natural feel than a formal hedge. It also allows them to blend into a wide range of landscape styles - they’re much more style agnostic than formal hedges.

Plant a row of a single species planted at regular intervals wherever you need privacy. Upright, narrow shrubs like Pittosporum Silver Sheen, Laurus nobilis, or Ficus ‘Nitida’ are staples. We particularly like the low water Laurus in arid climates like California’s.

Consider plants’ mature width when you lay them out for planting. To avoid waiting on growth, you can buy plants semi-mature - this costs a bit extra, but can be worth the more immediate satisfaction. 

Regardless of age, space plants prudently to avoid buying more than you need. Separating plants by their average mature width will eventually yield a gapless screen of foliage.

Giant bird of paradise are layered over holly fern, variegated shell ginger, and tree philodendron

Giant bird of paradise are layered over holly fern, variegated shell ginger, and tree philodendron

03 LAYERED PLANTING

If monolithic blocks of a single species do not suit your style, you can achieve privacy through layered planting designs. 

With this approach, privacy is more a byproduct than a central goal. Begin your design by thinking about your planting style and the spaces you’d like to define with planting. Privacy can be baked into this fundamental framework. 

Place tall plants where necessary to block views, and layer scenes of lower ornamental plantings in front of them. The tall plants that do the actual work of providing privacy should look like intentional parts of an overall planting composition.

We like using tall ornamental grasses like Panicum or Miscanthus. They obscure views well enough, but still allow light in. They also convey a lighter, airier feel than dense, dark shrubs.

Smaller trees like redbuds, olives, and Japanese maples are also excellent for achieving privacy without creating a green wall. These trees offer clear views at trunk height, while blocking significant expanses with their canopies. Layer low- and mid-height perennials and shrubs beneath them, getting taller as you approach the edge of the canopy. This strategy gives you freedom to create the exact level of visual screening you need.

Using a layered planting approach, you can stagger your planting, placing some plants near and other further from the space to be hidden from view. This can help spaces to feel less hemmed-in by planting, while still offering the privacy you require.

Fast-growing bamboo in Oakland, California back yard

Fast-growing bamboo in this Oakland, California back yard

04 BAMBOO

Fast-growing bamboo stands in a category of its own. It reaches great heights extremely quickly, delivering privacy at light speed when it is an urgent need.

For those seeking a tropical feel, bamboo delivers. Use it as a backdrop to large-leafed, deep green understory species for a lush, private oasis.

Bamboo is not low maintenance - prepare to pick up a lot of leaves. It also is notorious for spreading into unwanted zones. Choosing clumping bamboos like Bambusa multiplex ‘Golden Goddess’ or ‘Alphonse Karr’ can mitigate this issue, but even those cultivars run the risk of tunneling under fences and popping up in neighbor’s yards. 

If you need total security along property boundaries, keep bamboo in large plant containers.

A flowering vine creates a beautiful wall between neighboring yard in Reno, NV

A flowering vine creates a beautiful living wall between a neighboring side yard in Reno, NV

05 VINES

When looking to block views within a yard, dense vines on trellises are space-efficient and attractive. For those looking to distinguish separate patios for guest houses or ADUs, or looking to partition smaller yards, this is a good strategy.

Small trees in containers on San Francisco roof deck

Small trees in containers on this San Francisco roof deck

06 CONTAINER PLANTS

We would not recommend a long row of container plants - if you have a long boundary to screen, some sort of hedge or layered planting would be a better approach. 

If you have only a narrow view to block, however, container plants can be a fabulous approach. Because they add height to plants, containers offer near instant gratification for those seeking privacy. They can also be moved to suit your needs, a particularly handy feature in small yards that need to occasionally accommodate large groups.


STRUCTURES

Structural solutions for privacy have the advantage of instant gratification - build them, and voila: you have privacy. The downside? Privacy structures often cost more than planting, and can impact both circulation and the perceived size of spaces in your landscape. 

Let’s look at a few common structural privacy solutions.

Modern wood fence in Denver, CO back yard

Modern wood fence in a Denver, CO back yard

07 PRIVACY FENCES

This is the most commonly built privacy solution. Along property boundaries, fences are a logical and advisable approach, albeit costly. 

Classic vertical board fences offer total privacy. Paint them dark gray or black and add planting in front to utilize their privacy while reducing their visual prominence.

Horizontal board fences are designed with varying board widths, and can feature gaps of up to several inches between boards. These gaps mean the fence won’t totally block out light while still providing a decent level of privacy. Due to their higher cost of construction, we advise using horizontal board fences in short, targeted bursts, rather than along entire property perimeters. Put them where they’ll be highly visible, skip them where they won’t.

Metal outdoor privacy screen

Metal outdoor privacy screen via The Architects Diary

08 PREFAB PRIVACY SCREENS

Privacy screens are a great way to DIY structural privacy elements in your yard. Options like these from Veradek can make for great accent pieces in a design. 

Like trellised vines, these screens require minimal space, and make for a great solution when areas of a yard need to be hidden from view. Use them standing alone, or integrate them into a pergola to block incoming views from the side.

Wherever you place them, be sure to use planting at their base and along their sides to knit them into the landscape - placed on their own, they can feel a bit like an add-on, rather than an integral part of a design.

California back yard enjoys additional privacy thanks to a bourgenvilla covered pergola

This California backyard enjoys additional privacy and a stunning focal point thanks to a bourgenvilla-covered pergola

09 PERGOLAS

Pergolas can offer varying degrees of privacy. Clustering tall container plants around posts blocks views coming in from 45 degree angles, and vines allowed to grow robustly up columns and across pergola ceilings help to conceal the activity beneath. 

Pergolas can also incorporate wood slats, prefab screens, or other permanent elements to close off sightlines on sides where privacy is necessary. On a more temporary level, pergolas can also utilize retractable windscreens that hang from cross beams.  

Either of these measures to close off the sides of a pergola achieve privacy at the cost of expansiveness and connectivity. The space beneath the pergola feels smaller and more separated from the surrounding yard when it is walled off.

Backyard design in Los Angeles, California

Privacy is a critical factor in any residential landscape, but so is the quality of the design itself: how it feels, how easy it is to move through, how well it accommodates your outdoor life. Take care to protect these qualities when designing for privacy. As is often the case, a little compromise - some privacy, some openness - usually yields the best results.


DESIGNING FRONT YARD OR BACKYARD PRIVACY TAILORED TO YOUR YARD

Yardzen's award-winning online landscape design is tailored to homeowners’ geographic region and style preferences across the US. Our design process begins with understanding your space and a discussion of your budget and vision to minimize surprises when it comes time to build.

We want to make sure our design team can personalize your outdoor space, delivering a vision that includes what’s most important for your outdoor life and unique environment while keeping costs within range. We do this by utilizing our in-house Build Team made up of former contractors and our Pro Network of vetted professional landscapers across the country.

Ready to level up your home improvement with a professional landscape design? Create your design profile or explore our design packages today!
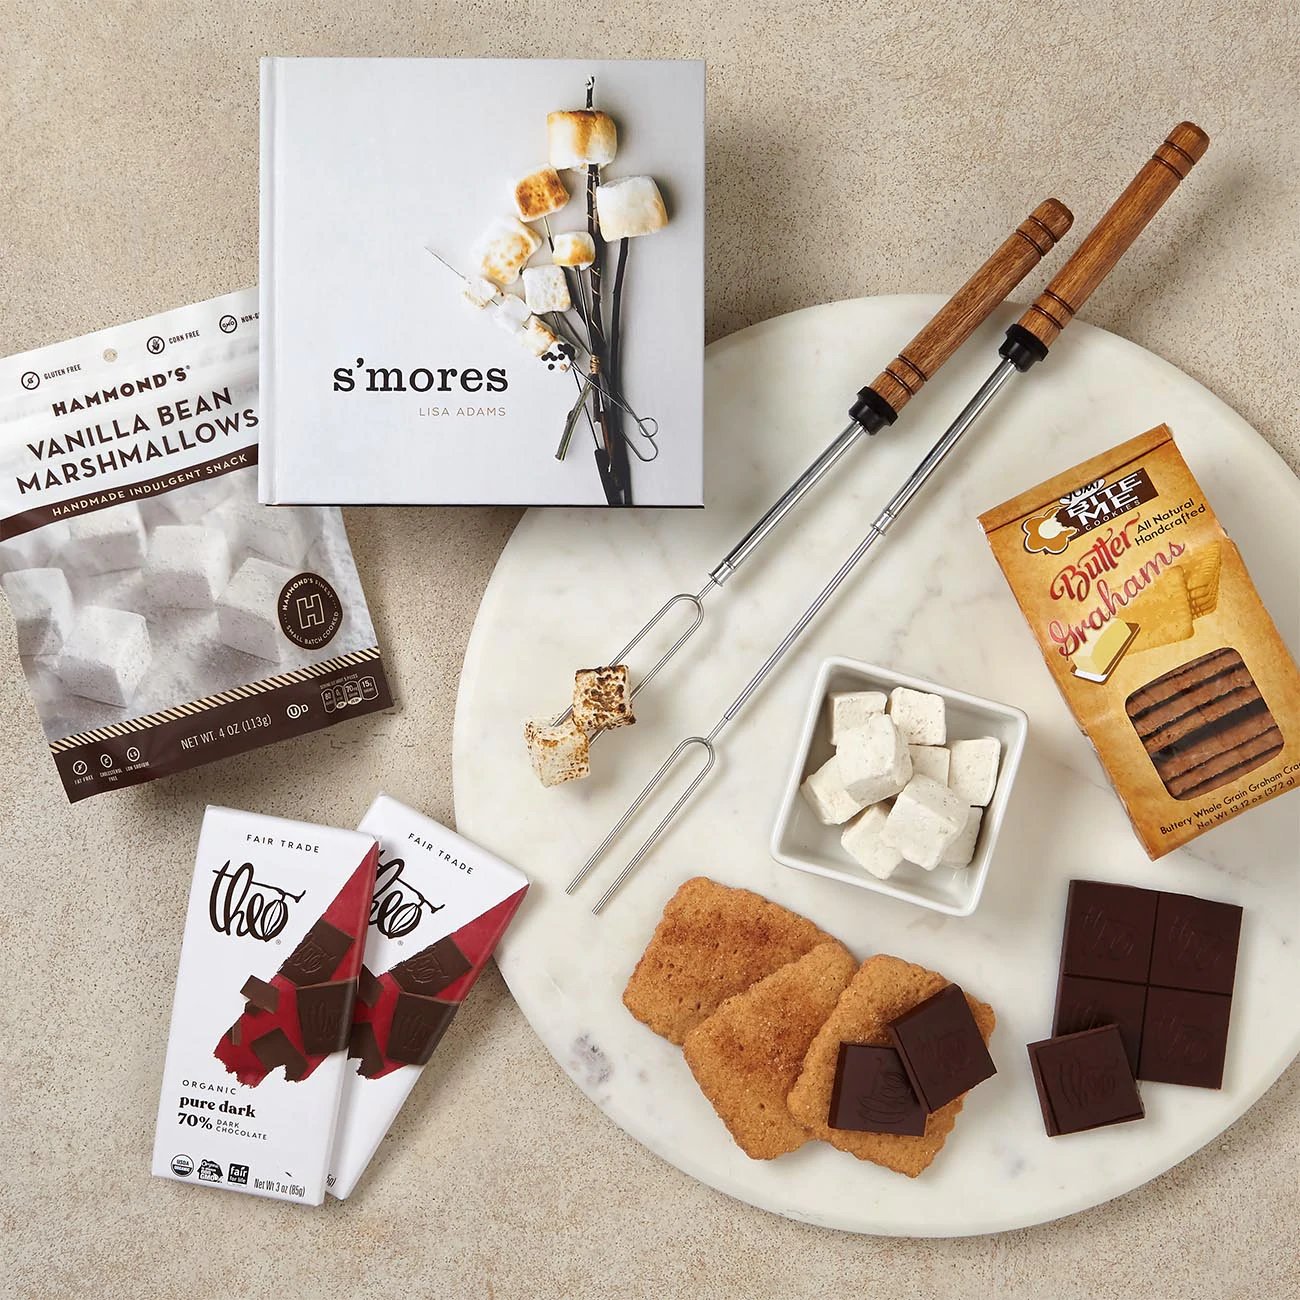
 

How to Achieve the Look of a Wood Deck Without the Worry—with TimberTech

TimberTech’s Mahogany for this modern California hideaway

We love TimberTech decking. It’s super durable, low maintenance, and has a lower lifetime cost than wood. It’s also extremely sustainable. In 2021 alone, TimberTech diverted roughly 500 million pounds of waste, and sales at TimberTech since 2001 have helped to preserve over 3 million trees.

Beyond all this, TimberTech looks really, really good. 

To be more specific, TimberTech looks like real wood, and not just one type of wood, but pretty much any wood you could find. From rich ipe to ruddy redwood, freshly cut cedar to gracefully aged oak, there is a TimberTech product to suit any wood aesthetic.

Below, we’ve collected a few of our favorite TimberTech looks. Hailing from all corners of the country and representing strikingly different styles, these projects demonstrate TimberTech’s versatility, plugging in perfectly to any style, anywhere.

TimberTech’s Coastline for this East Cost beach house

East Coast Beach House 

The owners of this beachy retreat on the Long Island Sound wanted their backyard deck to evoke the sandy gray color and mellowed edges of weathered wood. 

TimberTech’s Coastline color fit the bill perfectly. Layering soft grays above a pale brown base, it evokes both the weathered exterior and unweathered core of boardwalk planks.  

To keep things bright and breezy, a matte black TimberTech handrail traces the edges of the deck, offering both fall protection and classic beachy looks.

With stormy summers and snowy winters, decks take a beating in the northeast. Opting for TImberTech let this client hang on to that clean and casual look while skipping the splinters, annual weatherproofing, and inevitable repairs that come with wood decks. The result is a showpiece deck with wraparound stairs and built-in seat walls that confidently commands the spotlight in this clean and comfortable design.

TimberTech’s Mahogany for this modern California hideaway

Modern California Hideaway 

This narrow side yard makes the most of its limited space, packing in a plunge pool, hot tub, lush tropical planting, and a stunning mountain view. A sleek TimberTech deck stitches everything together, defining a unified space while oozing modern cool.

TimberTech’s Mahogany color of the decking is a perfect match for ipe, minus the expensive purchase price, difficult installation, and sustainability challenges. The rich brown of the decking heightens the sense of enclosure established by the towering bamboo, helping to amplify the drama of the panoramic view.

Uneven solar exposure would be a recipe for uneven weathering with a typical wood deck - with wood, the sunny areas would fade more quickly than the shaded spots. With TimberTech, the realistic appearance of the decking will hold constant across the entire structure, no fuss required.

TimberTech’s American Walnut for this elegant woodsy retreat

Elegant Woodsy Retreat

Nestled in a Northwestern forest, this upscale cabin needed two levels of decking to take full advantage of the beautiful scenery. 

With deep brown bark and dark green foliage on all sides, the deck had to feel cohesive with the surrounding forest. To do the trick, the design turned to TimberTech’s American Walnut color, a finish inspired by rustic and reclaimed wood. With grain tones ranging from chocolatey brown to ashy black, American Walnut looks right at home in this woodsy setting. 

The deep brown deck complements the sage-gray and stone finishes on the home’s exterior walls. Together, these tones form a palette of earthy finishes that make the house feel like a cohesive part of the forest.

TimberTech’s French White Oak for this charming southern farmhouse

Charming Southern Farmhouse

To complement their shingle-sided and gable-roofed home, this client sought a deck with the flavor of a Southern farmhouse: handsomely worn-in, pale in color, timelessly charming. 

They opted for TimberTech’s French White Oak, a gray-blonde color that perfectly captures the look of raw, untreated oak wood. This color scheme reverberates throughout the landscape design, from the Adirondack chairs to the natural stone paving of the paths and fire pit. 

The classic appeal of the deck material is counterbalanced by its modern design, with broad edges and wraparound stairs designed to maximize connectivity and circulation across the yard. 

Being a popular interior finish as well, the French White Oak also nods to the indoor/outdoor living aspect of the exterior cooking and dining area beneath the pitch-roofed pergola.

Order TimberTech samples to learn why it’s our top choice for any decking project!