Meet a Yardzen Contractor: Cutters Landscaping, Austin, TX

The contractors in the Yardzen Pro Network are top-rated professionals - we partner only with the best, most responsive, and diligent contractors for our clients' projects. This week, we chatted with our friends at Cutters Landscaping in Austin, Texas so you could get a glimpse at the type of Yardzen Pros that bring Yardzen designs to life.

image5.jpg

Tell me more about the founders of Cutters, how many people are on the crew, and what your philosophy is, how you started, what your backgrounds are?

This endeavor started out as a two-man crew. Charlie and Zach played baseball together at Texas A&M, and after graduating, Charlie went on to work for a large landscaping construction company, while Zach became a financial advisor for a top-tier investment firm. They both had a shared vision of becoming entrepreneurs and were able to combine Charlie’s extensive knowledge of landscaping practices with Zach’s business management portfolio to create what is now Cutters Landscaping— a 30-man crew with an additional 3 designers in the heart of Austin, Texas. 

A personal note from Charlie and Zach:

Some might say going into business with friends is a risky decision. For us, the decision was quite simple. Our trust in one another and our mutual respect for our different roles and contributions are what keep our business thriving from project to project. Our philosophy has always been to truly enjoy doing what we do, and we’re proud to say we have a lot of fun taking care of our clients’ landscaping needs with the help of the amazing team we’ve built here at Cutters!

What makes Cutters different from other landscape contractors?

What sets Cutters Landscaping apart from other landscape companies is our communication with our clients and our speed of process. We are extremely responsive and we try our very best to provide our prospective clients with an estimate the same day we visit their property, which is pretty rare in this industry. We have heard in the past that landscapers will come out to the project site and then take weeks to provide an estimate, which is why we have a streamlined process to eliminate that type of negative client experience altogether. Our clients are the reason we’re here and we keep an “available anytime” attitude to ensure they get answers sooner rather than later when it comes to their project. 

In addition, we have a relatively large number of crew members. In design builds, most companies keep around 10 crew members, and we tripled that. Our crew is highly experienced and can do anything from laying grass to building a home from scratch, and having such a large and skilled crew enables us to complete more projects in a shorter period of time. Our goal isn’t to stay on your property for months at a time. We like to get in and get out in a matter of weeks so our clients can start enjoying their new space as soon as possible!

What’s the most requested feature lately?
Lueder pavers and black star gravel have been requested a ton lately. Lueder pavers are stones that weigh close to 200 pounds a piece, and we use anywhere from 10 to 75 total on most of our projects (we are currently putting out over 100 per week due to the high demand!). These are great for walkways and new patios and have grown increasingly popular in the Austin area, as they are a wonderful alternative to concrete. Concrete typically comes with a set of rules and an approval process concerning impervious cover, so these pavers are a great option for people who want that solid concrete look without the hassle. Black star gravel has many different names (basalt rock for instance), but is essentially a grayish-black rock that pairs beautifully with the pavers to give the space a modern and defined look. Throw in some trendy steel planter beds and you’ve got the cherry on top! 

Austin has a good year-round outdoor season, do you have an especially busy month or season?

Austin is a beautiful city and what really draws people here are the seemingly unlimited opportunities for outdoor adventure and fun. We have a couple months of scorching heat every summer, and a couple months of frigid temperatures every winter, but our business is nonstop due to the fact that for most of the year, the sun is shining and the temperature is perfect. Homeowners are typically hesitant to install plants and sod during colder months, so planting may slow in the winter, but hardscaping stays on our schedule year-round. Our biggest influx of clients comes right around the time winter ends and spring begins. Clients around this time are eager to bring their yards back to life after the colder months, and to get them looking bright and welcoming for the spring and summer. While we certainly love the extra business around this time, we find that our installation can get pushed out by 3-4 months as we try to keep up with the influx. With that being said, we pride ourselves on our consistency throughout the year, and we are thankful for our large crew for making our builds as time-efficient as possible.

What’s the average cost of a project in the Austin area?

The average cost of a project in Austin, Texas is around $35k. While we’ve also completed projects with a $10k budget, and some with a $100k+ budget, it has never been about the size of the project for us. We truly enjoy meeting homeowners out on their site and seeing them get absolutely thrilled about the design of their project— however big or small. Working with them to bring that design to life is what gets us out of bed every morning. To us, nothing is more fulfilling than watching their reactions when the project is complete, and hearing about all the great times they’re going to share with family and friends in their new yard. We can't put a price tag on that, which is why we are open to ALL projects year-round! 

For folks who are looking for a low-cost renovation, what’s the most cost-effective change they can make for the biggest impact?

We get this question a lot and we love it! We understand that not everyone out there has $35k to spend on their yard, but making a few subtle changes to the space can definitely spruce it up and make it a more pleasant area to hang out in with friends and family. A good place to start is by adding a few planter beds, then some rocks, mulch, and plants. Putting in a bed with mulch has the ability to really bring out everything else around it, and the additions can give the yard some extra aesthetic appeal. If you want to take this one step further, adding in a few lueder pavers as a walkway can really modernize the space. These are all great options for those looking to add some flavor to their yard without breaking the bank, and you can have all of it done for around $5k. 

What is a new trend you've seen that you think is going to take off soon?

A new trend we’ve seen take off here in the Austin area is stock tanks. These fully-functioning “mini-pools” are an amazing alternative to in-ground swimming pools and hot tubs. In places like Austin where summer temperatures can climb into the 100s, having your own swimming pool is ideal. These are a perfect option for those who want to get some sun and have a beer with friends in the comfort of their own backyard, and their low cost and maintenance make them all the more appealing. We expect these to really take off with the millennial generation, as they add a laid-back vibe to yards that may not be big enough for a full-sized pool. Cutters can add a stock tank to your yard for around $2,500! 

What is something you think landscape design clients should know before starting their build?

Before starting their build, it’s important for clients to understand that landscaping is essentially construction work. When considering this, it’s necessary for clients to understand that there are pipes and wires underground that aren’t always easily discovered, and certain things may come up once our team gets onto the project site and starts working. For example, we had an experience recently where a pool company had installed pipes three inches below the ground, so the first time we dug in, we ended up hitting a pipe. Clients tend to panic when this type of issue comes up, but reputable companies like ours have built great relationships with plumbing and irrigation workers over our years of experience, and we will always take the necessary measures to mitigate issues that arise when we’re on site. There is a certain amount of trust that our clients need to have in us as a company, and we do a fantastic job of ensuring that their home and property are in the best hands. At the end of the day, this is what we do, and we are abundantly prepared to serve our clients in the best situations, and also in the situations where issues unexpectedly arise along the way. It’s part of the job! 

What is your favorite part about working with Yardzen clients?

We absolutely love working with Yardzen clients because they always seem to know exactly what they want— and it shows in their beautiful designs. They understand what it’s going to take to bring their design to life, and they seem more keenly aware of the cost of the project they want to take on. Our Yardzen clients trust the process, and they trust us. This makes it so much easier to do our job, and nothing makes us happier than bringing their design to fruition. Yardzen has taken a new and unique “tech approach” to landscaping that is certainly going to change the industry in a positive way for years to come, and we are very proud to work with them! 

Fence Design Ideas for Every Style and Budget

Fencing can be purely functional, purely decorative, or, as is usually the case, it can fall somewhere in between. We’ll walk you through the need-to-knows of landscape fencing, and offer a few of our own tips about how to get the look and function you’re aiming for.

Get started on your fence design and install today with Yardzen!

A mix of fence heights in this Yardzen front yard

Fence Heights 

Height limits are commonly set by local regulations. Front yard fence heights typically range from 3’ to 4’ (we prefer a 40” front yard fence). Side yard and backyard fences are normally 6’ in height, occasionally climbing to 8’. It’s common for up to 18” of lattice to be allowed above a 6’ opaque backyard fence.

A “Good Neighbor” fence in a Yardzen side yard that adds beauty and privacy

Where to Fence 

If kids or dogs are an issue, you’ll want to fence your entire property. If security is a concern, full fencing with a taller front yard fence (5’ or higher) and lockable gate is ideal. In this situation, we suggest considering front fencing with some visual permeability to avoid an unwelcoming fortress feel. If none of the above applies, front yard fencing is effectively unnecessary unless you want it for aesthetic value.

Fences running along side and rear property lines are generally a good idea to avoid awkward discussions with encroaching neighbors, especially in dense areas or between smaller lots.

A front yard x-fence in a Yardzen yard that delineates the property while still welcoming friends and neighbors.

Visual Permeability

Opaque fences, where there are no gaps and you can’t see past the fence, increase the sense of privacy and make spaces feel smaller and more enclosed. To the outside world, they signal a desire to be left alone.

Visually permeable fences, where you can see through gaps in the fence, make spaces feel larger and more open, and project a more welcoming feel to the neighborhood.

Whether to use opaque or visually permeable fences depends on your design goals. The privacy of backyards typically calls for an opaque fence. Unless front yard privacy is a concern, we encourage clients to use visually permeable front yard fences, both to expand perceived space and to more warmly engage the surrounding neighborhood. 

Pro Tip: If you’re looking for a halfway point between openness and enclosure, grow a vine to cover some of the gaps in a visually permeable fence. Go with a native vine and you may get some butterflies in your yard as a bonus.

A black-stained wood fence in this Yardzen front yard

Materials

Material selection is foremost a durability concern. Choose materials that are suitable for your local climate. Areas that are particularly arid or wet may want to avoid wood due to increased weathering rates. 

Materials do influence style, but wood and metal, the most common fence materials, tend to be fairly style agnostic - it’s the form in which they are presented that really expresses style.

Style

Fences with more ornamentation - post caps, pointed pickets, decorative top rails - evoke a more traditional feel. Fences with no ornamentation - minimal post caps, unadorned joints, no twists or points - look more modern. Fences also tend to look more modern when they include parallel horizontal lines or wire grids.

Of course, fences are not restricted to modern or formal - there are tons of fun designs that blend modern and traditional style indicators. Here are a few fence styles we love, along with some rough pricing (note that prices do vary significantly with region, material availability, and labor costs):

A vertical fence painted in an off-white for Shira Gill. (Read the blog post!)

A black-stained vertical fence in a Yardzen yard

Vertical Board: $90 per linear foot

  • Cost-effective yet handsome. Suitable to almost any style.

  • A simple coat of paint or stain elevates the look of vertical boards.

  • Paint or stain helps a fence to become invisible while emphasizing adjacent planting - think of a black curtain at the back of a stage. 

  • Use this approach around the entire side and back yards. 

  • Add 4” gaps between the boards if using as a front yard fence.

Tip: Read Shira Gill’s blog post about how painting her fence transformed her backyard.

Backyard horizontal fence

Horizontal fence in this Yardzen front yard

Horizontal Board: $120 per linear foot

  • A modern, showpiece style best suited to short runs in high visibility areas.

  • Typically built with hardwood or standard wood stained to hardwood tones. 

  • Install with uniform, narrow gaps, or gapless.

  • Mixing board sizes adds interest, but it also adds expense. If playing with size, don’t get carried away.

Backyard hogwire fence in a Yardzen yard

Front yard hogwire fence in a Yardzen yard

Hogwire: $90 per linear foot

  • A versatile and reasonably priced alternative

  • Suitable for modern farmhouse or rustic traditional designs, but best avoided in fancier contexts - it’s charming but a bit rough around the edges.

  • Visually permeable but child and dog proof - a great option when you need to balance containment with an open, welcoming feel.

  • Paint the frame to spruce it up, or leave it as natural wood for a more rustic feel.

  • Generally best for front yards, but appropriate for backyards that do not abut other homes.

Horizontal modern fence in a front yard

Hogwire metal fence in a front yard

Modern Metal: $150 and up per linear foot

  • There are MANY metal fence styles out there, but we prefer it when they keep things clean and simple.

  • These examples take different approaches to infill - chunky vertical pickets, slender horizontal pickets, tight wire grid - but each one offers a visually permeable, contemporary look.

  • The black color draws attention to the yard rather than the fence.

  • Suitable for short front yard runs, but not recommended at taller heights or to wrap an entire property.

An x-fence in a Yardzen front yard

X-Fence: $60 per linear foot

  • Not suitable for containing kids or dogs (clearly), but uber-welcoming and great for folks who are neither all the way modern nor all the way traditional.

  • This style takes the openness of ranch-style split rail fencing and dresses it up with some fancier carpentry, creating a tidy but comfortable vibe. 

  • It feels very at home with a white coat of paint, and loosens up a bit when adjacent planting reaches through its gaps.

Our Advice

Start with a fence design and hire a professional. Fences are an expensive but necessary part of many landscaping projects. Ensure success by hiring professionals to both design a fence that achieves your style and budget goals and install the fence. Get started with Yardzen today.

Keep it simple. Complex fencing designs quickly ratchet up costs, and can become a distraction from the broader yard. A bit of loud fencing can be great, but in general, make your fence a background element, not the star of the show.

Keep what works. If your existing fencing is structurally sound and just needs a facelift, try a new coat of paint - this is far more cost-effective than replacement, and saves budget for use on higher priority landscape features.

Spend for Impact. It can be worth going for more elaborate fence designs when they’ll deliver a big visual impact. Find the key views where a bit of fencing can elevate the entire yard, and target your spending there. Don’t bother building fancy fences where they won’t be frequently seen, such as in side yards or behind dense planting.

Be consistent. It’s ok to use two different fence styles on a property, but we generally recommend stopping there. Pair a showpiece style with a complementary workhorse style, and apply them where appropriate. 

How To: Xeriscaping Your Yard

Front yard xeriscaping for Yardzen’s cofounders, Adam and Allison, in their Yardzen-designed yard.

Origin

Water, and the lack thereof, are fundamental concerns in any landscape project. How can we design landscapes to look, feel, and perform how we’d like while also conserving water?

This was a question the folks at Denver Water asked themselves in the early 1980’s. Faced with serious drought, the utility codified a landscape method to drastically reduce the need for irrigation. They called this method “Xeriscaping”, from the latin xer for “dry” and scape for “landscape” or “view”. 

In the drought-filled decades since, xeriscaping has taken off, commonly misnomered as “Zero-Scaping” for its emphasis on water conservation.

Get started on your xeriscaping your yard today with a Yardzen landscape designer!

Xeriscaping for a Yardzen front yard

Style

Xeriscaping is fixed in our minds as a method for making desert landscapes— picture a limited palette of rocks, cacti, succulents, and rugged shrubs and grasses. This is, in fact, just one expression of the method, applicable to arid climates like the Southwest. 

Wherever you are, xeriscaping should emulate wildland plantings from your region. This could be grasslands, woodlands, even forests. In theory, there are as many styles of xeriscape landscapes as there are naturally occurring plant communities—that is to say, a lot. 

A xeriscaped Yardzen backyard

Principles

Denver Water initially defined seven core principles of xeriscaping:

  • Landscape planning and design

  • Soil 

  • Limit Lawns

  • Water Efficient Planting

  • Efficient irrigation

  • Mulch

  • Maintenance

Some practices underlying these principles are centuries old. In this sense, xeriscaping simply put a name to well-established planting practices.

Xeriscaping in a Yardzen backyard in Seattle. A mix of grasses and evergreens make this a rich and lush landscape, unlike popular ideas of xeriscaping as a “desert” garden.

How?

One need not follow the seven xeriscape principles to the letter of the law. If a landscape requires very little or no irrigation to thrive it is essentially a xeriscape. The principles do, however, provide a useful framework to review best practices for creating and maintaining low- or no-water planting designs. We’ll take a quick look at the most important points.

Xeriscaping for a Yardzen front yard

Landscape Planning and Design

To carry out all these described xeriscaping practices, you’ll want to plan ahead with a landscape designer and contractor, like Yardzen. A careful assessment of your existing property will clarify light patterns, heat and wind exposure, and other climate factors. A bit of careful planning up front pays dividends via healthy, fuss-free plants down the road.

A Yardzen front yard with a limited amount of lawn for the kids to play.

Water Efficient Planting

Plant selection may be the most crucial factor in planning a xeriscape design. Plants in a xeriscape must thrive in the local climate, and be happy surviving off natural precipitation alone, save for the occasional nudge from irrigation. People frequently turn to native plants in xeriscape designs, as natives have evolved to do exactly this.

Natives aren’t your only option. Introduced plants from equivalent climate and geographic conditions can perform great in xeriscapes, but best practices recommend exhausting native options first.

Whatever plant species you choose, provide them with the conditions they want. Understory plants, evolved beneath tree canopies, want shade to avoid drying out. Remembering the maxim for xeriscapes to mimic local wildlands, we advise looking to natural plant communities for guidance on what plants to use and where to plant them.

Pro tip: Group plants with similar light and water requirements together - this maximizes plants’ chances at success while minimizing maintenance requirements.

A xeriscaped Yardzen backyard with turf, mulch, and climate-adapted plants

Limit Lawns

Lawns require a lot of water to survive. A 2006 study found that 60% - 80% of household water consumption in the Southwest went to irrigation, and that the majority of that water went to irrigating lawns. 

Lawns are also typically overwatered, commonly receiving up to double the irrigation they need to survive.

Xeriscapes can have lawns, but they should be kept as small as possible. We advise skipping ornamental lawns, and keeping lawns for play spaces and other functional uses to a minimum viable size (or, replace them with artificial turf).

Lawns that do make it into xeriscape designs should be put on a water diet - water deeply, but less frequently.

A xeriscaped Yardzen backyard

Efficient Irrigation

All plants require irrigation for their first year or two to get established. Beyond this establishment period, a xeriscape planting design ought to thrive with almost no supplemental irrigation. 

This said, weather is increasingly erratic, and an irrigation system is a wise investment to ensure plants do receive the moisture they require.

Any irrigation system - not just those in xeriscapes - should be checked routinely for leaks. It should also incorporate a weather sensor, which cuts operation when wet weather is detected. If you’re the analog type, you can also just manually turn off your system during storms or cool/wet seasons.

We advise watering all plants with drip irrigation, and doing so in the evening. This limits waste and minimizes loss to evaporation. 

Lawns are the sole exception: they should be spray irrigated. When designing lawn irrigation, take care to keep all water landing on the lawn, and not on adjacent paving. Avoiding narrow strips and odd shapes makes this easy.

Efficient water management goes hand in hand with irrigation efficiency. Water, be it irrigation runoff or precipitation, should be captured and infiltrated on site as much as possible. This recharges groundwater supply and offsets irrigation needs. It also helps to reduce flooding and pollution in local waterways.

Pro Tip: maximize permeable surfaces to capture as much water as possible. Groundcover plants are exceptional at detaining water and coaxing it back into the ground, but if you prefer less vegetative cover, beds of gravel or other loose aggregates can be placed adjacent to paving to capture runoff before it reaches the gutter.

Xeriscaping for a tiered Yardzen backyard

Soil 

Soil conditions are as important to plant health as light and water. Soil type also influences the rate at which water soaks into the ground, and how long water will remain suspended in the root zone for plants to access.

Because yard soil is often disturbed or low in quality, xeriscape principles suggest amending soil with organic matter (compost made from local leaves is a safe bet). The higher the organic matter, the greater the soil’s capacity to retain water, and the less you’ll need to supplement with irrigation.

Before you go wild with the compost, though, take a moment to see what your plants really want from their soil. 

Plants evolve in all types of soil conditions. Species adapted to poor soils are likely to suffer under heavy fertilization. If you are planting natives adapted to local soil conditions, success may come most readily by simply skipping soil amendment - some plants just want to be left alone.

Be they native or introduced, try to place plants in soil conditions they’re accustomed to. This takes a bit of research, but not much, and it will save you labor down the road, especially if you group plants with similar soil preferences together.

This Yardzen front yard make beautiful use of mulch for curb appeal

Mulch

Xeriscape gardens lean heavily on mulch, and for good reason. Mulch preserves soil moisture, insulates against soil temperature swings, and blocks weeds that would otherwise compete for water with your designed plantings. 

Bark mulch can be kicked or blown around, leading to a bit of a mess in certain conditions. Rock mulch holds its ground better, and is commonly used in xeriscapes to evoke a desert aesthetic. 

A word of caution: rock mulch absorbs sunlight during the day, and reradiates heat at night, warming the soil. For heat-tolerant plants, this is not necessarily a problem, but for most plants warmer soil leads to water loss and increased irrigation needs. 

If rock mulch is an aesthetic must, try it in shaded areas where it won’t absorb and emit as much heat.  

The ultimate mulch is not a mulch at all: groundcover plants. These low, fast-spreading species are superior to mulch in their capacity to improve soil health, infiltration rates, and water retention, which offsets irrigation needs. They also lower ground temperatures, and help to cool incoming breezes that blow above them. Native groundcovers especially - when planted in the conditions they like—often thrive with little to no inputs, and won’t require the annual replacement that bark mulch does.

A xeriscaped Yardzen backyard in Seattle

Maintenance

Done correctly, xeriscapes require less maintenance than traditional landscapes. Simply by reducing lawn size you will slash your maintenance requirements. 

Careful plant selection and placement—choosing climate appropriate plants, grouping them by shared preferences, and placing them in conditions they enjoy—creates conditions for plants to take care of themselves, without much help at all from homeowners.

Benefits amplify in planting designs that heavily feature natives, which, due to their local adaptation, tend to require less care and fewer inputs of water, pesticides, and fertilizer than introduced species.

Water savings and reduced maintenance translate to cost savings—one study links xeriscapes in Nevada to 50% reductions in annual water bills, and 70% reductions during hot summer months. 

Pro tip: As an added perk, natives also provide habitat for local fauna. Introduced plants can go toe-to-toe with natives in terms of climate tolerance, but they pale in comparison in terms of habitat value. If you want butterflies and birds to frequent your garden, natives are the way to go.

Get started on your xeriscaping your yard today with a Yardzen landscape designer!

Landscaping Transforms a Bay Area Home for a Young Family of Outdoor Enthusiasts

Andrea and Garrett Matt in their Bay Area backyard. Photo by Jessica Kay.

Andrea Matt loves where she lives in Northern California’s Bay Area. “Livermore is a wildly outdoors climate. It’s beautiful almost year round,” she explains. She and her husband, Garrett, are outdoors people. Whether entertaining friends, enjoying a family dinner, or playing with their baby daughter, they want to do it outside.

When they purchased their new home, their yard, however, was not up to the task. “We had a yard we could use, but it wasn’t ready for outdoor living,” says Andrea. The L-shaped yard had lots of space and sunlight, but it’s two sides felt disconnected, and much of it was underutilized.  “There was a massive opportunity to maximize use and create a cohesive space,” she says, adding, “Franky, it needed upscaling.”

A before picture of Andrea and Garrett’s backyard.

Providing safe and ample play space for their daughter was a top priority, but they hoped to do so without sacrificing their own enjoyment. “We wanted a really nice space that adults and children could both enjoy,” says Andrea.

Project managers by day, the couple knew enough to know they needed help reimagining their Bay Area landscaping. “We didn’t want to do it wrong or hodgepodge it together,” Andrea explains. They turned to Yardzen to help them realize their vision.

The landscape design that resulted ramps up the style, function, and sense of connection throughout their yard by leaning on a few key changes.

The wrap-around composite deck fosters indoor-outdoor living. Photo by Jessica Kay.

The “before” of the backyard, including the pergola, which blocked light from the house.

The biggest move is a new wrap-around deck, built from composite decking to save on maintenance and withstand weathering from sunlight. Crucially, the deck is set at the elevation of their interior living room, abutting an exterior sliding glass door. “You walk out of the house and it feels like an extension of our living space,” says Andrea. 

During the design process, the couple made the hard choice to remove an existing pergola that shaded the space outside their living room. While counterintuitive— pergolas are typically an asset— the pergola’s removal welcomed a wash of natural light into their home, and strengthened the connection between indoor and outdoor spaces.

In addition to fostering indoor-outdoor living, Yardzen’s deck design improves a sense of connection in the yard. Mirroring the yard’s L-shape, the deck bridges the yard’s two sides by offering multiple seating areas with long sight lines linking one side of the yard to the other. Collectively, the seating areas wrap around the corner of the house, like a bread crumb trail driving engagement of the full yard. “The deck ultimately is what makes the yard feel connected. It feels like one yard,” says Andrea.

The wrap-around deck. Photo by Jessica Kay.

Wrap-around stairs strengthen this sense of connection, providing free-flowing circulation and broad, permeable boundaries between the deck and adjacent spaces. The steps also double as informal seating along the entire deck perimeter, which has proven useful when watching little ones play in the yard. By eschewing railings, the stairs also open up views across the entire yard, amplifying the sense of connection and perceived size of the space. When you sit on the deck, you are immersed in the yard, not separated from it.

Yardzen’s design hangs onto a large lawn as a play space for kids. “Creating that big of a lawn has been the best thing we could’ve done for children. Our daughter runs wild on it,” says Andrea. Two other details were key in transforming the look and feel of their yard: adding lights and staining the fence.

The new design features embedded lights in the riser of the deck stairs, as well as key accent lighting in perimeter planting zones. “The lighting took us from a nice yard to a luxury yard. We’re thrilled with it,” says Andrea.

The old fence was given a whole new look with black stain, which makes the climate-adapted plants and shrubs pop. Photo by Jessica Kay.

Wanting a fresher look from their fence, but trying to keep the budget under control, the couple worked with Yardzen to land on a solution: stain the existing fence black. This simple solution has been remarkably effective at spotlighting their planting. “It makes the yard pop in the best way,” Andrea explains.

Andrea and Garrett wanted their furniture to meet the level of design established by their yard, so they worked with Bay Area furniture company Terra Outdoor Living to find the big key pieces like their dining set. This turned out to be a great call. “We got awesome customer service, and we’re super happy with the furniture,” says Andrea.

The furniture from Terra Outdoor Living brings the whole space to life. Photo by Jessica Kay.

With their Bay Area landscaping now fully transformed, the Matt family has wasted no time getting outside to play, entertain, and relax in their new space.

Photos by Bay Area photographer Jessica Kay.

Guide to Low-Maintenance Plants and Planting Design

Low-maintenance landscaping in this backyard

Yardzen clients live busy lives, so it’s no surprise that one of our top design requests is “low-maintenance plants.” In other words, plantings that look beautiful with little human intervention. This is one of the top reasons to work with a landscape designer— to craft a yard that appears thoughtful and well-considered. Yardzen’s Design Director, Kevin Lenhart, shares the guiding principles of low-maintenance softscape design.

Pro Tip: Low-maintenance plants tends to be more sustainable and require fewer natural resources.

Get started on your low-maintenance yard today with Yardzen!

What is Maintenance, exactly?

Mowing, watering, fertilizing, raking, trimming, dealing with seasonal shifts, and fixing broken stuff are some of the many tasks that comprise landscape maintenance. You’ll never eliminate all of these steps, but smart planting choices will minimize them. 

Low-maintenance planting should:

  • Minimize time and money spent on upkeep

  • Minimize inputs applied to the landscape (water, fertilizer, etc)

  • Maximize plant success

  • Maintain your desired landscape style

To this, we would add three ecological goals that can be achieved - without necessarily intending to do so - simply by pursuing a low-maintenance design:

  • Habitat expansion

  • Water and energy conservation

  • Pollution prevention

A Yardzen backyard with low-maintenance plants

Designing with Low-Maintenance Plants

Well-maintained plantings looks legible, well-organized, and intentional. These are qualities people uniformly appreciate in landscapes, regardless of style.

Right Plant, Right Place

Rule #1 of low-maintenance planting: choose plants that are well-adapted to your site. The happier your plants are, the less they’ll need your help. 

Native species with proven landscape performance are a great place to start. Place native plants in conditions that match their natural habitat, and they’ll thrive with little to no irrigation or soil amendment—they’ll actually prefer to be ignored. 

Don’t feel limited: climate-adapted plants can also be simple to grow when your yard and their native range share a similar climate.  

Wherever your plants come from, the trick is to assemble a group of species that:

  1. Occupy different vertical levels (ground-level, low, medium, tall)

  2. Enjoy the same light, soil, water, and climate conditions (the conditions of your site)

  3. Look good next to each other 

Do this, and you’ll be tending a community as a whole, not catering to individual plants.

Limit Lawn

We’ve said it before, but it bears repeating: lawns are the most management-intensive part of a yard’s landscape. To maintain a lawn, one must mow, apply fertilizer, and irrigate (heavily, in much of the US). This all requires a lot of time and resources.

The trouble is, lawns are also useful. No plant beats a lawn for walkability. 

Strike a balance: keep enough lawn to do the running, playing, and lounging that you demand from your yard, but avoid lawns that are purely decorative. Minimizing lawn minimizes your maintenance. It also reduces pollution to waterways from excess fertilizer, and energy consumption from mowing. If you want the look of a decorative lawn, include it sparingly as a foreground to frame larger planting areas, not as a broad scenic field.

Turf looks beautiful and natural in this Yardzen yard paired with gravel, mulch, and low-maintenance plants

Consider Turf

As we shared in our Guide to Grass Alternatives, turf is an excellent alternative to lawn that is highly durable and doesn’t require the time and natural resources that lawns do.

Low-maintenance plants and mulch in this Yardzen yard

Use Mulch

Mulch blocks weeds, keeps soil moist, insulates against temperature swings, and, when plant-derived, slowly enriches the soil. It’s not the only low maintenance ground covering, but it’s very effective.

When choosing mulch, consider your climate. Wind, rain, heat, and native flora all influence the type of mulch you should use. Also consider upkeep when choosing and placing mulch. Bark mulch requires annual replacement, and most any mulch can be kicked, washed, or blown outside its intended bounds. 

Pro tip: if you lean naturalistic, you can mulch by simply allowing leaves to remain where they fall. Leaf litter is the original mulch, and a rich source of soil nutrients and insect habitat (if you want birds, you need bugs).

Densely planted perennials via Smale Riverfront Park

Plant Densely 

With time, weeds will grow through mulch—the enriched soil and lack of competition in bare patches of planting beds are irresistible to them. If weed suppression is a priority, dense planting is a more effective strategy to pursue. It’s also pretty (if you ask us), and with the right plants, it can be very easy to maintain.

Dense planting mimics natural plant growth patterns, in which unplanted areas are scarce, and plants grow amongst each other in distinct vertical layers. To be clear: “dense” does not have to mean bulky, messy, or heavy. You may be picturing hulking shrubs and rangy perennials, but it's easy to maintain breathing space and clean lines while still planting densely. 

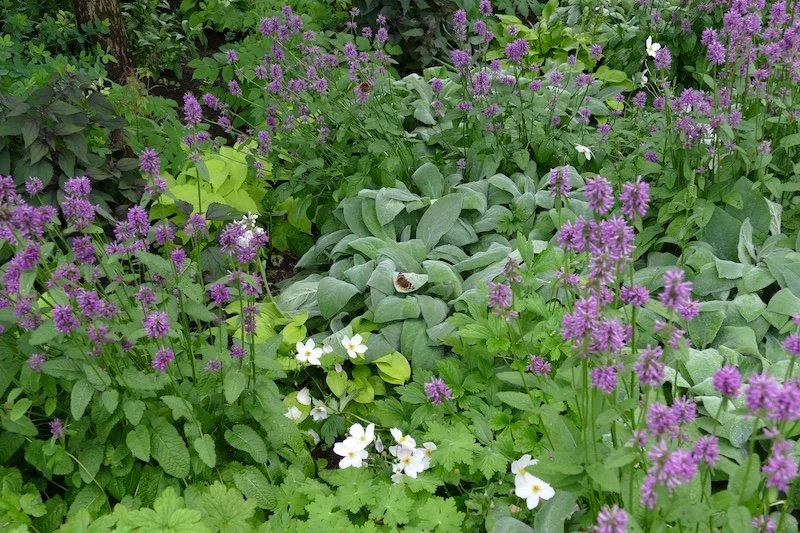
To do so, utilize low, spreading ground cover species to fill gaps between taller plants, spaced as widely as you wish. Ground cover plants are cheap, attractive, easy to maintain, and great at beating back weeds. Ground cover plants around the base of trees are an easy habitat win, too.

Pro tip: use a single ground cover species for a controlled and minimal look, and two to three species for a more natural feel.

Fussy Flowers

Big showy flowers are the pride of many traditional gardens, but they can require a lot of work and create quite a mess. Those seeking a low-maintenance landscape design would do best to avoid annuals, Heirloom Roses, and other flowers that require lots of tending and cleanup. If these species are a must-have, limit your work by keeping all your high-touch flowers in a single part of the yard.

Plants of varying heights, structures, and textures in a Yardzen yard

Seek Structure 

Instead of looking for showy blooms, lean on plants with great natural structure to anchor your designs. Handsome evergreen shrubs, upright ornamental grasses, or sculptural cacti and succulents do fabulously in the spotlight (just pick the right plant for your region and climate).  Flowers fade, drop, or require deadheading. A great structural plant is a living, no fuss work of art.

Soft Around the Hedges

Trimmed hedges and topiaries require constant tending. Skip the trimming and allow your hedges to grow in a natural form. 

Pro tip: boxwoods, Pittosporum, and other common hedge species tend to have a compact form that projects the same geometric feel as a trimmed hedge, just with a touch more softness. 

Fruitless olive trees prevent the mess of fruiting olives

Litterbugs

This one is obvious: avoid species known for heavy litter. In particular, avoid plants with significant seed or fruit drop—fruit drop on paving is a maintenance nightmare. (Fruitless olives are great for low-maintenance yards.)

While they are more work than evergreens, deciduous trees and shrubs can be worth the seasonal leaf cleanup. We love the dynamism deciduous plants lend to planting designs. Our advice: balance your maintenance tolerance against the benefits of deciduous species to your design.

For Kids and Dogs

If you have kids or dogs, plant for toughness where it counts. Hardy plants tolerate a bit of trampling, but delicate species will leave you on the hook to tend or replace damaged plants. If you have delicate species, you can improve their odds of survival (and yours of less maintenance) by placing them safely away from high activity areas.

Plant Containers

Planting in containers gives you extra control over planting conditions. You will determine soil type, water, and light, and can adjust plant position as needed to improve plant condition. 

Pick container-friendly species, especially ones noted for easy care. Set them up with the soil and light conditions they prefer, and follow their recommended irrigation schedule. 

Want to make it even simpler? Pipe drip irrigation through the bottom of large outdoor container plants. Just place them carefully - you don’t want to move them once the irrigation is in place.

Do What Nature Would Do

Following these steps will maximize your odds for hassle free planting, but there is never a guarantee that plants will survive without a little extra help, especially in their early years. 

Time reveals which species are and are not a good fit for your yard. If a plant fails to thrive, or requires too much support, don’t be afraid to replace it with a species that is a more natural fit to the site. This is how nature would handle things.

Low-Maintenance Front Yard Landscaping

A low maintenance Yardzen front yard in Los Gatos, CA

Creating year-round curb appeal is a top request from Yardzen clients. Yet, many homeowners live busy lives and don’t want to spend their weekends maintaining their front yard and exterior facade. So, we asked Yardzen’s Design Director, Kevin Lenhart, for his top tips on creating low-maintenance front yard landscaping that is beautiful, functional, and sustainable.


Less Lawn

Lawns are the most management-intensive part of a yard’s landscape. Maintaining a lawn requires fertilizer, regular mowing, gasoline (to power lawnmowers), and water, often lots of it. This all adds up to considerable effort and expense, especially in drier climates.

Our advice:

  • Hang on to lawn where you need it, like kids’ play areas, but skip it where it's not functionally necessary.

  • Utilize small amounts of lawn for “cues to care”. A crisply mown path framing street-facing planting signals a well-designed landscape to the neighborhood. 

What can we replace lawns with? Options abound. Broaden your planting areas, add mulch or groundcover planting to in-between spaces, sub in artificial turf, or expand paving, gravel, or other hardscape areas. Any of these solutions - or a combination of them - should net less maintenance for you. Read our Guide to Grass Alternatives for an Eco-Friendly Yard to learn more.

Pro tip: A modest mown frame contrasts marvelously with looser ornamental grass and perennial plantings - picture messy hair in a suit and tie.

This Yardzen front yard makes great use of mulch.

Mulch

Mulch is a workhorse. It suppresses weeds, preserves soil moisture, and stabilizes soil temperature. Plant-derived mulches can also enrich soil as they break down. 

Bottom line: mulched planting areas require less weeding and watering, saving you time and money while keeping your street-facing planting areas looking sharp.

Creeping rosemary is a beautiful and fragrant evergreen groudcover

Groundcover Planting

Groundcover planting does all that mulch does, and more. Roots from groundcover plants improve drainage and soil health, while their foliage is valuable for stormwater management (more on this below). From a maintenance perspective this means less mess in your yard, healthier plants requiring less upkeep, and greater groundwater reserves to offset irrigation needs.

Functional, got it, but how do we make groundcover plants look attractive from the street? 

Allow groundcover plants to spread between taller ornamental plants, or to encircle the base of trees. This establishes a base layer for taller ornamentals to rest upon, producing a vertically-layered, full planting aesthetic while keeping actual plant quantities (and planting budget) under control. 

The added ground-level vegetation will also help to cool breezes as they blow across your yard to your front porch or patio.

Pro Tip: seek out native groundcovers - they’ll require the least maintenance and irrigation to thrive, and will offer superior habitat value to boot.


Low-maintenance, climate-adapted lavender

Pick the Right Plants

There is much to consider when choosing plants to minimize maintenance (so much so, we wrote a blog post about Low-Maintenance Plants). 

The plants you choose determine the amount of water, fertilizer, pest management, and general upkeep required to keep your yard looking curb-ready. Pick plants that are happy in your yard -  they’ll look the best, and will require the least of you. 

Quick tip: wherever you may live, we advise browsing native species with proven track records as landscape plants - they’re likely to succeed with the least help.

Irrigation

The less irrigation your plants require, the less time and money you will allocate to watering your plants. Select plants that can survive with minimal or zero irrigation once they are established. 

Don’t worry, this approach won’t limit your options to succulent gardens. By choosing species well-adapted to local weather patterns, you can support planting designs filled with plants of all types, from perennials to shrubs, trees to groundcovers. Pro tip: Look to your regional landscape for inspiration.

An irrigation system will save you the hassle of hand-watering, but an inefficient system will use more water than you need - and you’ll pay the bill for it. 

Our advice: 

  • Use drip irrigation for everything except lawns (use spray on lawns)

  • Make sure any spray irrigation hits its target - don’t water your driveway.

  • incorporate a weather sensor into your irrigation system - it will stop watering during wet weather. 

Feeling low tech? Skip the weather sensor and just turn off your system when a storm is coming, or during cool or rainy seasons.

Stormwater Management

Stormwater is precipitation that falls onto your property. Left unchecked, it roams the grounds sweeping debris into unwanted areas and eroding unprotected slopes. Planting is your best defense against this mess. Mulch can be swept away, but plant matter holds fast, capturing water and coaxing it back into the ground. 

Not wanting to go overboard on planting? Permeable surfaces like gravel or rock also capture and infiltrate stormwater. Perhaps a bit of both? Creative combinations of planting and rock beds can offer striking front-yard schemes for managing stormwater. 

However you do it, managing runoff will keep your post-storm maintenance to a minimum, while helping to reduce flooding and pollution in your region. 


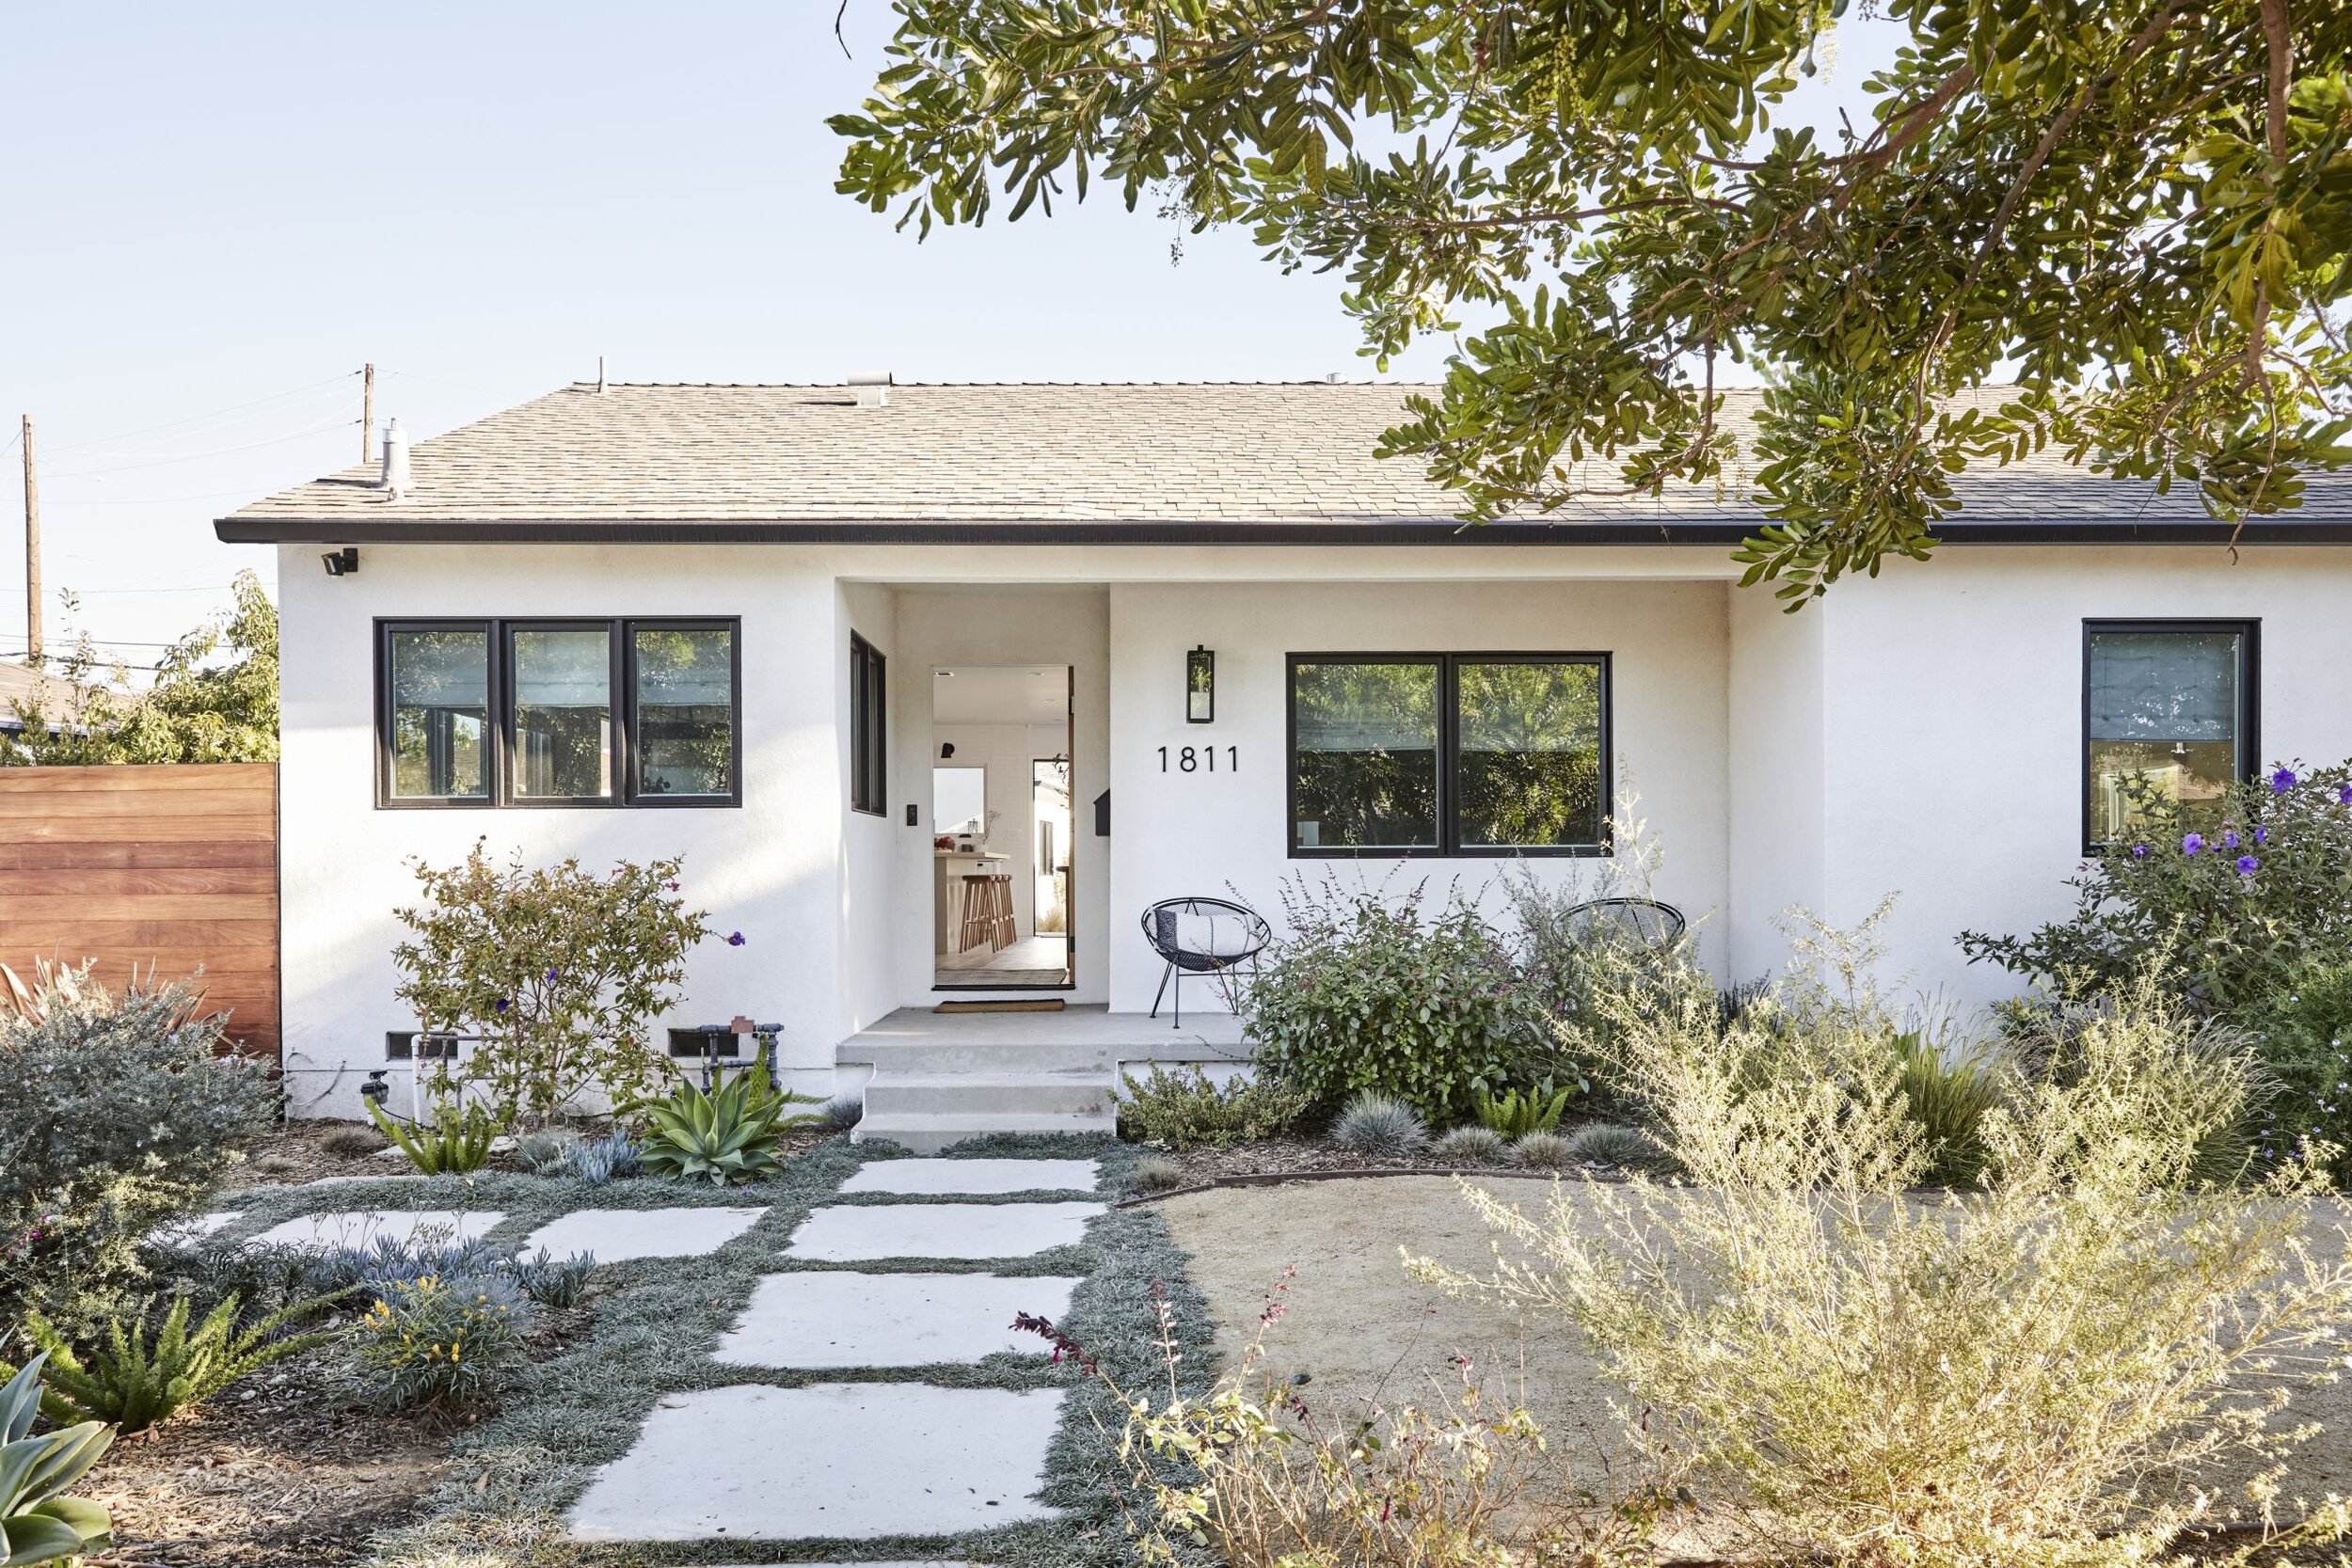
A Yardzen front yard that utilizes easy-to-maintain pavers and decomposed granite

Hardscape

Durability is crucial for exterior design materials, and paving is no exception. An appropriate paving material can withstand stresses from weather, site conditions, and plain old wear and tear, but low quality or regionally inappropriate materials will crack, crumble, or find some other way to fail before their time, aesthetically as well as functionally. 

  • Investigate which materials perform best in your area and use them, particularly in high visibility front paths or porches. (Pro tip: look for regionally-sourced materials.)

  • Invest in high quality materials up front to avoid early repairs or replacement down the road.

This front porch utilizes composite wood decking.

Wood (and its Counterparts)

Wood is gorgeous, but it requires work to maintain. It’s also softer than rock or concrete, and deteriorates more quickly, particularly in extreme weather - it’s a bad call for desert heat.

If you are committed to wood, apply coats of paint, stain, or sealant every one to two years (more often in intense climates) to maintain its integrity and appearance. This regimen is not low maintenance, per se, but it will increase the overall longevity of wood features, and keep them looking as good as can be expected. You’ll still see some weathering over time, but this can be handsome in the right context. 

Too much work? Try composite decking. Blending wood fiber and recycled plastic, composite is an environmentally friendly, attractive, and durable wood alternative (we recommend TimberTech decking and railings). The best part: no waterproofing necessary. Install it and you’re done.

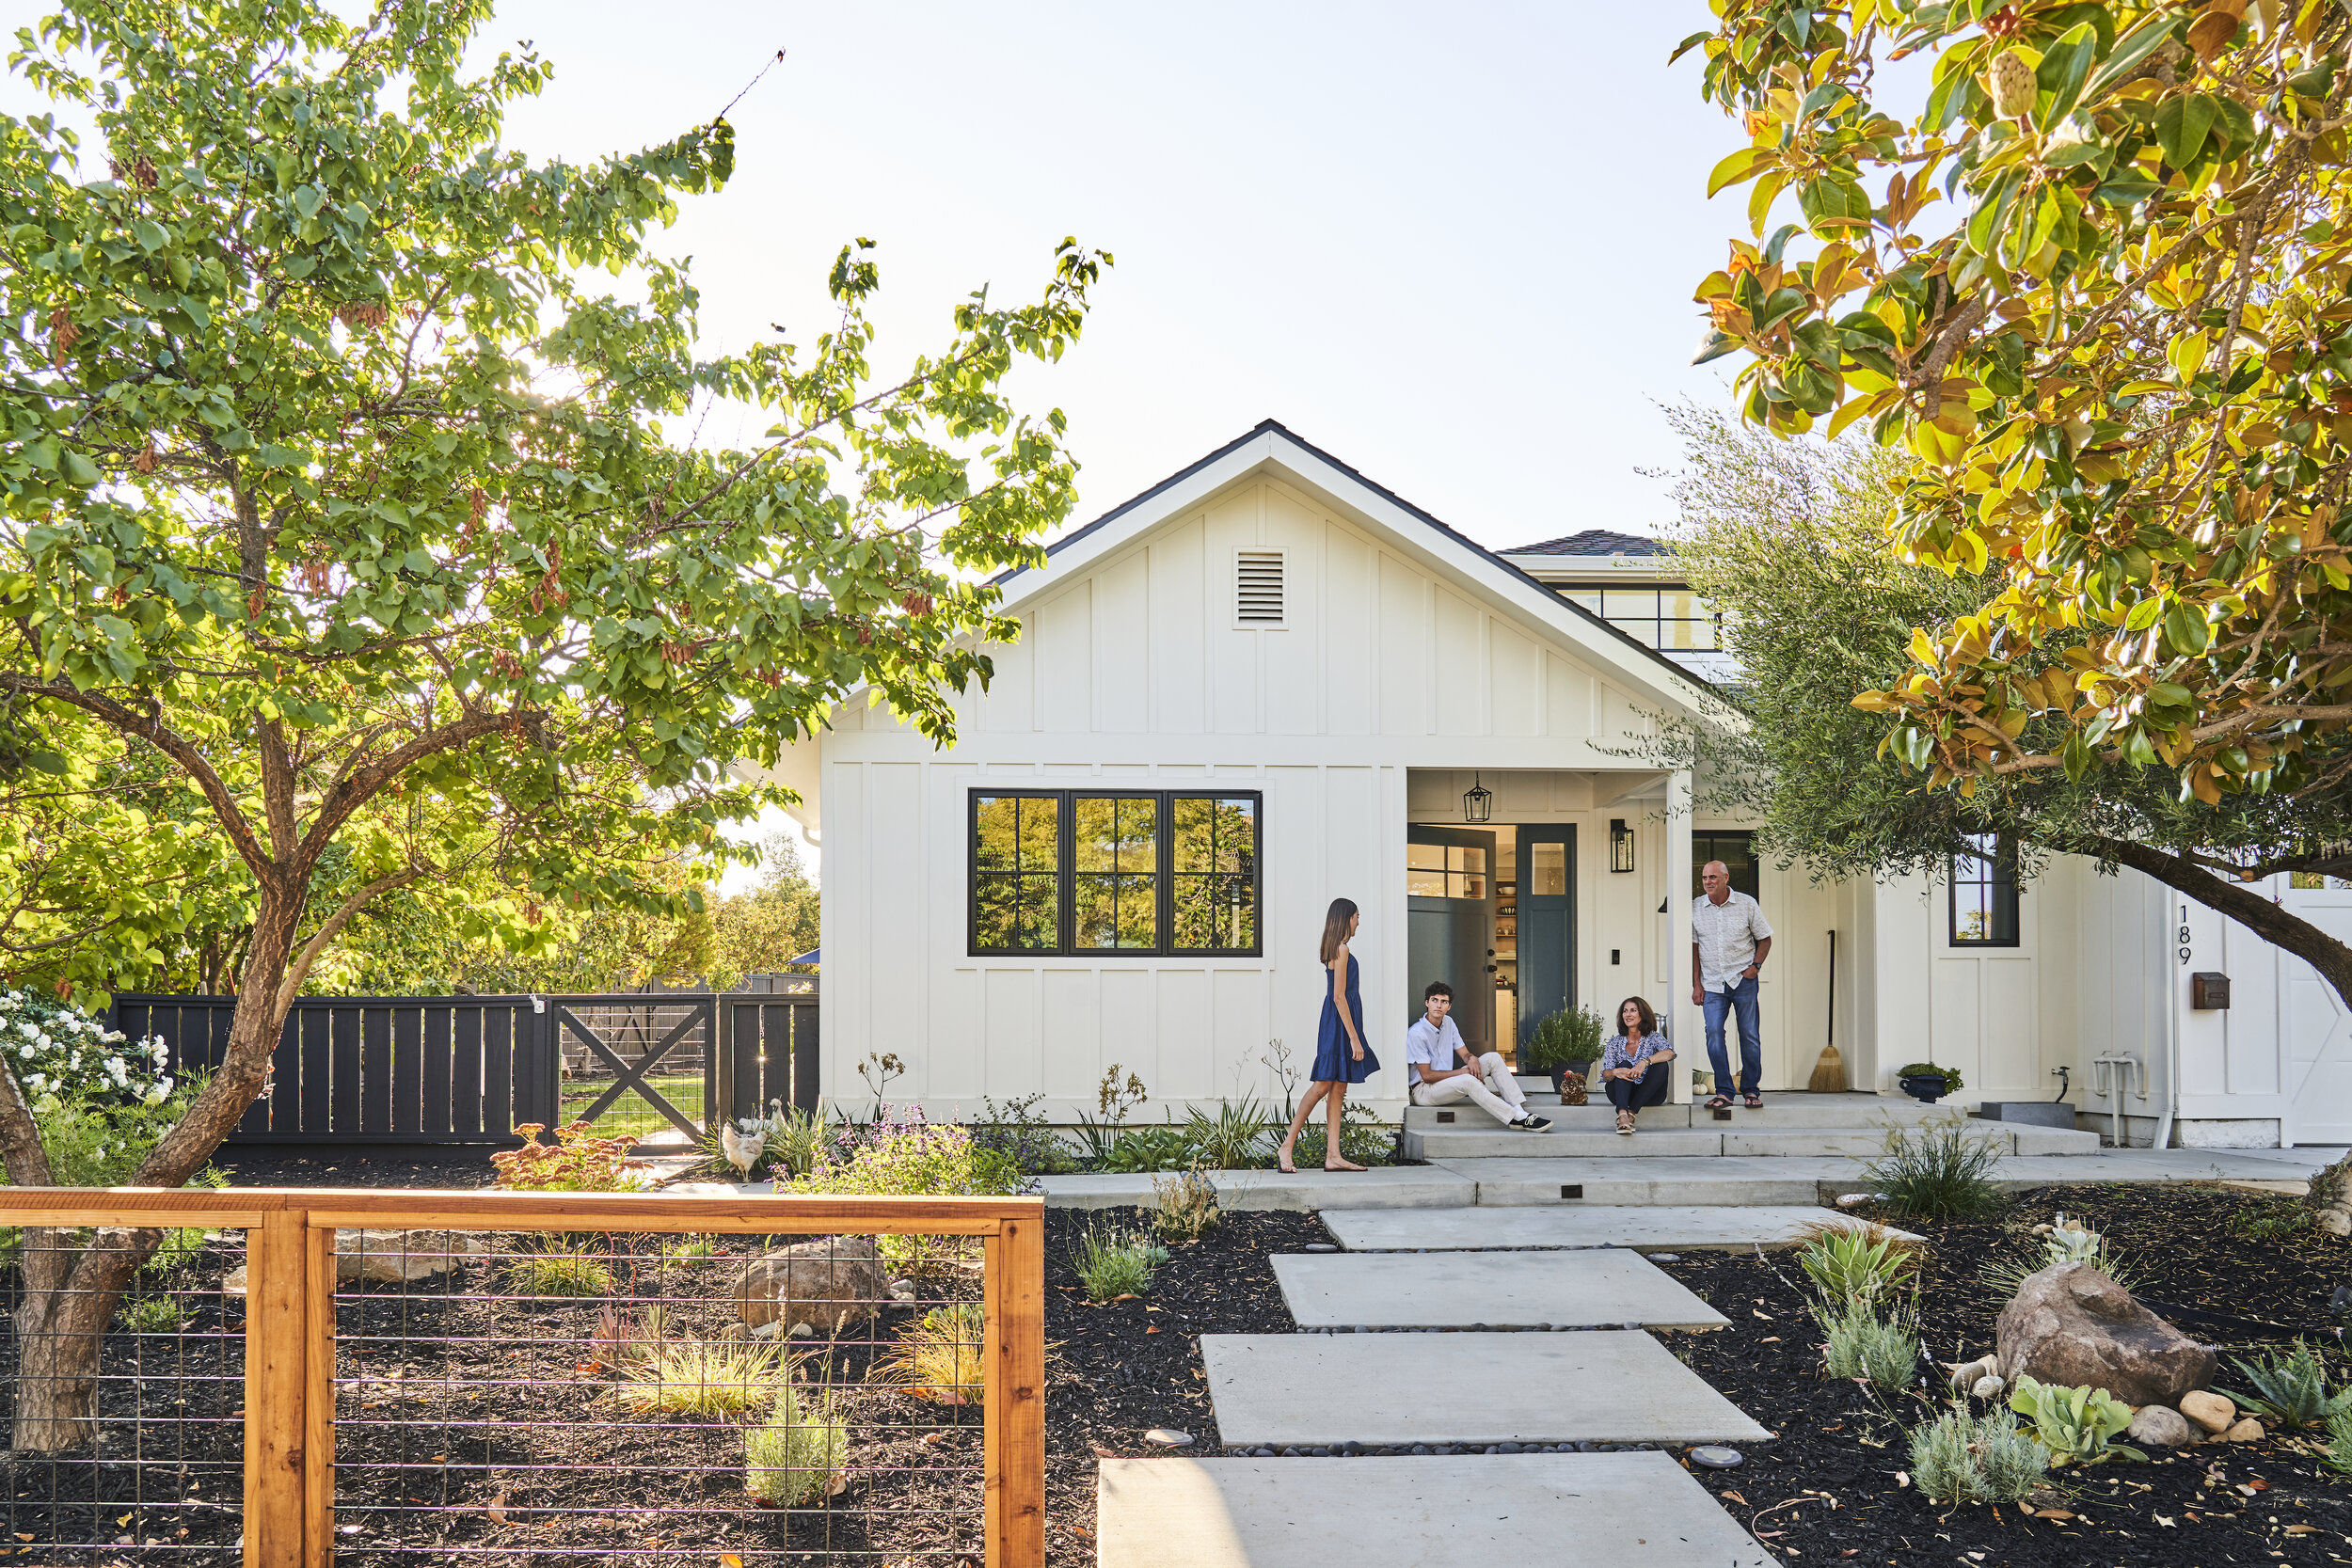
Bright white paint on elegant shiplap siding adds year-round curb appeal to this Yardzen yard.

Paint and Sealants

Paint is a huge factor in creating curb appeal—it’s one of the top reasons we launched our Curb Appeal package. Exterior paint sets the stage for front yard landscaping, and suffice to say that paint color, finish, and quality merit careful consideration. Be sure to check out our Guide to Choosing Exterior Paint.

Paint selection is as much a maintenance question as an aesthetic one. Premium paints tend to offer greater protection from the elements, and help offset maintenance to your home’s exterior. As with other exterior home decisions, we advise investing more upfront to save yourself effort and expense down the road.

Wood stain’s level of protection depends on its opacity. Clear stains are not as effective at protecting wood from weathering as opaque stains. If you still want to see some woodgrain (we don’t blame you), semi-transparent stain is a good compromise, offering greater protection without losing the wood look.


Don’t Forget Decor!

Exterior decor, like mailboxes, house numbers, planters, and lighting are transformative. Well-considered details make your home’s outdoor spaces look thoughtful and elevated throughout the seasons of your yard. That’s why we include them in our Curb Appeal package.

To learn more, read our blog post with Rejuvenation all about creating year-round curb appeal.

Metal roofing comes in many colors, including white, black, and gray

Roofing

Replacing roofing is a huge expense, but deferred repairs can cascade into a series of other even costlier headaches for homeowners. It pays to maintain the integrity of your roof, but we’d all prefer to just not have to worry about it. 

Enter metal roofing. It’s super durable, commonly warrantied to 40 or 50 years, which is approximately three times the lifespan of asphalt shingles (it also costs about two or three times as much). It’s also very fire resistant (if you live in the western US, take note), and has high solar reflectivity, which reduces heat absorption and helps to offset home energy use. 

Aesthetically, metal roofing comes in a variety of appearances - it can look like a metal roof, or you can get versions designed to look like tile or shingles.  The roofing’s finish has superior longevity - no more cracks or bald patches where shingles have lost their texture. From the street, your roof will stay looking fabulous for decades without you lifting a finger.

Windows

As with the roof, window integrity affects overall home condition—leaky windows let in moisture and air that can cause all types of trouble, from rot to inefficient energy use. 

To avoid maintenance and expense, we recommend installing windows that will hold their shape and maintain a weatherproof seal. To this end, window material is the biggest factor to consider (Marvin offers an excellent summary of different window materials). 

In general, wood windows are prone to warp more easily, while aluminum and fiberglass windows (or windows with a combination of both materials) maintain their shape and the integrity of their seal. Fiberglass in particular is pretty wonderful. It holds paint well, resists rot, has excellent thermal efficiency, and performs well in extreme climates. It’s also competitively priced. If the wood look is important to you, fear not - many windows combine materials, balancing the benefits of an aluminum or fiberglass frame with the appearance of wood. 

Whatever windows you select, we recommend considering energy efficiency—windows are one of the biggest factors affecting home energy expenditure.

Kick Back and Enjoy the View

As these tips show, much of maintenance is determined by decisions you make in the design and installation phase. If hassle free curb appeal is a priority for you, let your design and build teams know early—your weekends will thank you.

DESIGNING A LANDSCAPE TAILORED TO YOUR NEEDS

Yardzen's award-winning online landscaping design is tailored to each of our client's local climate and design preferences. Our design process begins with understanding your space, aesthetic preferences, and a discussion of your budget and vision to minimize surprises when it comes time to build. We want to make sure our top-notch designers can personalize your yard, delivering 3D and CAD renders that reflect what’s most important for your outdoor life and unique environment, while keeping costs within range. We do this by utilizing our in-house Build Team made up of former contractors and our Pro Network of vetted professional landscapers across the country.

Ready to level up your home improvement with a professional landscape design? Create your design profile or explore our design packages today!

Sustainable Hardscaping Unlocks a Family Backyard’s Potential for Indoor-Outdoor Living

Homeowners Chris and Heather purchased their 1926 bungalow in Berkeley, CA for the home's interior charm. But, the front and backyards left much to desire: lawn in the front and outdated concrete and toxic trumpet trees in the back.

Chris, a developer, and Heather, an ICU nurse, are avid runners and love to spend as much time as possible outside with their two kids and their dog—at home and on the trails throughout the Bay Area. When they purchased their home in 2017, they knew that they would first have to tackle their crumbling foundation, which they quickly checked off the list, but they dreamed of renovating their backyard one day to extend the footprint of their 1,200-square-foot home.

The “before” of the backyard

This summer, Chris and Heather started to think about transforming their outdoor space. After 18 months of living at home, they knew the importance of an alfresco living room where they could work, dine, entertain, and relax.

Heather discovered Yardzen through another nurse at work, and due to her and Chris’s busy schedules, she opted for the ease of online landscaping and exterior design. Their top priorities for their new backyard:

  1. Creating cohesion between home and yard with a deck that prioritizes indoor-outdoor living

  2. Sustainable materials and habitat-supporting plants throughout

  3. Exterior Design: Reimagining their home office with french doors to allow light in and removing plastic siding.

  4. Low-maintenance everything

  5. Design aesthetic: California casual with neutrals, purples, and greens

The Yardzen team got to work reimagining this Berkeley backyard, taking into account all of Chris and Heather’s priorities. The result: an outdoor space that epitomizes the beauty of indoor-outdoor living in California, including eco-friendly materials, like sustainably sourced decking and water-smart hardscaping, and habitat-supporting plants, like salvia and lavender. 

Here are some of the key components of this beautiful design.

Indoor-Outdoor Living

Using Yardzen’s new Outdoor Transformation package, our talented team created a new backyard and exterior facade that epitomizes indoor-outdoor California living. The key to this flow between home and yard was adding a deck that connects them. Once a steep and slippery step is now a long-lasting TimberTech®  deck with waterfall stairs. The deck also made the french doors off the back possible, adding beauty and light to the interior.

Sustainable Hardscaping Throughout

Because of the homeowner's commitment to sustainable materials in their outdoor space, Yardzen’s design team opted for high performance decking from TimberTech, an outdoor living brand that manufactures decking products containing up to 80% recycled content. (The AZEK Company, parent to TimberTech, diverted approximately 400 million pounds of waste and scrap from landfills in 2020, with ambitions to reach one billion pounds annually by the end of 2026.)

Another sustainability-minded decision in this backyard is the mix of gravel and pavers. Neither requires water, which is incredibly important for California. And, together, they create a permeable surface for water absorption, which offsets the water needs of plants in the space. Mixing gravel and pavers is a water-smart decision for many regions throughout the country.

Habitat-Supporting Plants

In Yardzen’s onboarding, Chris and Heather told us to “bring on the bees and butterflies” as a way to do their part to support habitat on their small patch of earth. Included in this design are several native and climate-adapted plants, like Verbena, Salvia, and Yarrow. Plus, plenty of Lavender (Heather’s favorite).

Exterior Details

Chris and Heather opted for Yardzen’s Outdoor Transformation package, which includes paint, siding, windows, and doors, in addition to landscape design. For this space, it was impossible to reimagine the landscaping without first removing the outdated plastic clapboard and resurfacing the facade to match the period-appropriate stucco on the rest of the home. Plus, they removed the dilapidated shed to make room for a wrap-around deck. They also added french doors on the home and garage to optimize the indoor-outdoor living flow and enhance natural lighting in once-dark spaces. Last but not least, they painted the exterior white and added black trim to brighten up the home and yard.

California Casual Style

Chris and Heather purchased their home because of the rich neutrals throughout, from the cream-colored plastered walls to the mahogany trim, all of which recalls the beautiful simplicity of California’s Mediterranean origins. They wanted to bring that look and feel into their outdoor spaces with textured hardscaping in neutrals. In the foreground of the design is a mix of pea gravel and poured concrete pavers. In the background is TimberTech’s Vintage Collection® in Coastline®, which is a rich greige that works beautifully with the pea gravel and the home’s exterior.

The Finishing Touches

To complete the look of the backyard, Yardzen’s team selected comfortable pieces in elevated neutrals from some of Yardzen’s favorite outdoor living companies. The lounge chairs are from Neighbor, the dining table is from Rejuvenation, the dining chairs are from West Elm, and the bistro table is from Crate & Barrel.

When is the best time to start my landscaping project?

yardzen5222021-68.jpg

Yardzen Design Director, Kevin Lenhart, shares his top tips for timing your outdoor project

kevin2.png

We’re often asked, “when is the best time to start my landscaping project?” The short answer: as soon as you can! Outdoor design and build can be a several-month project, often four to six months from design to install, so this is certainly one home improvement that requires planning and foresight. Here are some frequently asked questions about timing your outdoor project.

test (2).png

How long does the Yardzen process take?

From end to end, the typical Yardzen project takes about four months, although this can vary significantly depending on the scope of the work.

  1. Yardzen provides initial landscape designs within 3-4 weeks of project initiation, and final designs within 5-6 weeks.

  2. Once a homeowner receives their final design, their account manager will get to work to match them with a local, vetted landscape contractor in our Pro Network. This typically takes 3-5 weeks.

  3. Depending on project scope, installation can last anywhere from a few days to a few months, but one to two months is common for a mid-range landscape installation.

If I want to be enjoying my new yard this summer, when should I book a contractor?

Yardzen’s co-founder, Adam Messner, with Pro Network contractor Frank Green

Yardzen’s co-founder, Adam Messner, with Pro Network contractor Frank Green

Contractors are harder to book in their busy season (Spring through Fall), so it is best to plan ahead. Want a new yard by next summer? Aim to book your contractor during the fall or winter to ensure that they are ready to break ground in the spring. With the spike in pandemic landscape interest we’ve seen increased wait times, so it’s best to get on a contractor’s books as soon as you can. Yardzen’s team is here to help facilitate the entire contractor matching and selection process.

I live in a warm climate, can landscape construction work be done in the winter?

Yes! In warmer climates, including many parts of California, Arizona, New Mexico, Texas, and Florida, labor continues year-round with many Yardzen installations happening September through March.

A landscape project in Austin, TX completed in the winter by Cutters Landscaping

A landscape project in Austin, TX completed in the winter by Cutters Landscaping

Can I make any progress on my yard in the winter?

Starting design in the Winter is a strategic win, especially for clients in climates where freezing temperatures preclude Winter labor. 

A winter kickoff takes advantage of the cold season to work through project design and contractor coordination. By the time the weather warms and installations resume, clients can have designs in hand, a contractor in place, and be ready to break ground.

Reaching out to a contractor in the Winter also improves a clients’ odds of getting on their installation calendar sooner. At the minimum, contractors will be more available for site visits, cost estimation, and working through any final design adjustments with clients during the Winter off-season, all work that must be wrapped before installation can proceed. 

Thinking again of our goal to plant when the planting is good, a Winter kickoff leaves you well positioned for Spring plant installation.

_DSC3152.jpeg

When is the best time to plant?

Many regard Fall as the ideal planting season. Plants installed in Fall have the entire Winter dormant period to bulk up their root systems, aided by cool air and precipitation that keep the soil moist. 

(Added perk: Fall planting helps pollinating insects find food in a typically scarce season.) 

In milder climates, Summer planting is possible for many plant species, though increased heat requires extra work and water to keep new plants healthy.

In warmer climates, Winter planting is downright preferable for many plants (coniferous evergreens excluded), aided by the same dormancy and cool, moist conditions as Fall plantings. This being said, as temperature drops so does Winter planting viability, and frozen ground is a non-starter.

The target of Spring or Fall itself is loosely defined - depending on where you are, Spring planting can happen in March or May, Fall planting in September or November. Your contractor will know what is viable and what is not. The point is: you likely have more options for planting than you think.

Planting is often the final step in the installation process. So, when we think of timing our projects for optimal planting, we must consider the steps that come before it.

Start Early

All this is to say: landscape design projects can, and should, happen all year long. 

Considering the dynamism of climate, contractor availability, product supply, and the many other factors affecting landscape projects, the single best thing you can do to ensure a timely, smooth project is to start early, whenever that may be. 

How to Design an Outdoor Movie & TV Room

Backyard TV room in an Austin backyard. Installation by Yardzen Pros Cutters Landscaping.

Backyard TV room in an Austin backyard. Installation by Yardzen Pros Cutters Landscaping.

After years of quarantine living, we’ve all grown increasingly open to taking traditionally sheltered activities outside. Watch the big game and movies outside? Yes, please.

There are lightweight ways to create an outdoor movie theater, and there are more permanent approaches. We’ll break down both and suggest a few key purchases to help you realize your al fresco viewing dreams.

LOCATION, LOCATION, LOCATION

First step, choose a space.

Intention

Are you looking for a one-night pop-up, a built-out entertainment zone, or something in between? Choose your level of investment - in terms of effort and dollars - and let that guide your choices. 

Size

Just the fam, a small crew, or an outright party? You’ll need a space that will fit your group comfortably without going overboard. 

Our advice: err on the small side - size your outdoor movie space for the family plus a couple pals. It’s ok to spill out the sides for the occasional large gathering, and we’d argue it’s more important to prioritize coziness for a movie date night. 

Added bonus: keeping your theater space right-sized will preserve more of your yard for non-screen uses.

Convenience

Keep outdoor theaters close to indoor amenities like kitchens and bathrooms. It may be worth setting up across the yard if the backdrop is truly cinematic, but in general, we advise prioritizing convenience.

Wifi signal and electrical outlets are additional considerations that tend to keep outdoor theaters close to the home. A Wifi booster can solve spotty playback, but extension cables to power TVs and projectors are best avoided in any semi-permanent outdoor viewing setup (if it’s a casual one-night-only viewing party, extension cords are harmless, just don’t trip). 

Ambient Noise

Indoor theaters are silent. Outdoor theaters won’t be, but try to find a relatively quiet spot. The more ambient noise you have to contend with, the more robust your speakers must be. 

Turning up to drown out traffic or an AC unit can lead to angry neighbors pretty quickly - dodge that bullet by finding a quiet place to set up. If your theater is well-removed from neighboring homes, all the better.

Glare

Screens want to be in shade, so try to minimize incoming glare, be it from the sun or surrounding lights. 

If you’ll be viewing during the day, avoid spaces that face south or west (especially west). 

Shelter

A roof over your outdoor theater can be helpful, but it is far from mandatory. There’s something magical about watching a movie beneath the stars. Unless you plan to regularly watch in the rain, wet weather shouldn’t drive your theater design.

A Yardzen backyard in Houston with built-in couches around the projector

A Yardzen backyard in Houston with built-in couches around the projector

FURNISHINGS

With the location locked in, we turn to designing the theater itself. 

Furniture

Whatever furniture you choose, it must be comfortable. Make sure backs are supported, nobody is sitting on a hard patch of floor, and there are opportunities (plural) to kick up your feet.

For a casual outdoor theater, pick up some easy to move, comfy furniture like floor cushions and low-slung chairs, and toss an outdoor rug on the ground to foster an outdoor living room feel. If appropriate, all these pieces can be removed when not in use - this is crucial when your theater has a functional day job like a play lawn or driveway.

Structures with mounted TVs generally merit nicer furniture - if you’ve built a custom wall with a recessed screen cavity, you’ll want furniture with equally rigorous design to complement it.

Regardless of style, opt for outdoor rated products, and try to choose pieces that facilitate multiple uses. You’ll get more bang for your buck and greater utility from your yard if your theater doubles as a cocktail, work, or quiet meditation zone.  

Beyond comfort, you’ll want your outdoor theater to feel like your space. Get a feel for your exterior design style - we recommend browsing Yardzen’s project gallery - and let that guide your choices of furniture, light fixtures, paint, and other decorative features throughout the theater space.

Lighting

Light your outdoor theater just enough for comfortable use, and no more. Low-output LED lanterns, string lights, even tiki torches or candles are all simple, viable options. Light selection is a great styling opportunity - have fun with it.

To manage glare, keep lights below and directed away from the screen to minimize glare. String lights should stay relatively dim and distant from the screen.

Outdoor Comfort

The principles of designing a yard for cold weather use apply to outdoor theater design. (Read the article about Cool-Season Landscaping and Creating a Cozy Yard). You’ll be outside at night, so staying warm will be critical to comfort. 

For a lightweight solution, dress in layers, and keep some blankets around. 

If you have an overhead structure available, you can go a step further by mounting infrared heaters.

What about mosquitoes? If you need to use bug repellant, we suggest topical skin spray or cream. Avoid spraying your plants with repellant - this kills other insects that birds would rather keep around for dinner.

Backyard TV room in an Austin backyard. Installation by Yardzen Pros Cutters Landscaping.

Backyard TV room in an Austin backyard. Installation by Yardzen Pros Cutters Landscaping.

THE SCREEN

Your space is ready, now what do we watch?

Screen Size

Personal preference guides this decision, but we advise choosing a screen suitable to the space: large screens for large spaces, smaller screens for tighter areas. The same rule applies when setting the size of your projection.

We suggest maintaining a decent margin of wall material around a screen’s edges - it frames the picture and looks more intentional. 

Projector Screens

If you opt for a projector, you have a few screen options.

The easiest approach is to pick a blank wall and project directly on it. This is not without complications. Wall textures introduce shadows into projections (you want a smooth wall), while wall color and paint finish affect image color and sharpness. 

If you plan on consistent viewing, you can paint a wall with special screen paints, though acrylic and latex paints are a reasonable and more affordable next-best option. (Projectortop has a useful breakdown of paint types for projection walls.)

If you don’t have a great wall and don’t want to bother painting, just hang a smooth white sheet - this works great as a temporary solution, just take care to hang it as tightly as possible to minimize wind rippling. 

If image quality is a priority, you’ll want a proper screen. We prefer screens with low profile metal stands like the Elite Screens Yard Master Plus, which can be stored when not in use, and occupy a minimal footprint when assembled.

Retractable screens skip the setup of portable screens, but require a well-positioned beam to hang from. Minimalist wood frames are a fun solution - use them as cheeky viewfinders to literally frame key views in your yard when the screen is retracted.

Outdoor dining room and TV room for DIY Playbook in her Yardzen yard!

Outdoor dining room and TV room for DIY Playbook in her Yardzen yard!

THE DEVICE

Indoor TV 

For the infrequent, casual viewer, you can simply drag an indoor TV outside for the night. This approach is homespun, but cost-effective and fun (kids love moving the inside outside). 

If you plan frequent outdoor movie nights, build a weatherproof TV cabinet. Our advice to regular viewers: invest in a projector or outdoor TV to avoid hassle and equipment damage.

Projector

Projectors are portable, take up minimal space, and offer huge screen sizes - up to 150” - with solid image quality. They also make it simple to experiment with different theater zones around your property.

Many decent projectors are more affordable than outdoor TVs - we recommend the New York Times summary of cost effective, high quality options.

Keep in mind, to get large screen sizes you will need 10’ between projector and screen. For smaller spaces, opt for a projector with a short throw lens - these only need 5’ to project a 100” image.

Outdoor TV

For optimum image quality, outdoor TVs can’t be beat. 

Weatherproof and built to endure the elements, they hang permanently in your outdoor theater - no setup required, just sit down and enjoy. 

Because they are permanently mounted, TVs lack the flexibility of projectors, so take extra care when determining how and where to mount your TV.

Pro tip: invest in an outdoor rated TV mount and cables as well. Indoor components will rust. 

What TV should you get? Popular Mechanics has an excellent guide to answer that question.

Speakers

TVs and projectors typically come with decent built-in speakers, but sometimes you need a boost. 

Every projector and TV should have an analog speaker connection, and most offer bluetooth as well. While wireless bluetooth speakers avoid tangled cables, their playback can lag behind the image on the screen. If you have bluetooth speakers already, test them out, and backpedal to analog speakers if delays become an issue.

Backyard movie night with Emily Henderson

Backyard movie night with Emily Henderson

BE OUTDOORS

A final and crucial tip for outdoor theaters: enjoy them for being outdoors. Quiet spaces are already available to us indoors if you need a truly focused viewing environment. 

Our advice: take advantage of the outdoors to create a viewing space that adds style, function, and perhaps a little whimsy to your yard. Outdoor theaters should integrate the joy of being outside with the pleasure of a night at the movies. Cricket sounds and breezes are part of the point.

Happy viewing!